Time decides which of these cards is yours: a hand-lettered card with doodles or a pom pom printable takes an evening at most, while the embroidered card asks for more hours and leaves you with a keepsake.
1. Pom Pom Printable Card
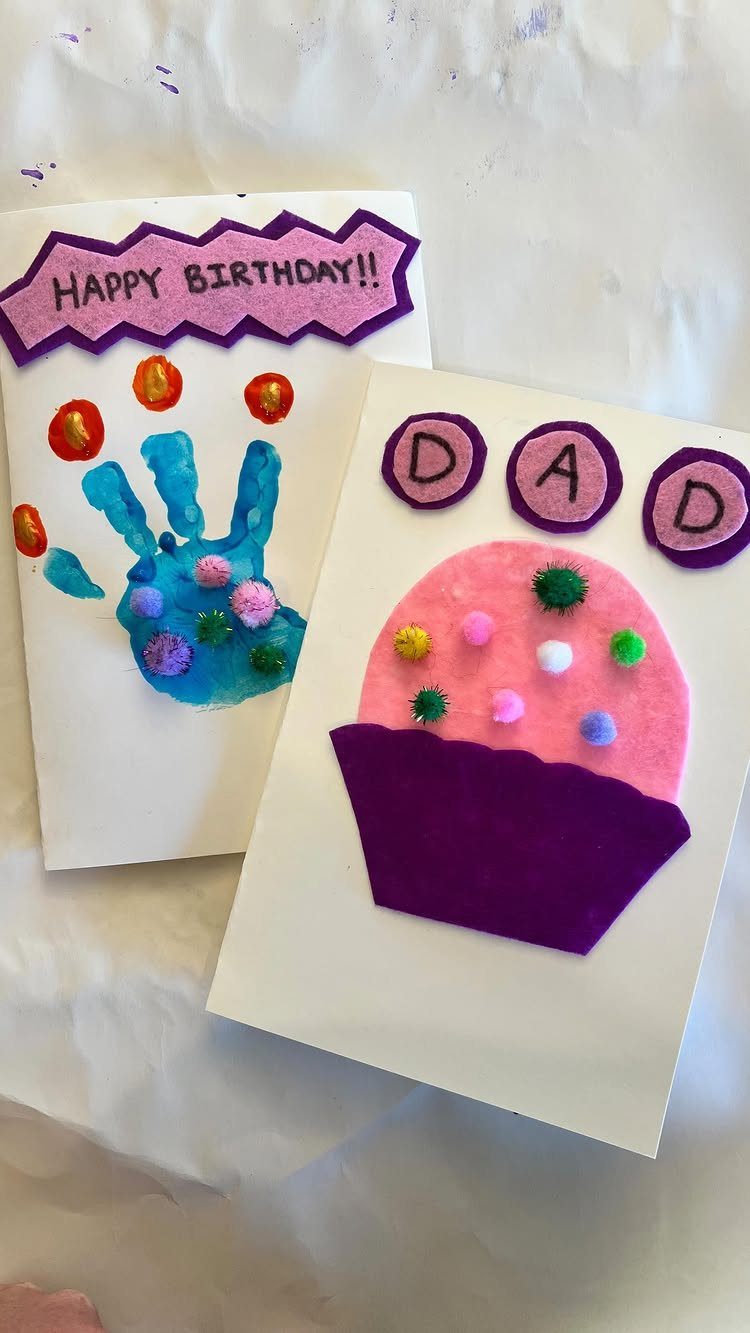
Pom poms give a flat card real texture, and a cupcake is a smart place to use them: a few fluffy dots stacked on a paper shape read as frosting at a glance.
The same trick works for a handprint card, which suits a child making something for a parent.
Glue the pom poms on last, after the paper shapes and lettering are dry, so nothing shifts.
Pick a small palette of colors and repeat them across the card rather than using a rainbow mix. Name the recipient in big letters, as with "DAD", and the card feels made for one person.
2. Hand Lettering Birthday Card with Doodles
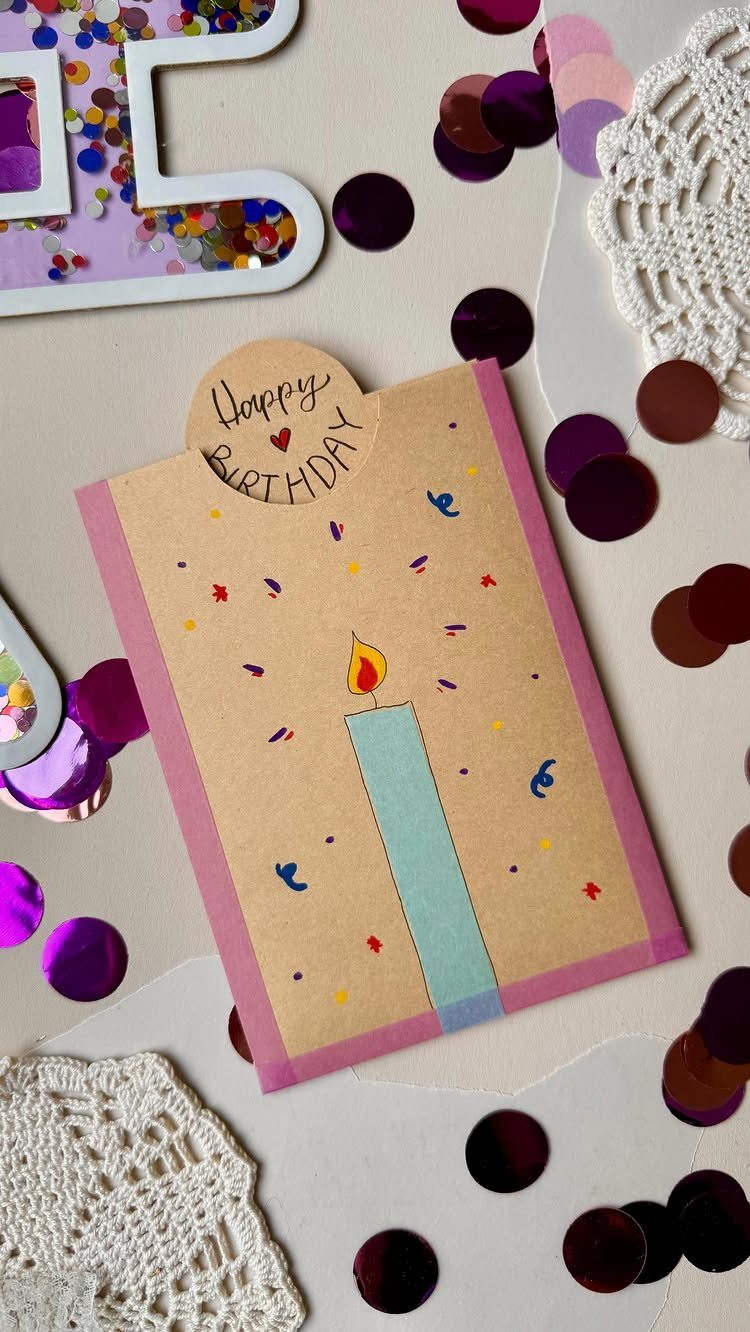
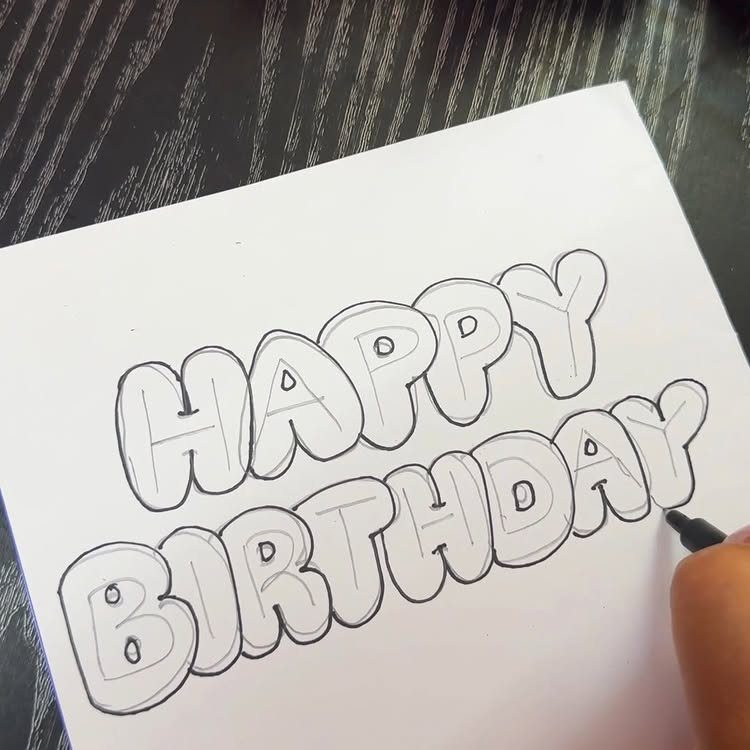
A single drawn candle is enough illustration when the lettering carries the card. Write "Happy Birthday" in pencil first, then trace it in a marker, and erase the pencil once the ink has dried.
Confetti and a strip of lace around the edges add color without any more drawing, which is the shortcut I’d take if you’re short on time.
Keep the doodles to one or two shapes. Plain handwriting, slightly bouncy, looks more personal than a font ever will.
3. Bunting Birthday Card
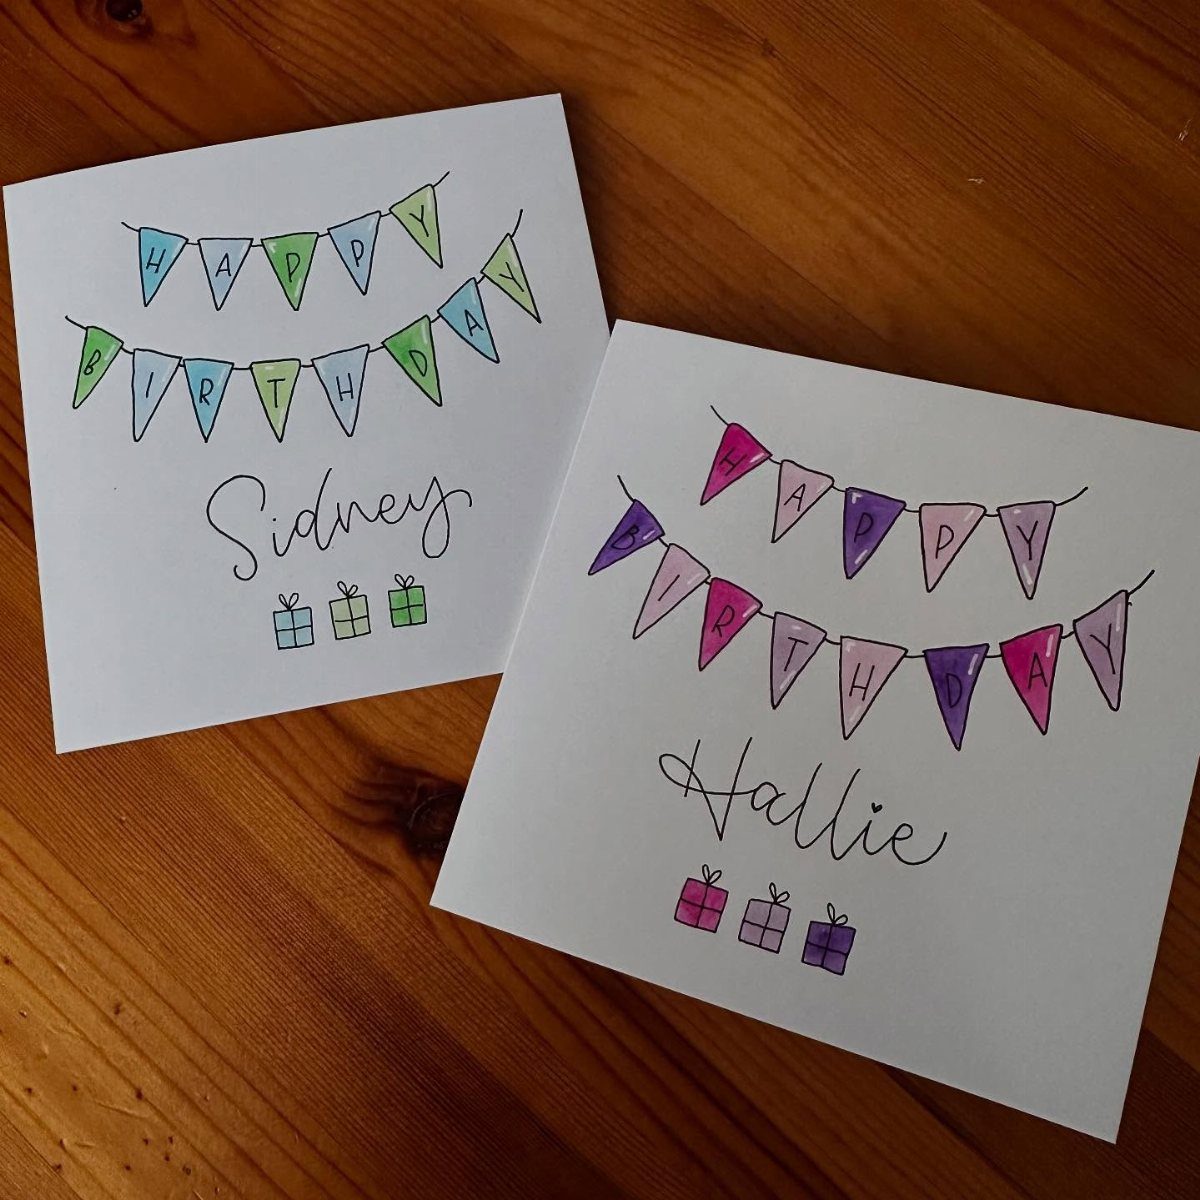
Cut a row of small triangles in different papers, string them along a line of twine or pen, and a plain card turns into a party.
Each flag holds one letter, so the greeting needs 13 of them; plan on two short rows if the card is narrow.
Adding the birthday person’s name in cursive below the bunting makes it personal.
Small gift drawings in the corners fill the empty space. Cut all the triangles from one template so the flags hang evenly.
4. Balloon Bouquet Card
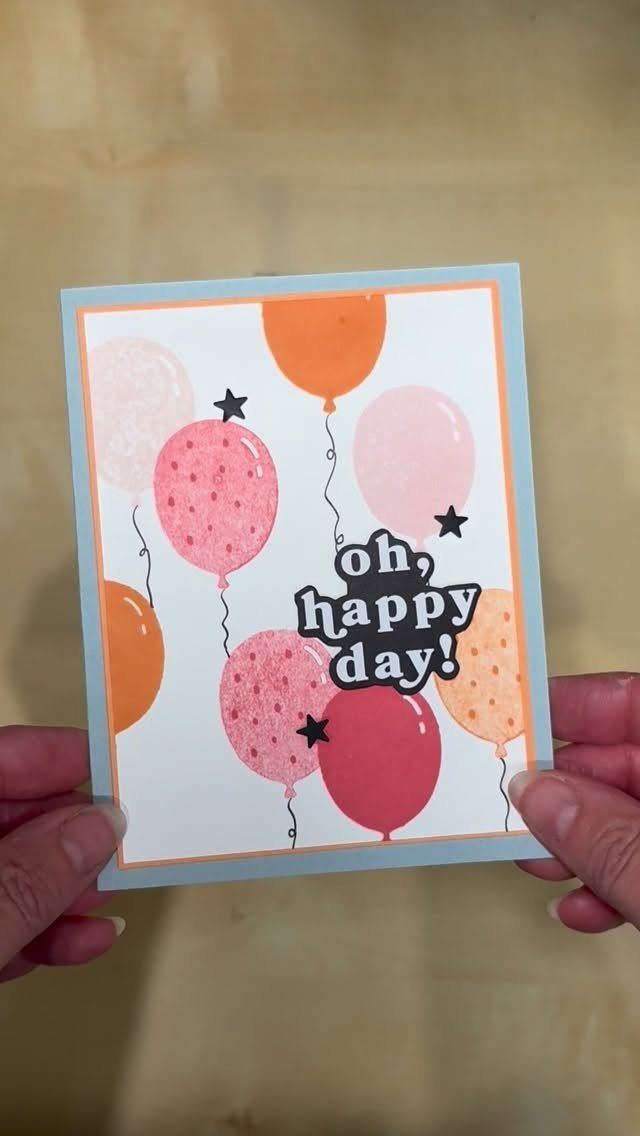
Balloons are about the easiest shapes to make: ovals in assorted colors, each with a thin line drawn down to a shared point. Gather the strings into one bunch and the cluster looks like a bouquet held in a fist.
Punched paper circles work well, or paint dabbed with a fingertip for a looser look.
I like a short phrase like "oh, happy day!" in small lettering below, so the balloons stay the focus. Overlap a few ovals so the bunch looks full.
5. Embroidered Birthday Card
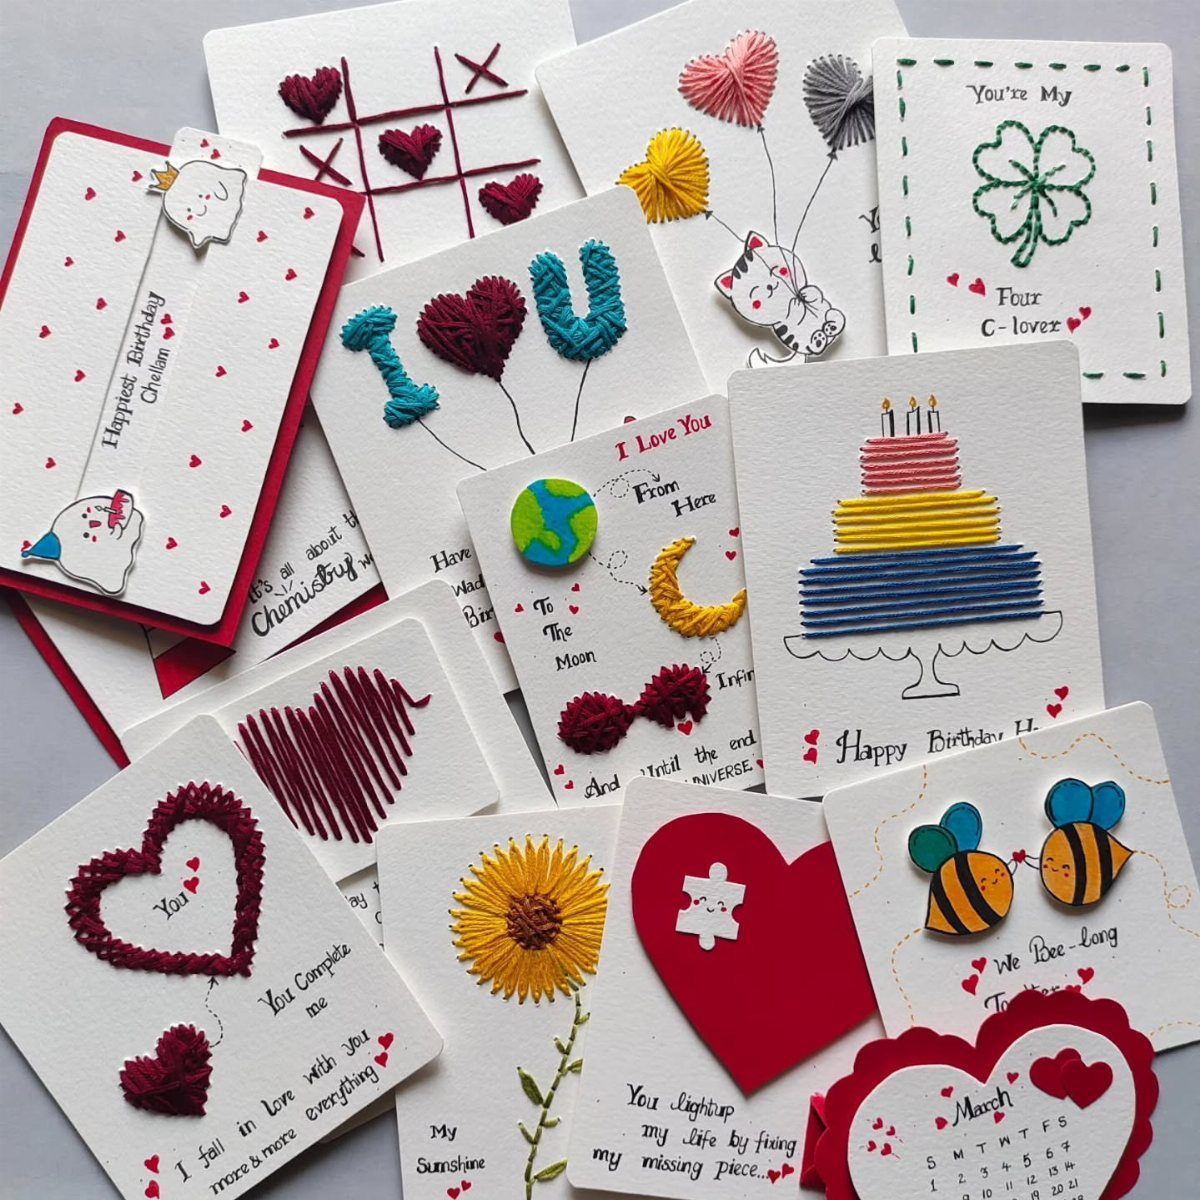
Stitching on paper sounds fussy, but it’s fast when the shapes are simple: hearts, flowers, a cake.
Poke the holes first with a needle along a pencil sketch, then sew through them with embroidery floss. Doing this keeps the paper from tearing.
Tape the thread ends flat on the inside and cover them with a layer of paper.
Paper cutouts beside the stitching add variety, and the whole thing makes a keepsake rather than a card to toss. Plan on more time than a drawn card needs.
6. Stack of Presents Card
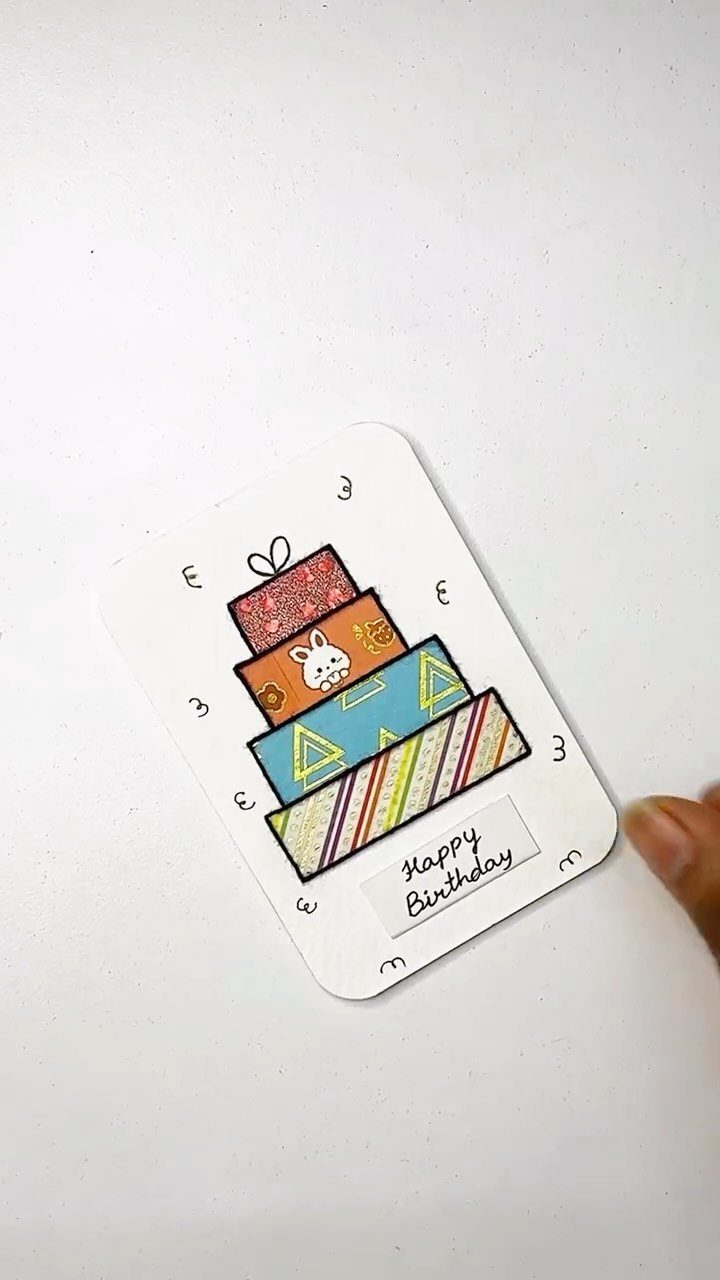
4 boxes stacked in different sizes make a quick, cheerful picture. Cut rectangles from patterned scrapbook paper or wrapping paper, then glue them in a tower with the biggest at the bottom.
Add a strip of contrasting paper as a ribbon across each box, and you’re done. I’d mix patterns but keep them in one color family so the stack looks planned.
7. Foil Balloon Collage Card
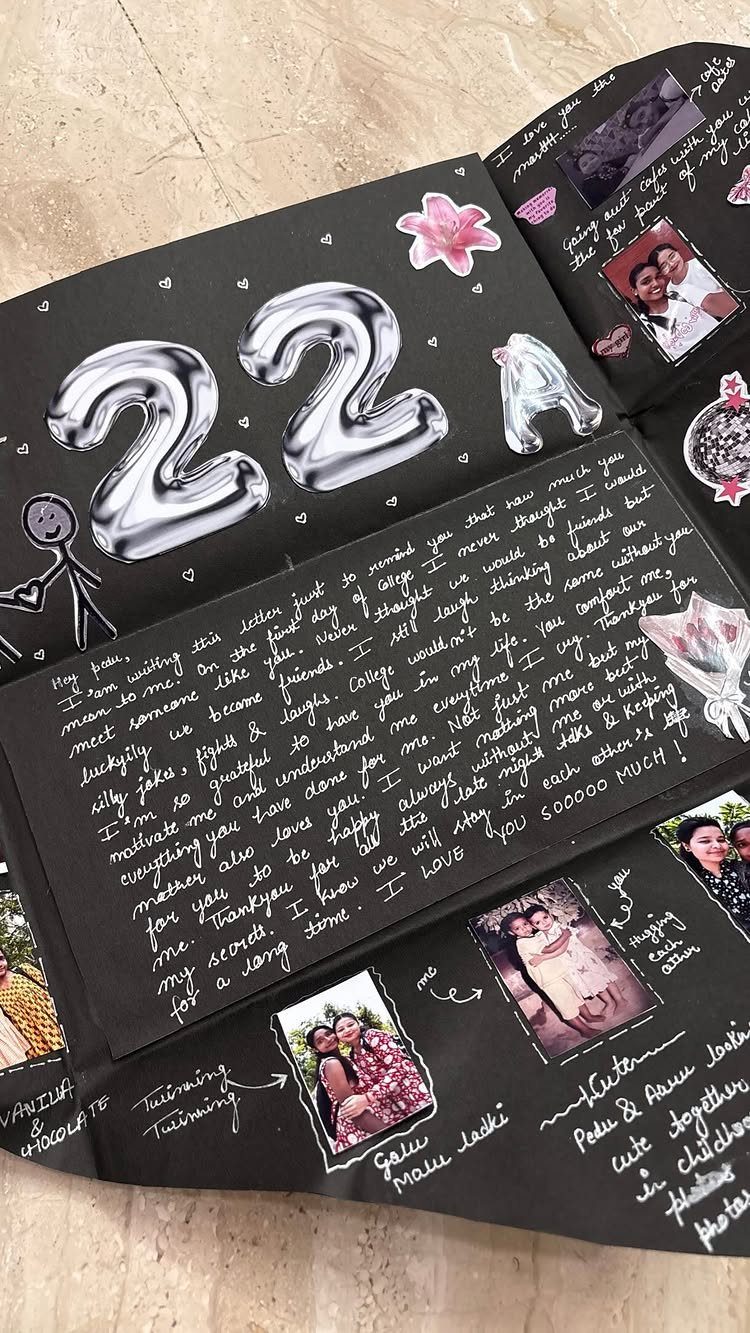
Silver foil number balloons look striking against black paper, and a "22" gives the card an age to build around.
Cut the numbers from foil paper or silver sticker sheets, then add a few photo cutouts of the birthday person with a friend.
Handwrite the message in a white gel pen or paint marker, since regular ink disappears on black.
Small stickers fill the gaps between photos. Keep the photos trimmed close so the numbers stay the focus.
8. Open When Birthday Card
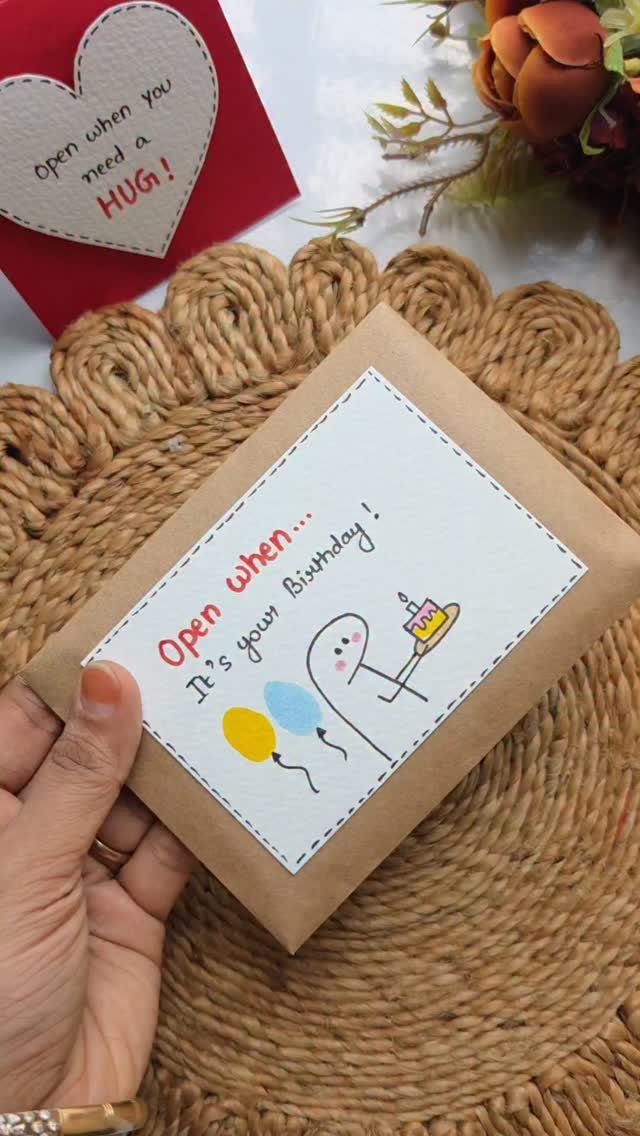
A card that says "Open when…
It’s your birthday!" lives in a kraft envelope, and that envelope is half the charm. Draw a small character, a cake and a few balloons on the card in simple lines, so the drawing stays quick even without much skill.
Kraft paper is plain enough that colored pencil or marker pops against it. I’d write the "Open when" line on the envelope front too, so the recipient knows to save it for the day.
A second card in another shape, like a heart, tucked in alongside makes a nice extra.
9. 3D Heart Milestone Card
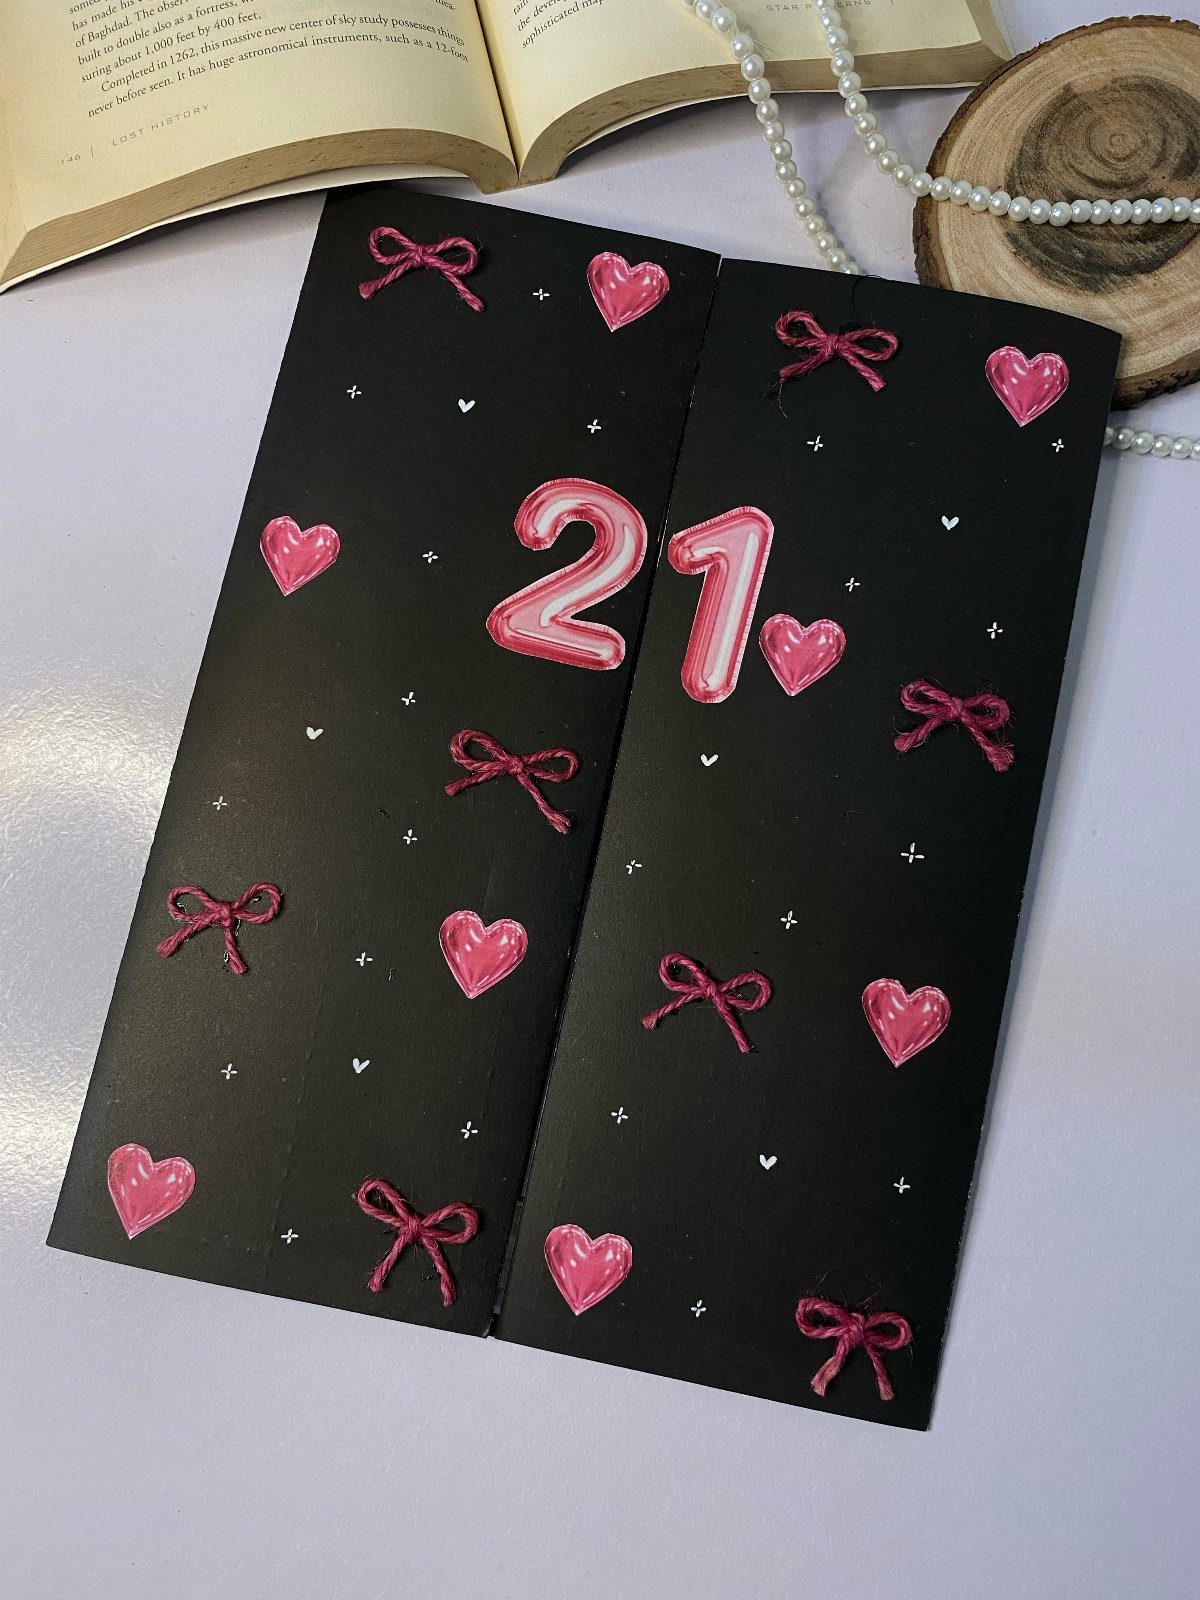
Pink 3D hearts on black cardstock make a milestone number look dressed up, and the contrast does most of the work.
Cut several hearts, fold each in half down the center, and glue only that fold to the card so the sides lift off the page.
Tie tiny pink bows and glue one to each heart or between them.
Cut the number from pink paper and set it where the hearts gather. Stick with one shade of pink; the black does the contrast for you.
Materials for DIY Cards
A basic card needs very little: cardstock, scissors and a glue stick. Washi tape, stickers, ribbon and lace are extras, and a rummage through the craft box usually turns up enough of them.
Buy embellishments in white.
Paper flowers and fabric trims take ink, markers and chalk, so one white pack can be tinted to match whatever card you’re making that day. An ink pad dabbed on gives a quick, even color.
Cardstock folds cleaner than printer paper and holds glue without buckling. Cut the small shapes from leftover colored scraps, then add the fine details with a marker or a sheet in a contrasting shade.
Personalization Tips
Write the message by hand, and write it for one person. A line that only makes sense to the recipient does more than any decoration.
When time is short, customize what you already have.
A quick tap of an ink pad in the recipient’s favorite color will dye plain white embellishments in about a minute, and the card ends up looking picked out for that person instead of grabbed off a shelf.
Mail cards earlier than you think you need to. A card that is days late loses most of its charm, so pick a design you can finish quickly if the date is close.
Using Scrap Materials
Keep a folder or envelope for leftover paper, trimmed ribbon and spare embellishments. Cards made from scraps cost almost nothing, and the mismatched pieces give each one its own look.
Sort scraps by color so you can find a match fast. Anything white can be tinted with ink, markers or chalk, so plain leftovers are often more useful than colored ones.
Use scraps for small parts: letters, shapes, borders and backing layers. Save fresh cardstock for the card base, where a clean fold matters.