Time at the table decides which of these tags is yours: a printable set takes minutes on a home printer, while embroidered paper and 3D clay figures are the slowest here and fit only a few special gifts.
The 12 ideas run from free cardboard and magazine cuttings to washi tape, natural materials and fabric scraps, and most of them look best when the tag echoes the wrapping.
Match the effort to the number of gifts, and save the embroidery or the clay figures for the ones that deserve it.
1. Printable Gift Tags
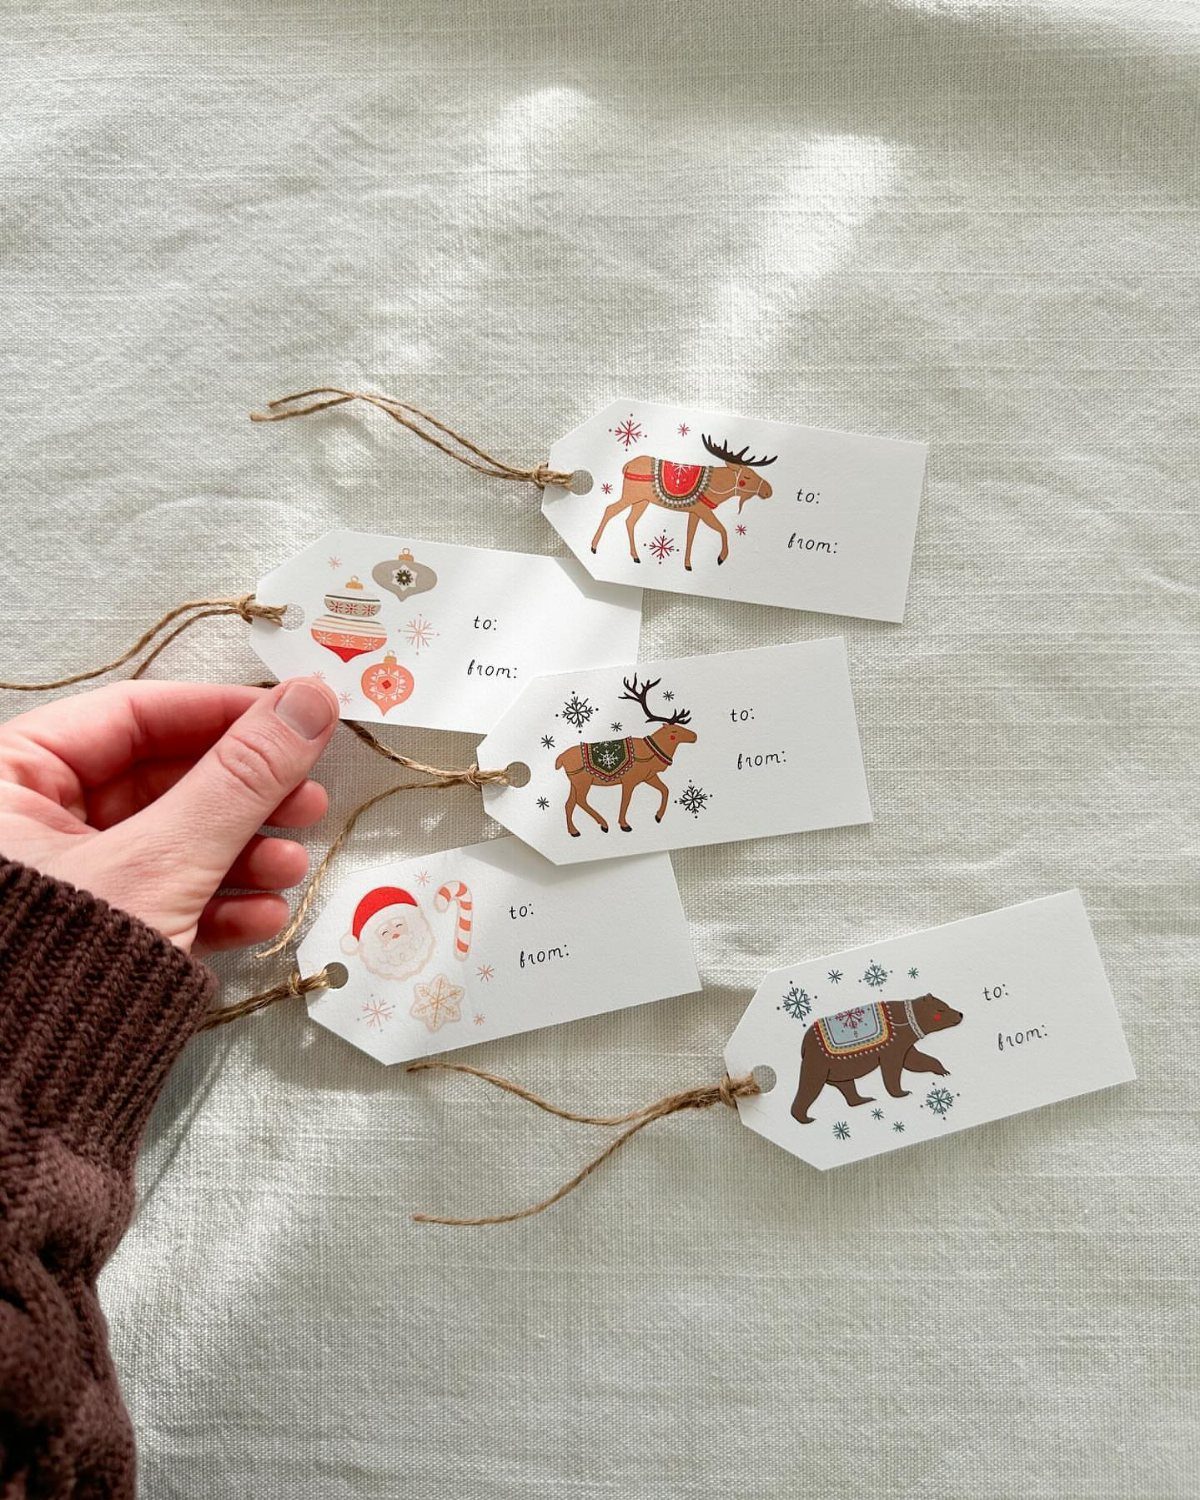
A home printer turns a sheet of cardstock into a dozen tags in minutes, which makes this the fastest route on the list.
Pick a set with the "to:" and "from:" lines already printed, so nobody has to write more than 2 names.
Cardstock holds up better than plain copy paper, and a paper trimmer gives cleaner edges than scissors. Once the tags are cut, a hole punch and a loop of twine finish the job.
Print a few extras. A smudged tag costs pennies to redo.
2. Magazine Cuttings Gift Tags
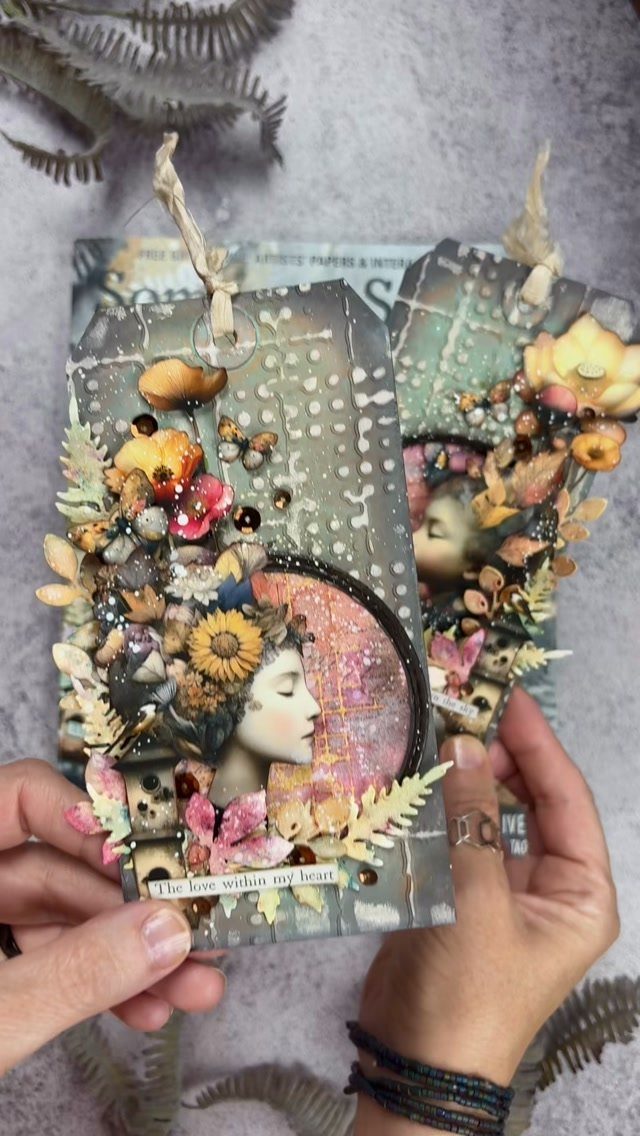
Old magazines are free, and one page can supply a face, a flower or a whole border.
Cut out a portrait or a bloom, glue it to a sturdy backing, and add a short line of handwriting or a clipped phrase for the message.
Layering is what makes these look made rather than pasted. Stack a small flower over the edge of a larger image, then trim the backing a bit wider than the collage.
Glossy pages curl with wet glue, so I’d use a glue stick and press the tag under a book for a few minutes.
3. Cardboard Gift Tags
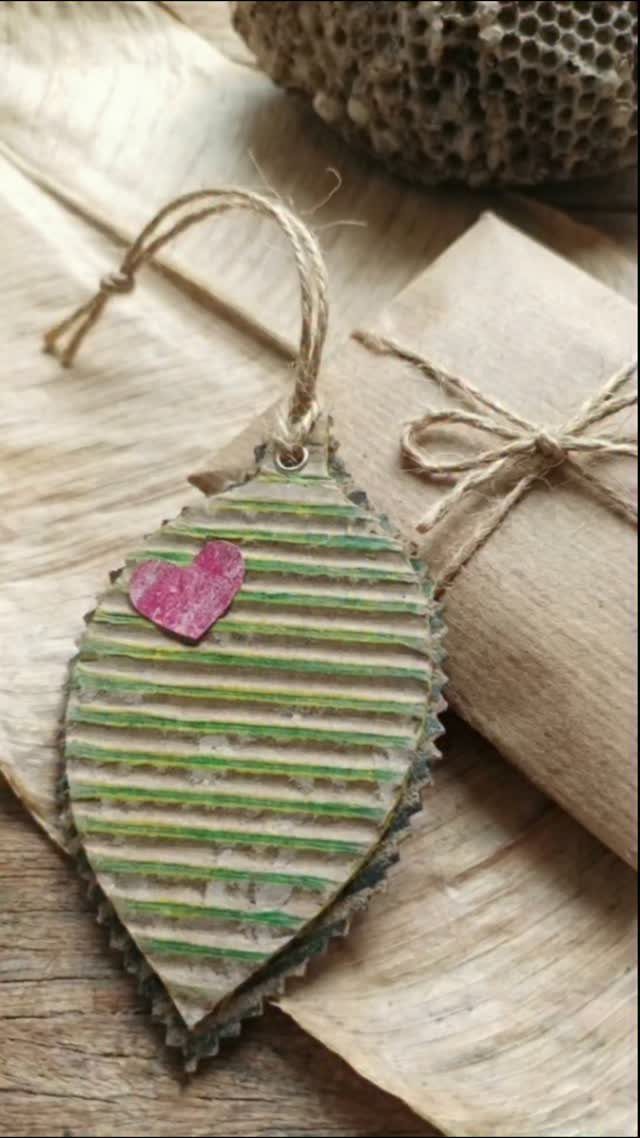
Cardboard from a shipping box costs nothing, and it pairs well with brown paper wrapping and twine. Cut the cardboard into a heart or a leaf, and punch the hole near the top so the string has somewhere to sit.
Corrugated board has ridges you can leave showing, and a bit of paint on the stripes adds color without much effort. A small paper heart glued on top gives a plain tag a focal point.
Trace a cookie cutter for even shapes. Scissors will do for thin board, though thick corrugated cuts more cleanly with a craft knife.
4. Washi Tape Gift Tags
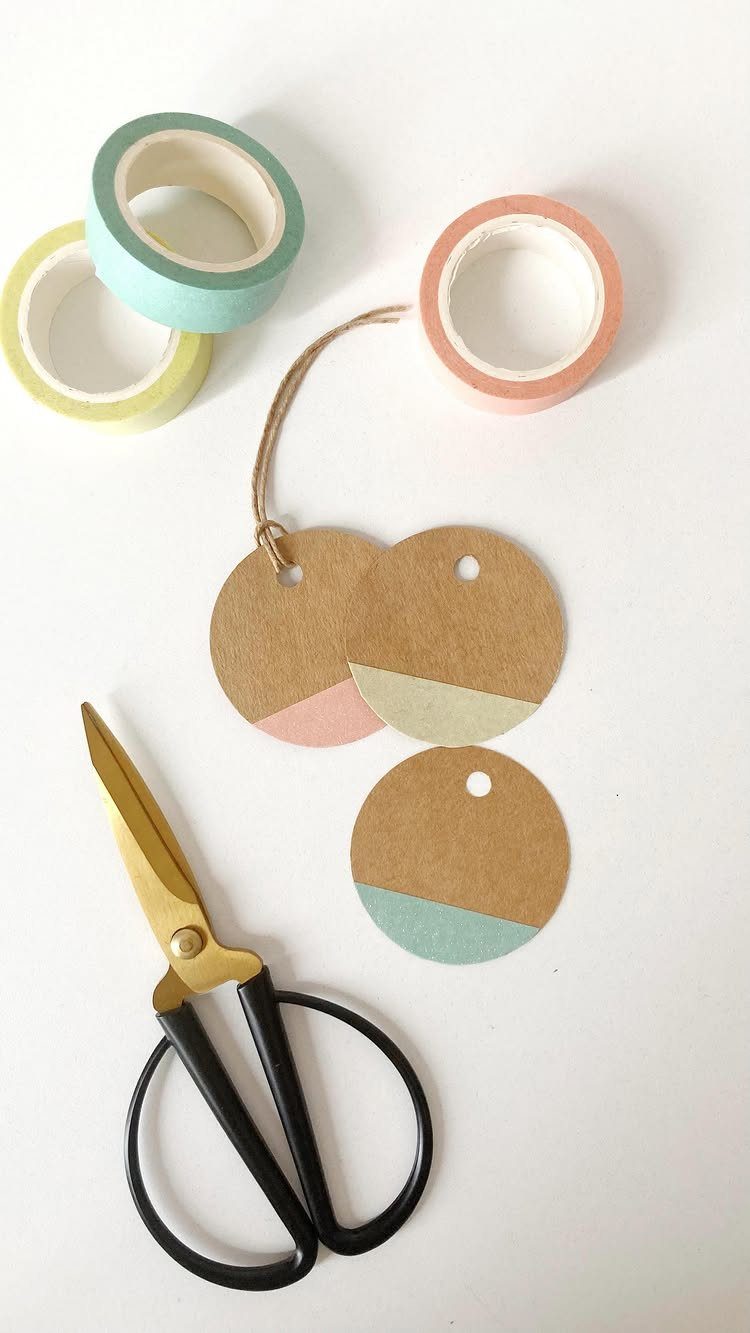
Washi tape is the lowest-effort way to add pattern to a plain tag. Cut circles from brown cardboard, lay strips of tape across them, and trim the overhang with scissors for a clean edge.
Two or three rolls in related colors read as planned; pile on more and the tag starts to look busy. One roll covers a lot of tags, so the cost stays small.
I like stripes at different angles on each tag, so a set looks related without being identical. Write the name on a blank strip of paper tape or leave a clear patch for it.
5. Natural Material Tags
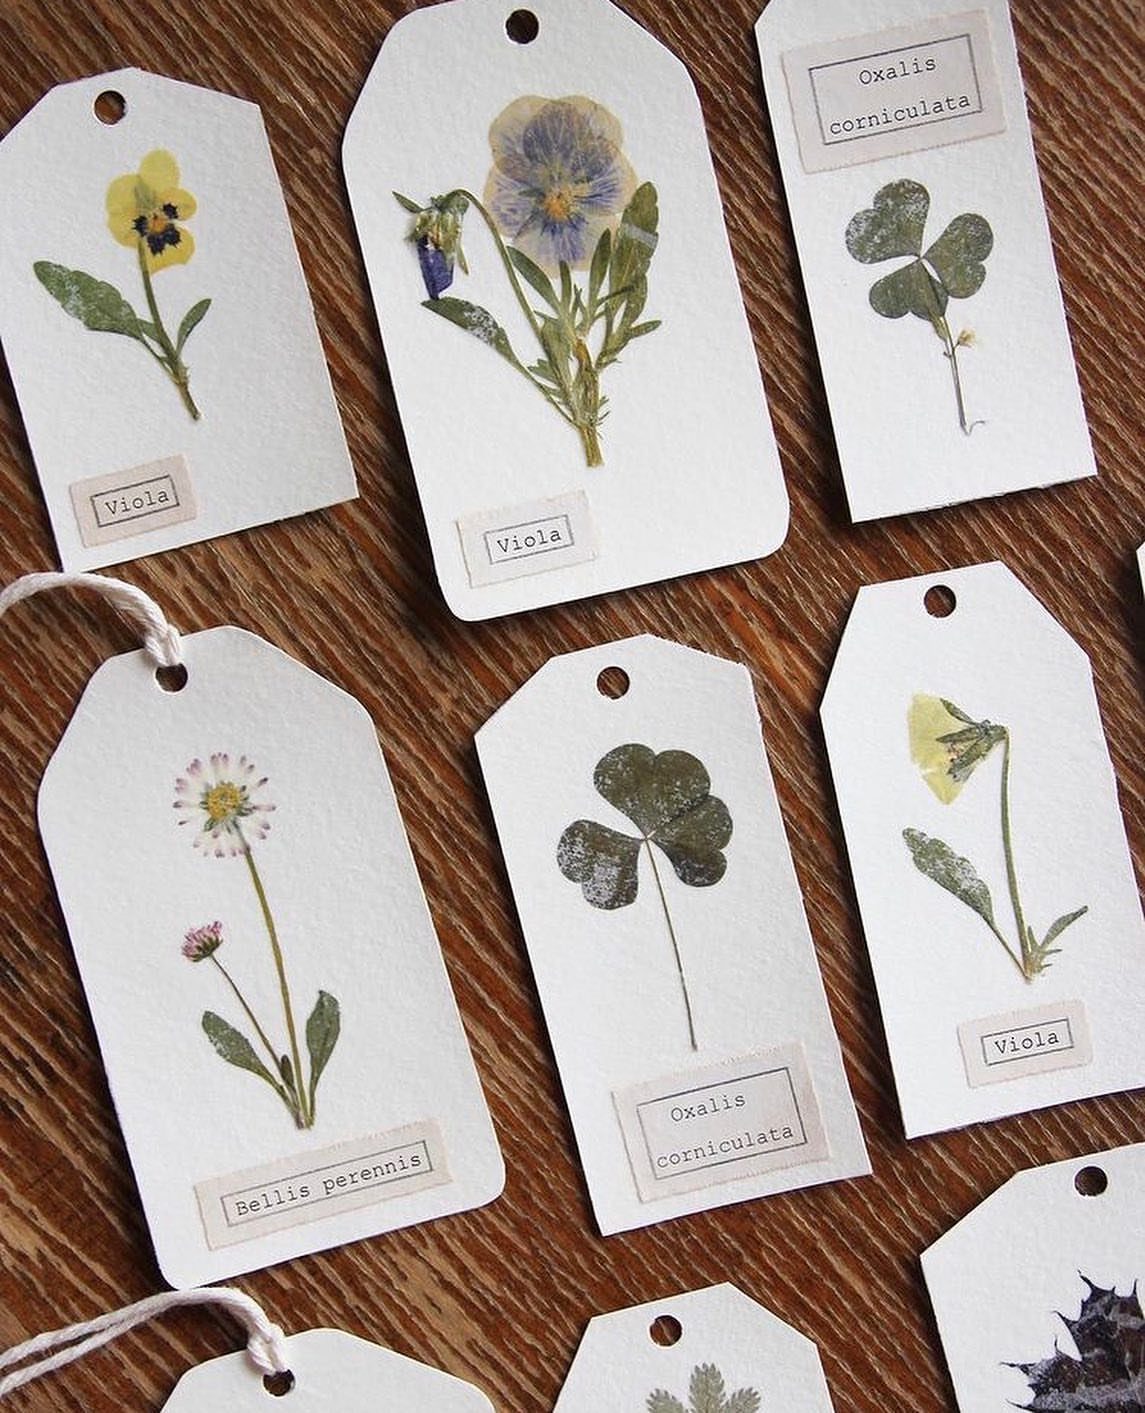
A pressed flower on a white tag reads like a page from a field journal, especially with a small botanical name written underneath. Violas and tiny weeds work well because they press flat.
Dry the blooms between sheets of paper under heavy books until they lose all moisture. Then fix each one to the tag with a dab of clear glue, using tweezers so you don’t crush the petals.
Looking up the Latin name takes a minute, and it makes the tag feel written for that one person. Use a fine-tip pen for the lettering.
6. Fabric Scrap Gift Tags
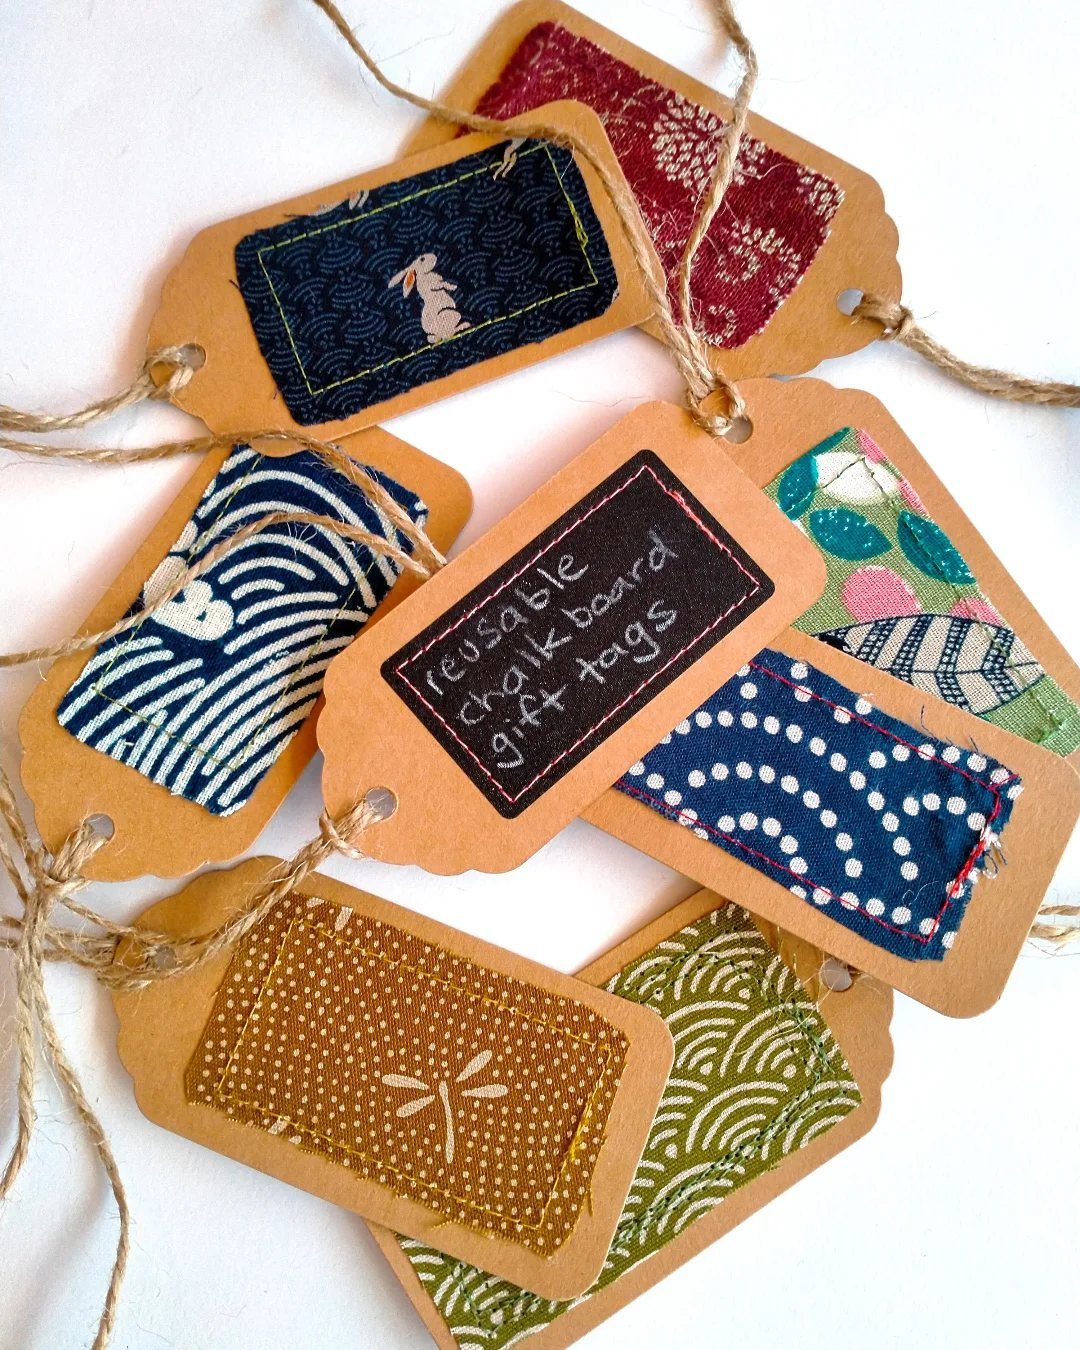
Scraps too small for any sewing project still cover a tag nicely. Cut a patch of patterned fabric, stitch it onto brown cardstock, and tie the tag on with twine.
Sewing through cardstock goes easier if you punch the holes first with a needle or a pin. Pinking shears keep the fabric from fraying without any hemming.
A small chalkboard label on one tag gives you a reusable spot for the recipient’s name, so you can wipe it clean and write again. Glue is a fine shortcut if you don’t want to sew.
7. Bold Lettering Gift Tags
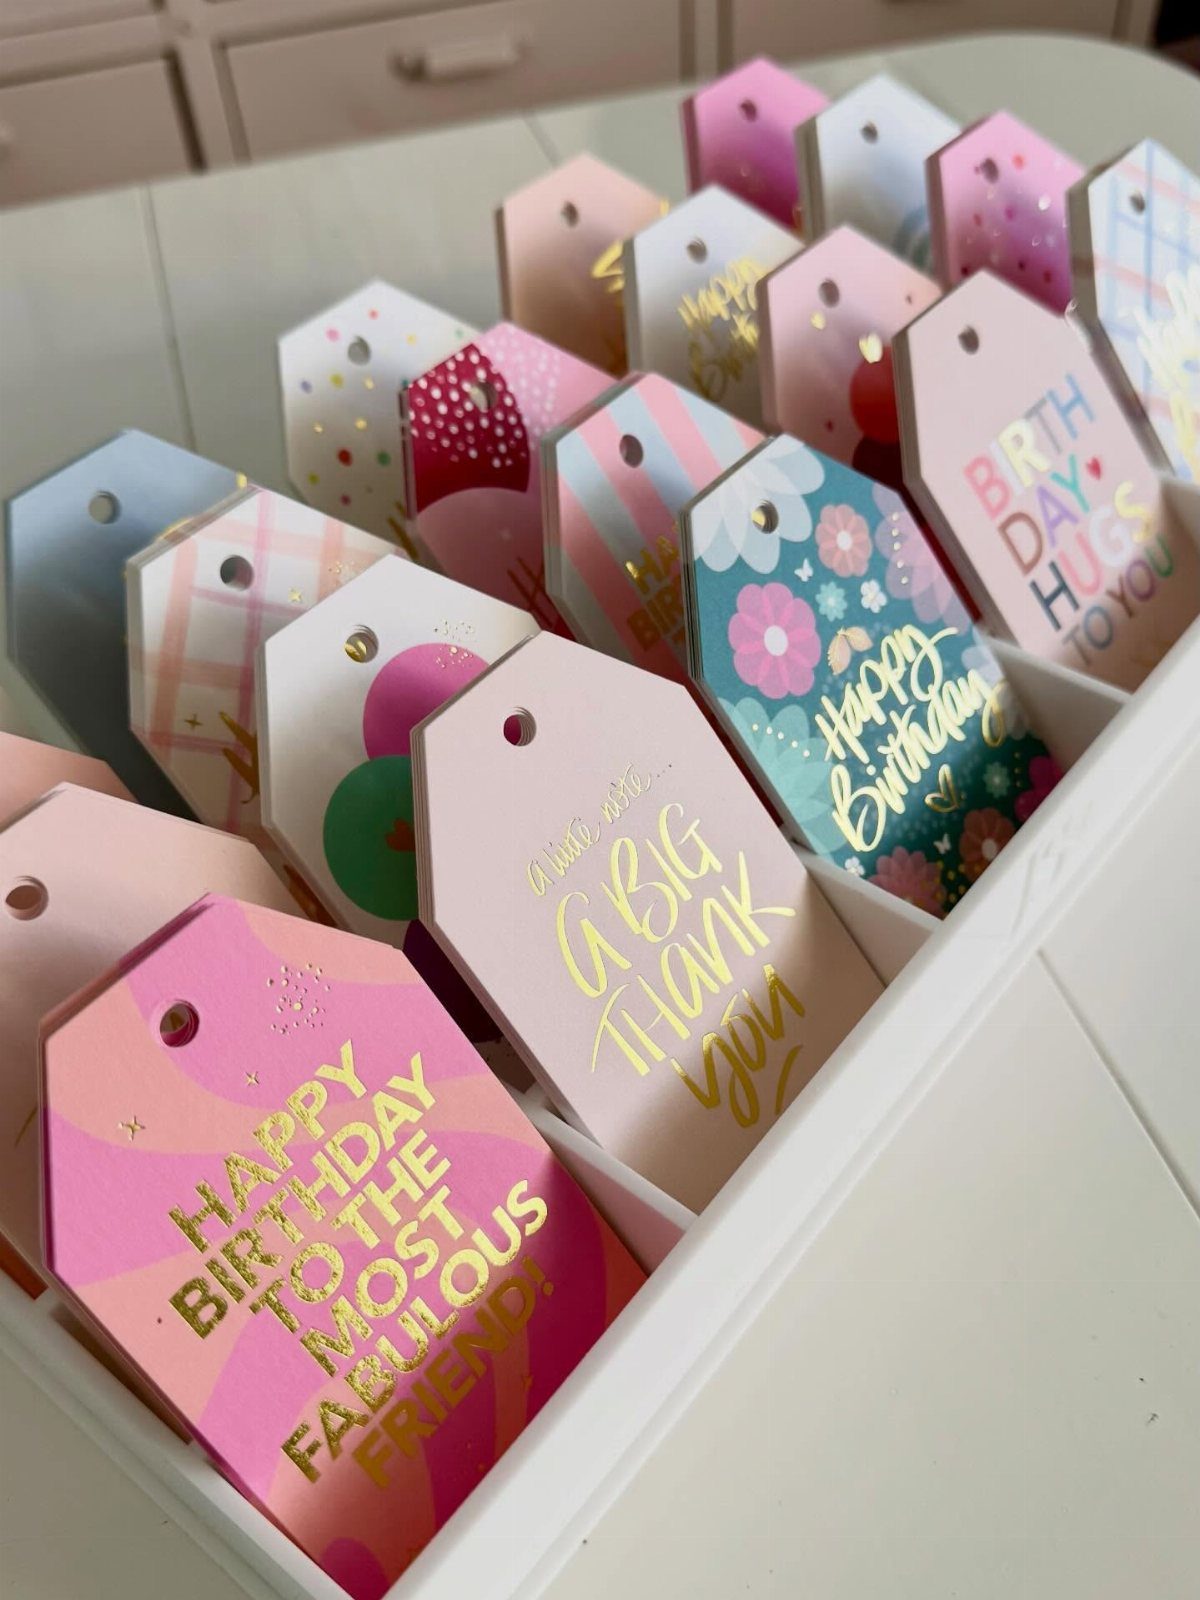
Big, bold type does the decorating for you, so the tag needs no extra trim.
Short phrases like "A big thank you" or "Birthday hugs to you" work best, because a few words in large letters stay readable from across the table.
Mixing all caps with a looser script on the same tag adds contrast. Pick one or two ink colors and repeat them across the set so it looks planned.
Print a batch on cardstock, as in the first entry, and cut them all at once.
8. Embroidered Paper Gift Tags
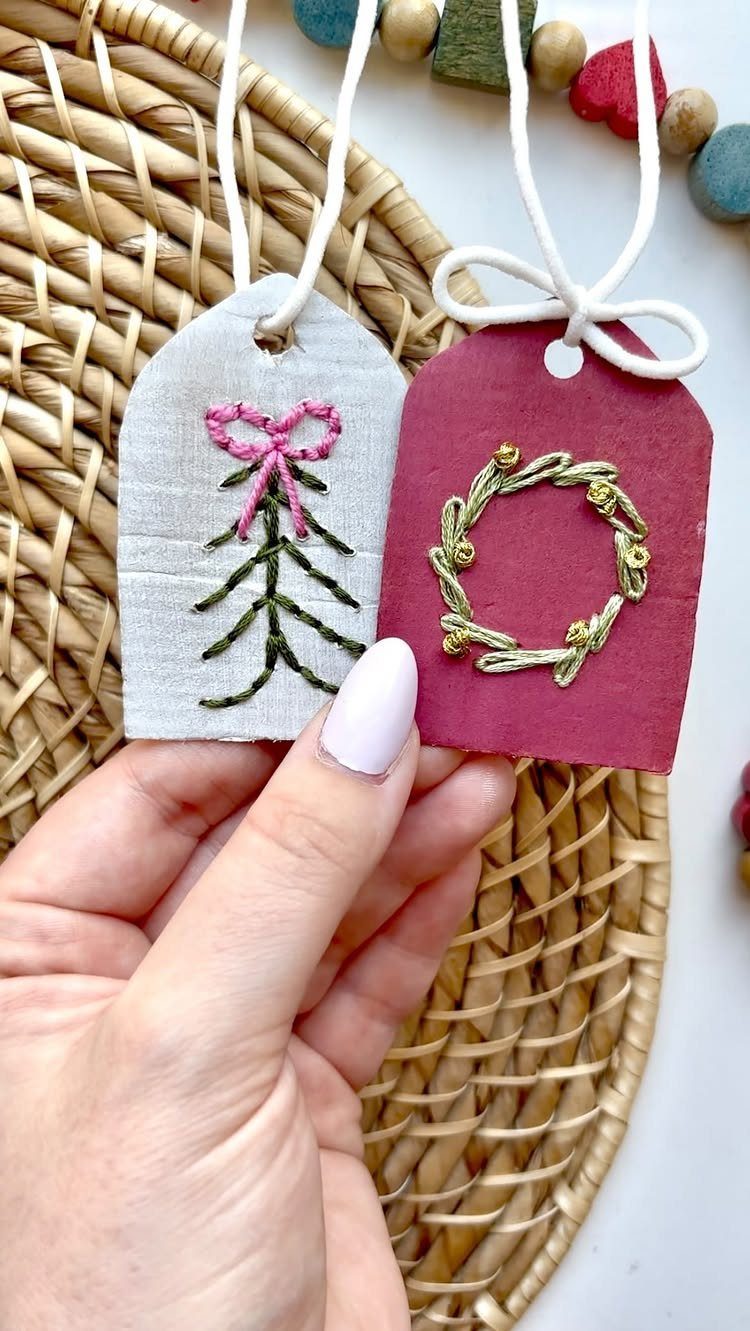
Stitching a tiny design straight into cardstock gives a tag that looks far pricier than it is. A tree on a white tag or a wreath on a red one needs only a few lines of thread.
Mark the design lightly in pencil, then punch each hole with a needle or a pin before you sew.
Keep the design small and simple. Stitching takes longer than any other tag here, so I’d save it for a few special gifts.
9. 3D Clay Figure Tags
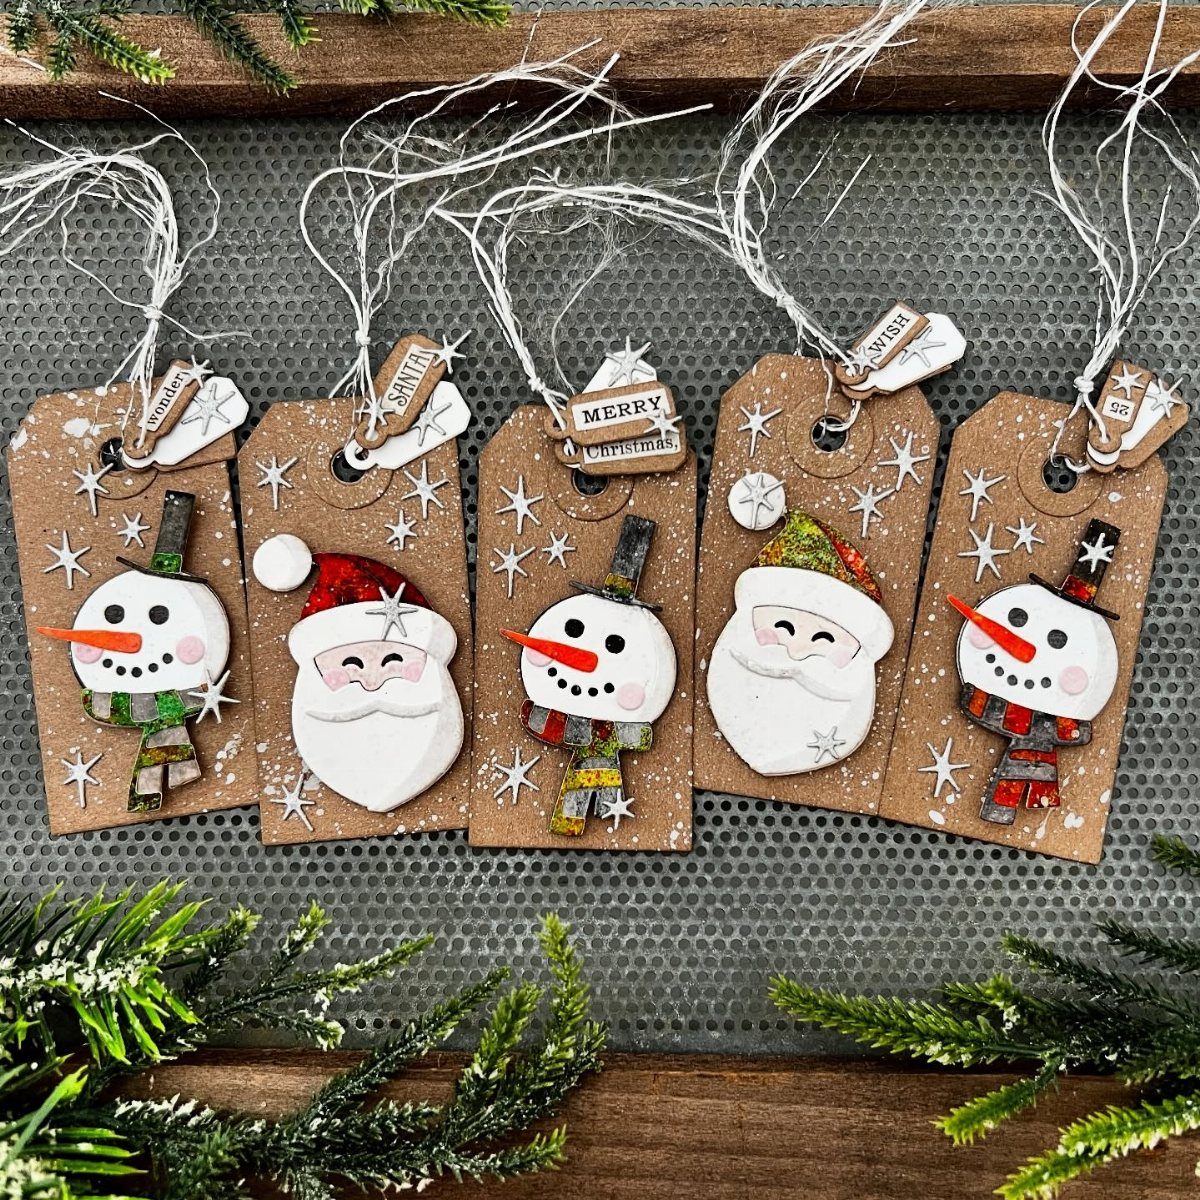
A snowman or Santa sculpted from clay and set on a kraft tag adds real depth, and the plain brown paper lets the little figures stand out.
One-word tags like "wonder" or "wish" keep the message short, which suits a small tag.
Make the figures flat on the back so they sit well on the paper. Let the clay set fully before gluing, then attach each one with a firm glue.
Expect this to be the slowest idea on the list. Sculpting takes patience, but the tags are one of a kind.
10. Hand-Drawn Pun Gift Tags
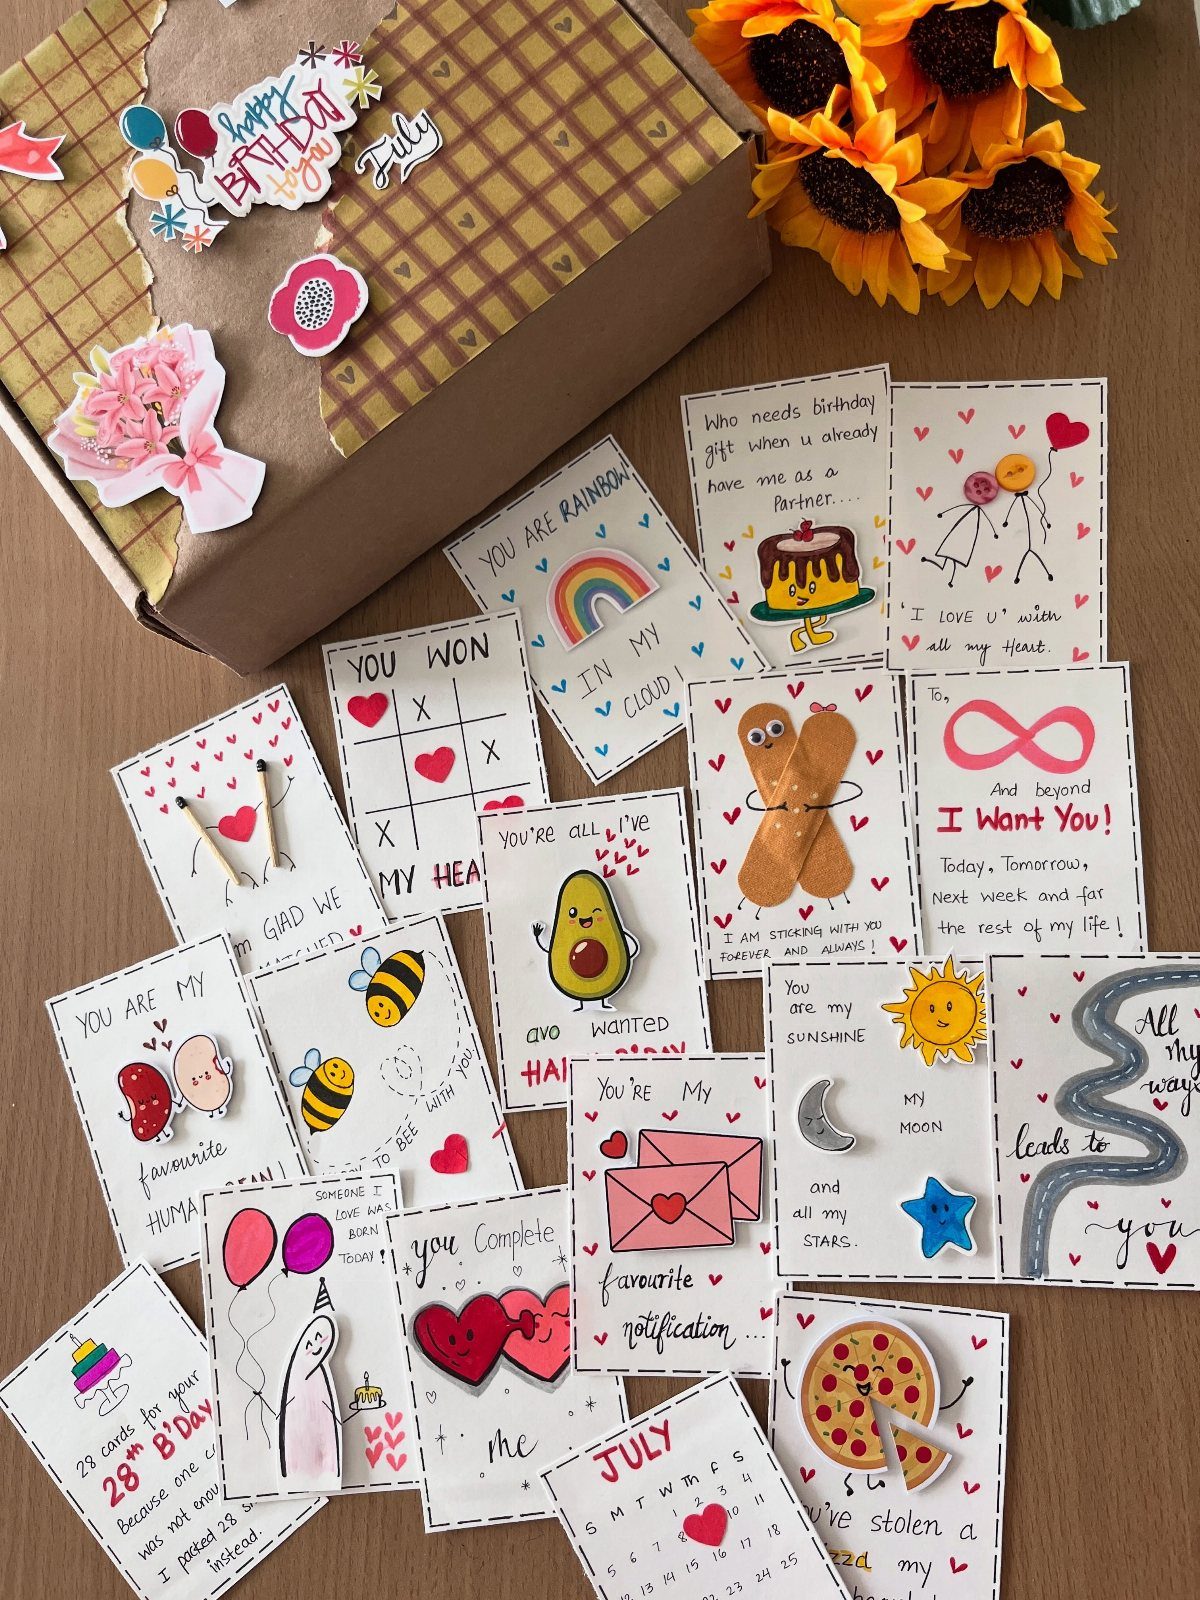
Puns are the cheapest personality you can add to a gift. A small drawing of a bee, a heart or a snack beside a short joke takes a pen and a white tag, nothing more.
Sketch in pencil first, then go over it with fine-tip markers.
Simple doodles beat fancy ones here, and a wobbly line adds charm. I draft a few puns on scrap paper first so the best one lands on the real tag.
11. Vintage Postcard Gift Tags
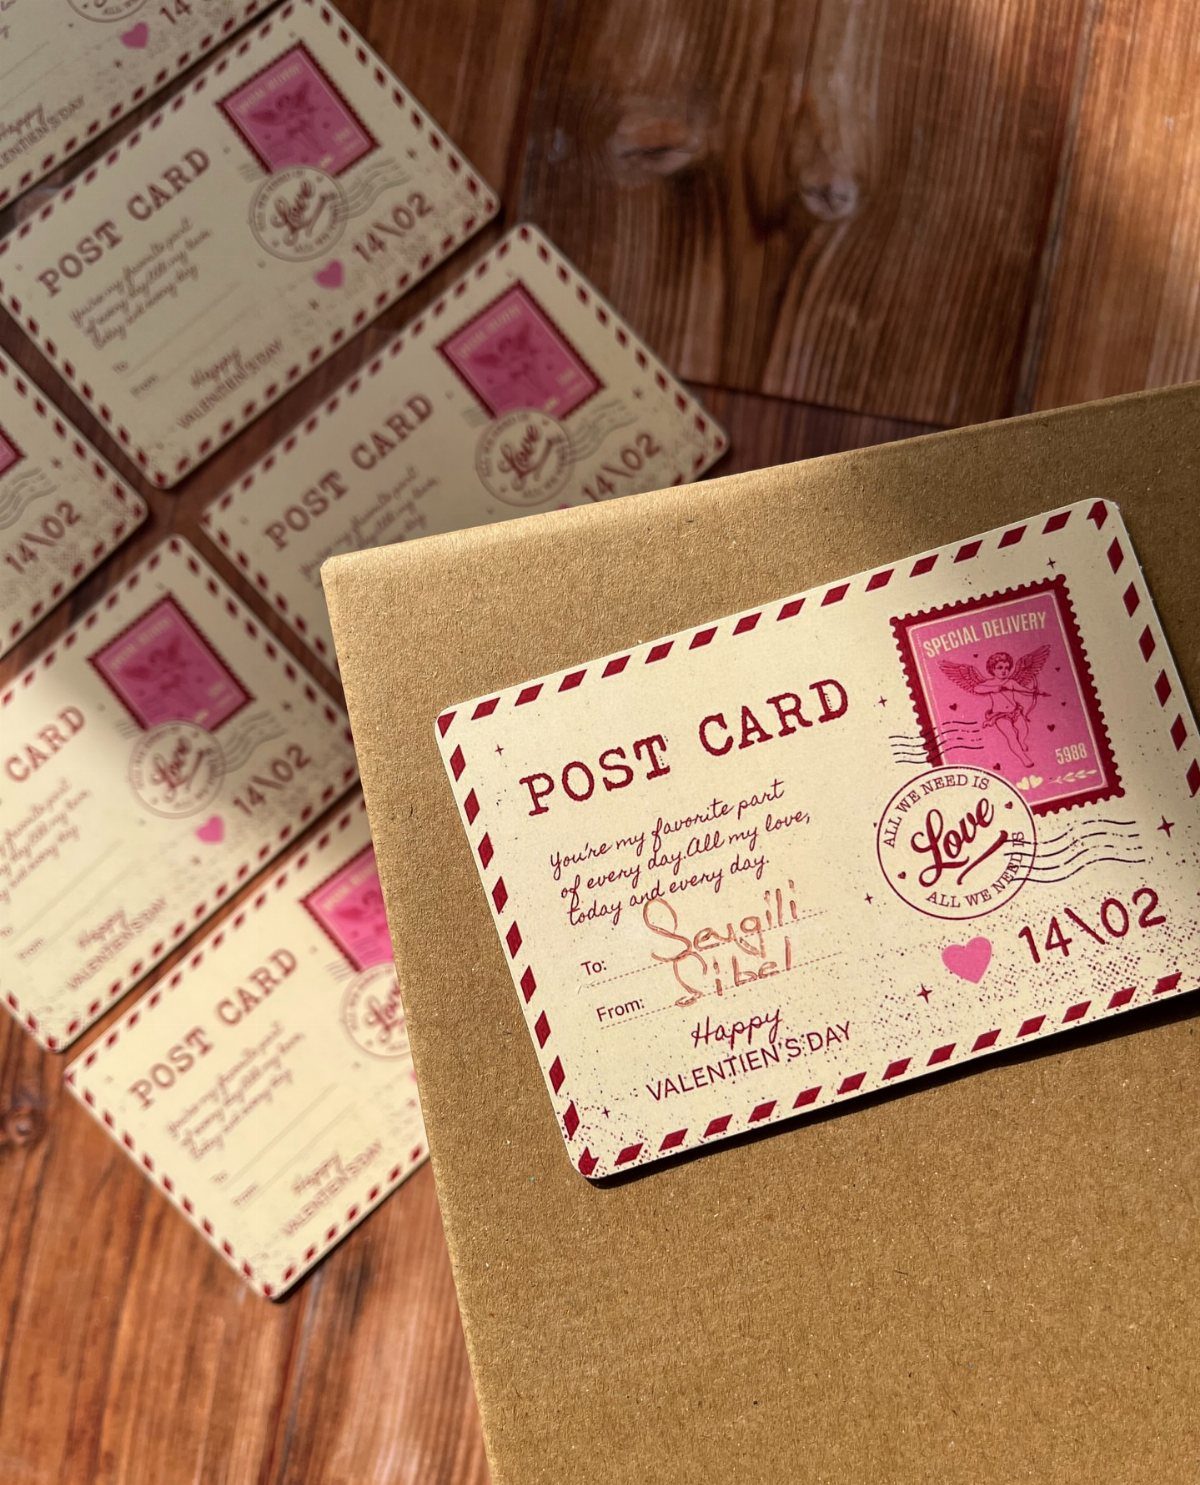
A tag shaped like a mini postcard turns the label into part of the gift.
Cream cardstock with a red border and a small drawn stamp looks old-fashioned, and "Post Card" printed across the top makes the joke clear at once.
Rule the border with a ruler so the edges stay straight. Leave a blank area for the message, then punch a hole in one corner for the string.
Tea-stained or cream paper both work. This pairs especially well with a plain brown box.
12. Layered Paper Collage Tags
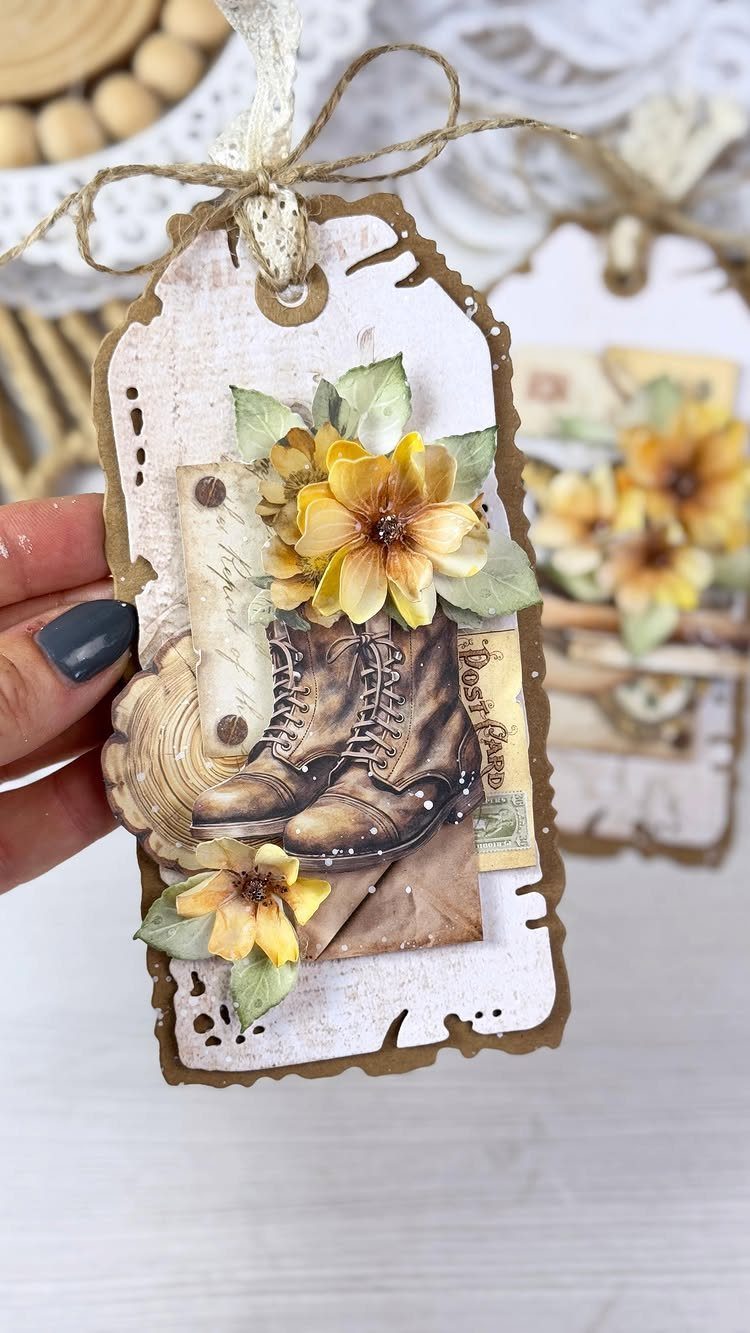
Aged paper, a flower and one small picture stacked together make a tag with real depth. Tear the edges of a parchment-toned layer instead of cutting them, then glue a smaller image on top.
Work from large to small: backing first, then the paper layer, then the picture, with flowers last. Tie the finished tag on with twine.
Keep to one or two colors, such as yellow against brown, so the pile of layers still reads as one picture. A glue stick keeps the paper from wrinkling.
Materials for Gift Tags
Check the recycling bin and the yard before you buy anything. Sturdy paper in almost any form can become a tag: scrapbook paper, table place cards, even the front of an old gift bag.
White cardstock follows the same steps as cardboard and gives a cleaner, simpler look. A scrap of fabric works too, as long as it has some body.
A sprig of rosemary or a small piece of pine tucked under the string looks good against plain kraft paper, and both are free if you have a yard. They add color and scent without any crafting at all.
Pick materials that match the wrapping. A tag cut from the same bag or paper as the gift looks planned, and it costs nothing extra.
You can match them to the gift bag or wrapping paper, or to the person’s tastes. It’s easy to make your own beautiful, unique gift tags with just a few items and a little creativity.
— WikiHow
What to Write on Gift Tags
A tag has maybe 15 words of room, so write less than you would on a greeting card. A tag is a label with a feeling attached, not a letter.
One line naming what’s inside, or who it’s for, is plenty.
Write the words on scrap paper first and check that they fit. Then copy them onto the tag in your neatest handwriting, leaving room around the edges so the line doesn’t crowd the hole or the string.
Frequently Asked Questions
How can I make my own Christmas gift tags?
A flattened shipping box gives you free tag stock, and kraft brown cardboard pairs naturally with plain paper and jute twine.
Trace a heart or leaf shape, cut it out, and punch a hole at the top for the string; a dab of paint rubbed over the corrugated ridges or a tiny paper heart glued on gives it some life.
What is a good font for a gift tag?
Big, bold letters are the safest choice for a tag, since 2 or 3 words in heavy type can be read from across the room.
Limiting the whole set to 1 or 2 ink colors makes a pile of tags look planned instead of random.