Which of these looks fits depends on the gifts in front of you: mixed sizes want a plain surface like kraft paper or crisp white with a single bow, while a pile of similar boxes can carry plaids or large dots.
Ribbon does the unifying: keep one color repeating across mismatched papers and the whole stack reads as a set.
1. Dark Green Wrapping Paper with Brown Ribbon
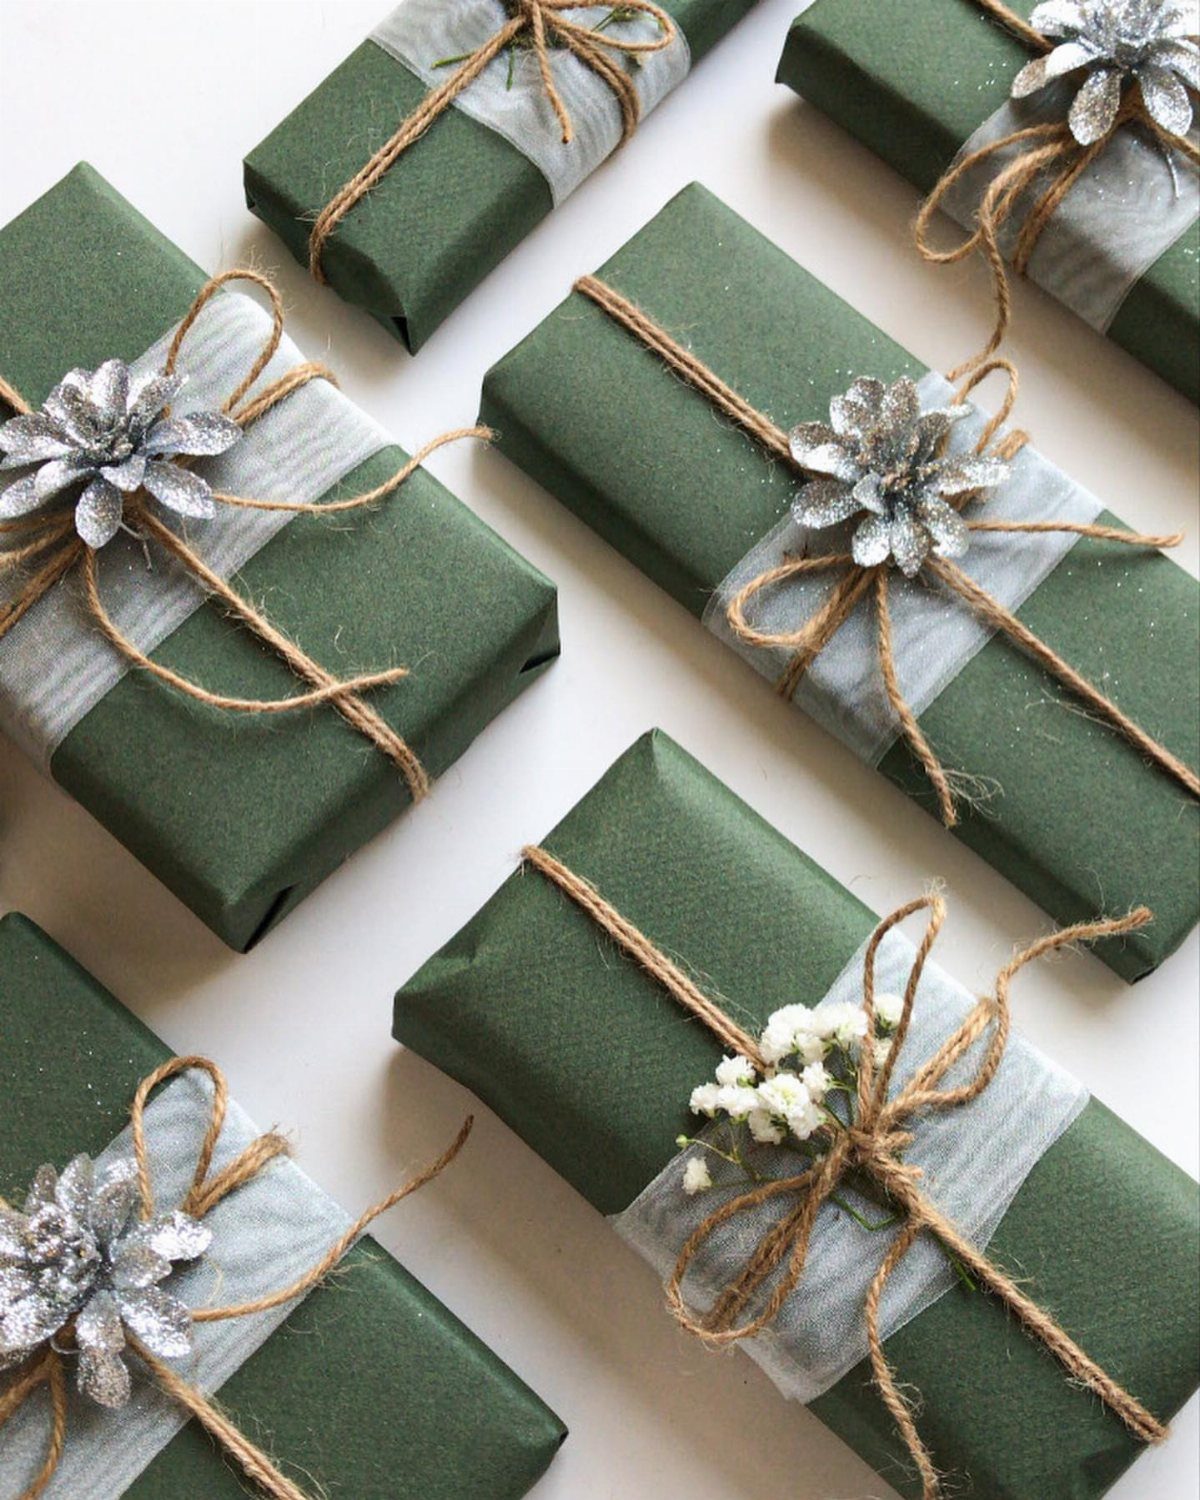
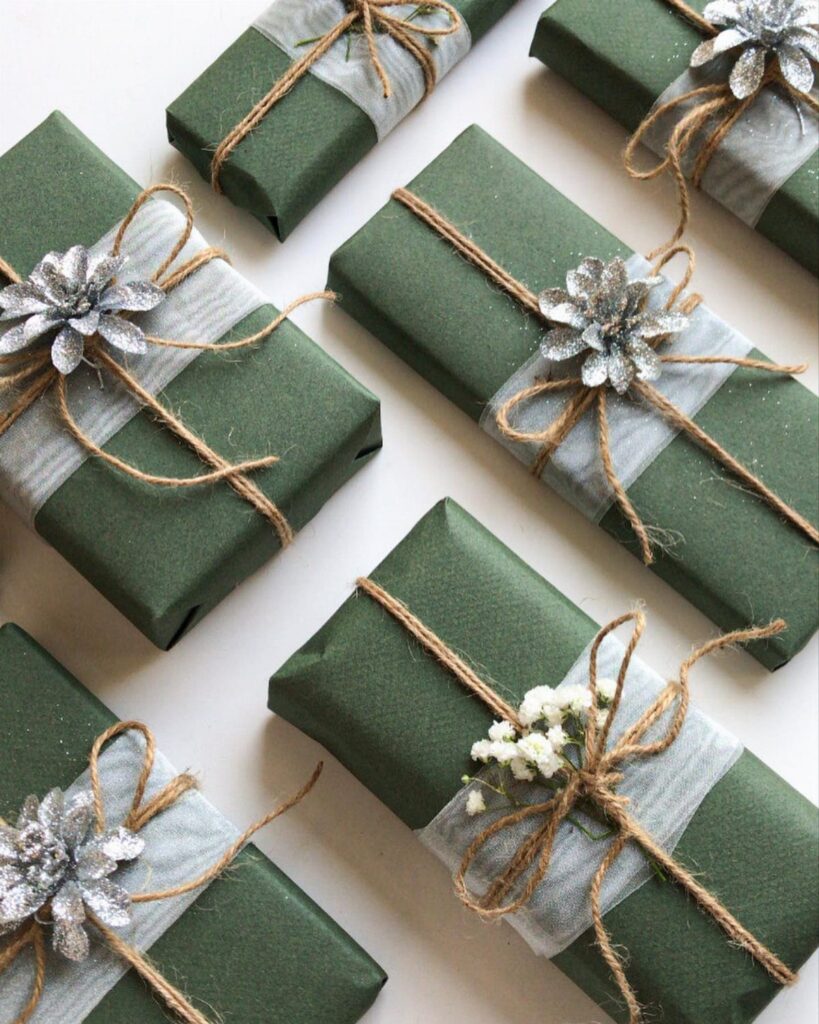
Dark green paper reads richer than red and hides fingerprints and creases better than pale stock. Brown twine keeps the look earthy, and sheer grey ribbon layered over it adds softness without competing.
Finish each gift with one small accent: a silver flower or a sprig of white baby’s breath. Pick one, not both, so gifts in a row look like a set instead of a sampler.
2. Kraft Paper Tied with Twine
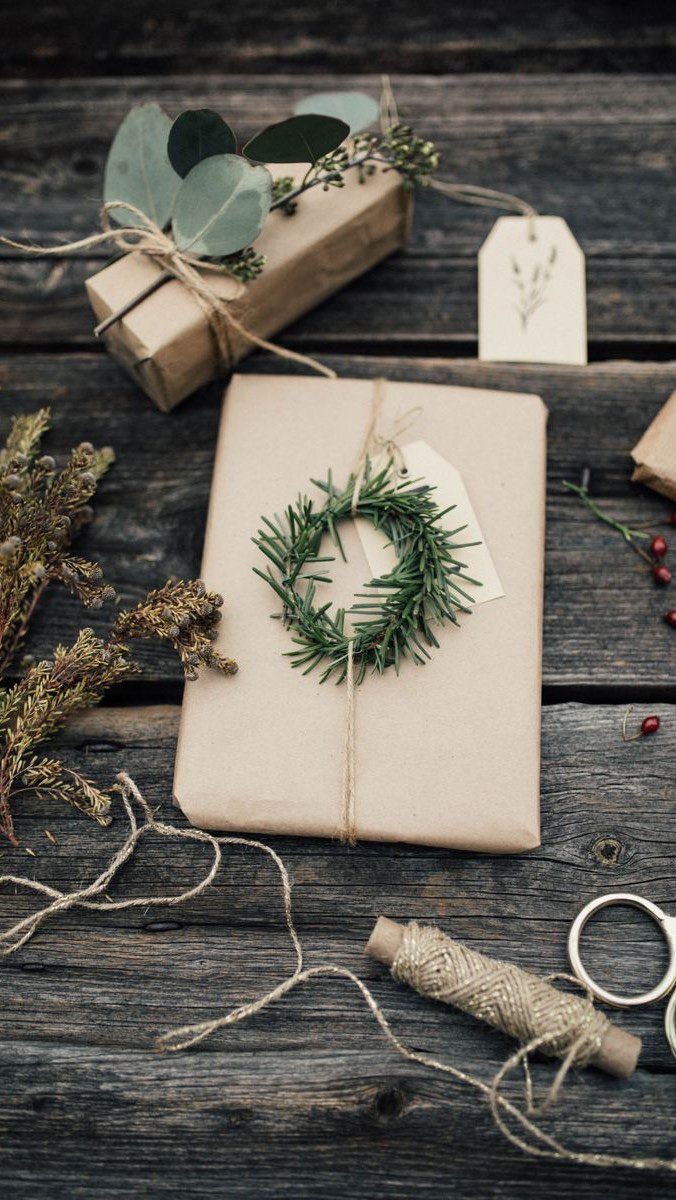
Brown kraft paper is the cheapest wrapping that still looks deliberate, and twine is the whole closure. Wrap tightly, tie a snug knot, and let the paper’s plain color do the work.
A small evergreen wreath tucked under the twine adds the only decoration you need. Add a blank gift tag so the recipient’s name goes in your own handwriting, which I prefer to a printed label here.
3. Wrapped Gifts in Turquoise and Sandy Beige
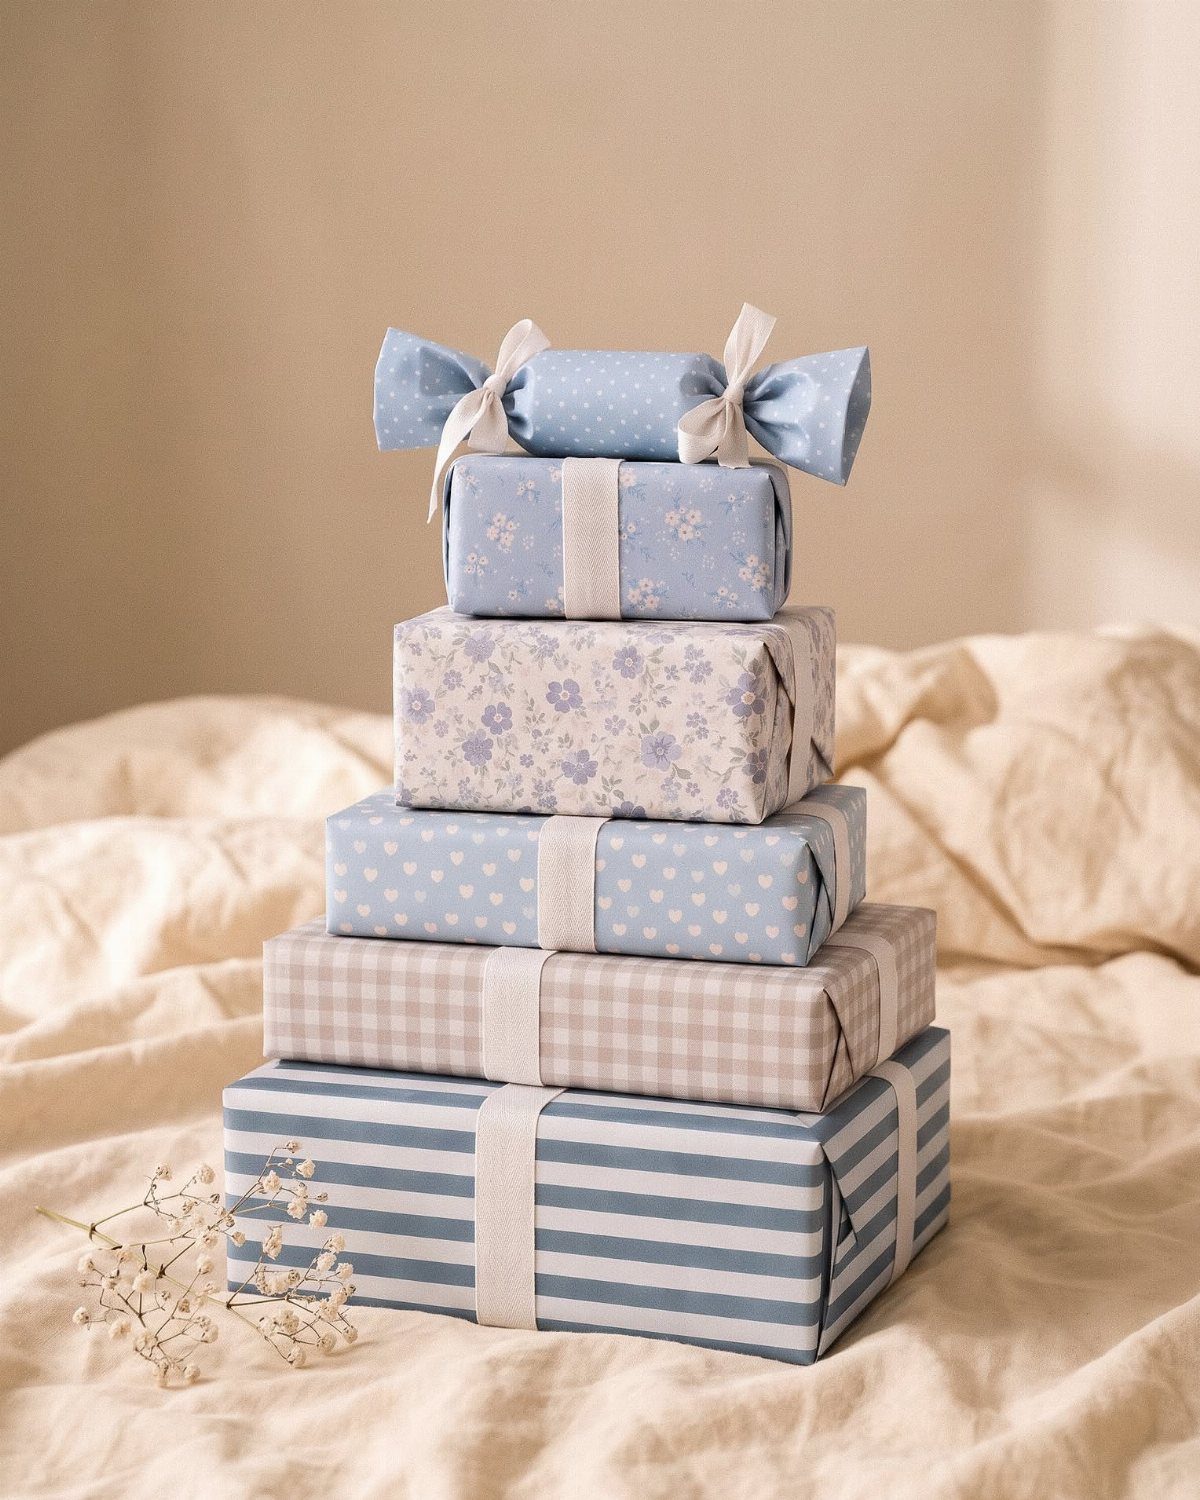
Mixing several blue patterns works when the blues share a mood and the ribbons stay quiet. Here, turquoise and white prints sit well together because nothing fights for attention.
Stack the gifts as a group on a sandy beige cloth and the whole pile looks like a planned display.
A single sprig of white flowers on top finishes it. If you want it calmer, keep the ribbons to one or two colors.
4. Crisp White Paper with Soft Satin Ribbon
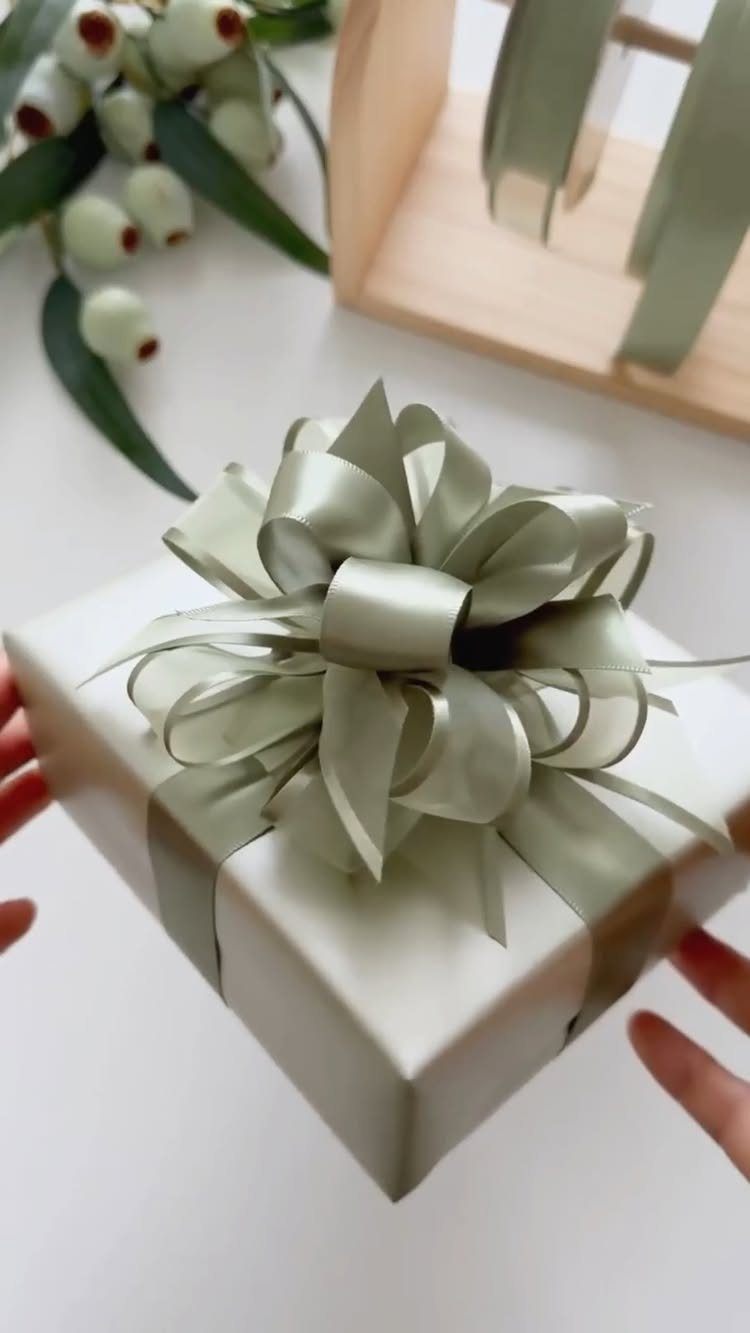
White paper with one oversized satin bow is the most forgiving look when presents come in different sizes. Use sage green ribbon, and make the bow large; a skimpy bow on plain paper looks unfinished.
Satin slips, so tie a firm knot before you shape the loops.
Press the paper edges sharp and keep seams on the underside. With a plain surface, every crease shows, so take your time folding.
5. Plaids Galore
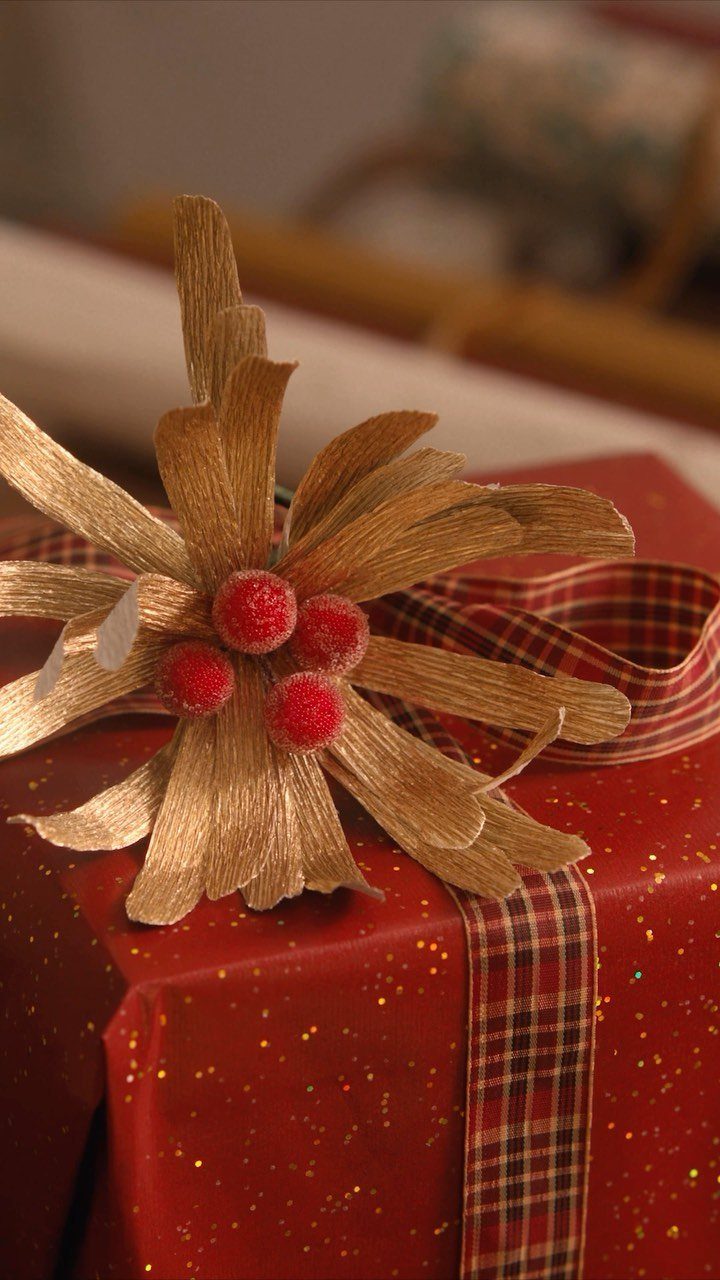
Plaid ribbon is the easiest way to make glittery red paper feel traditional instead of flashy. The pattern calms the sparkle and adds a woven, wintry warmth.
Top the knot with a gold bow carrying red berries and you have a finished gift in 2 moves.
I would keep the paper solid and let the plaid be the only pattern, since busy paper under busy ribbon turns messy.
6. Wrapping Paper with Large Dots
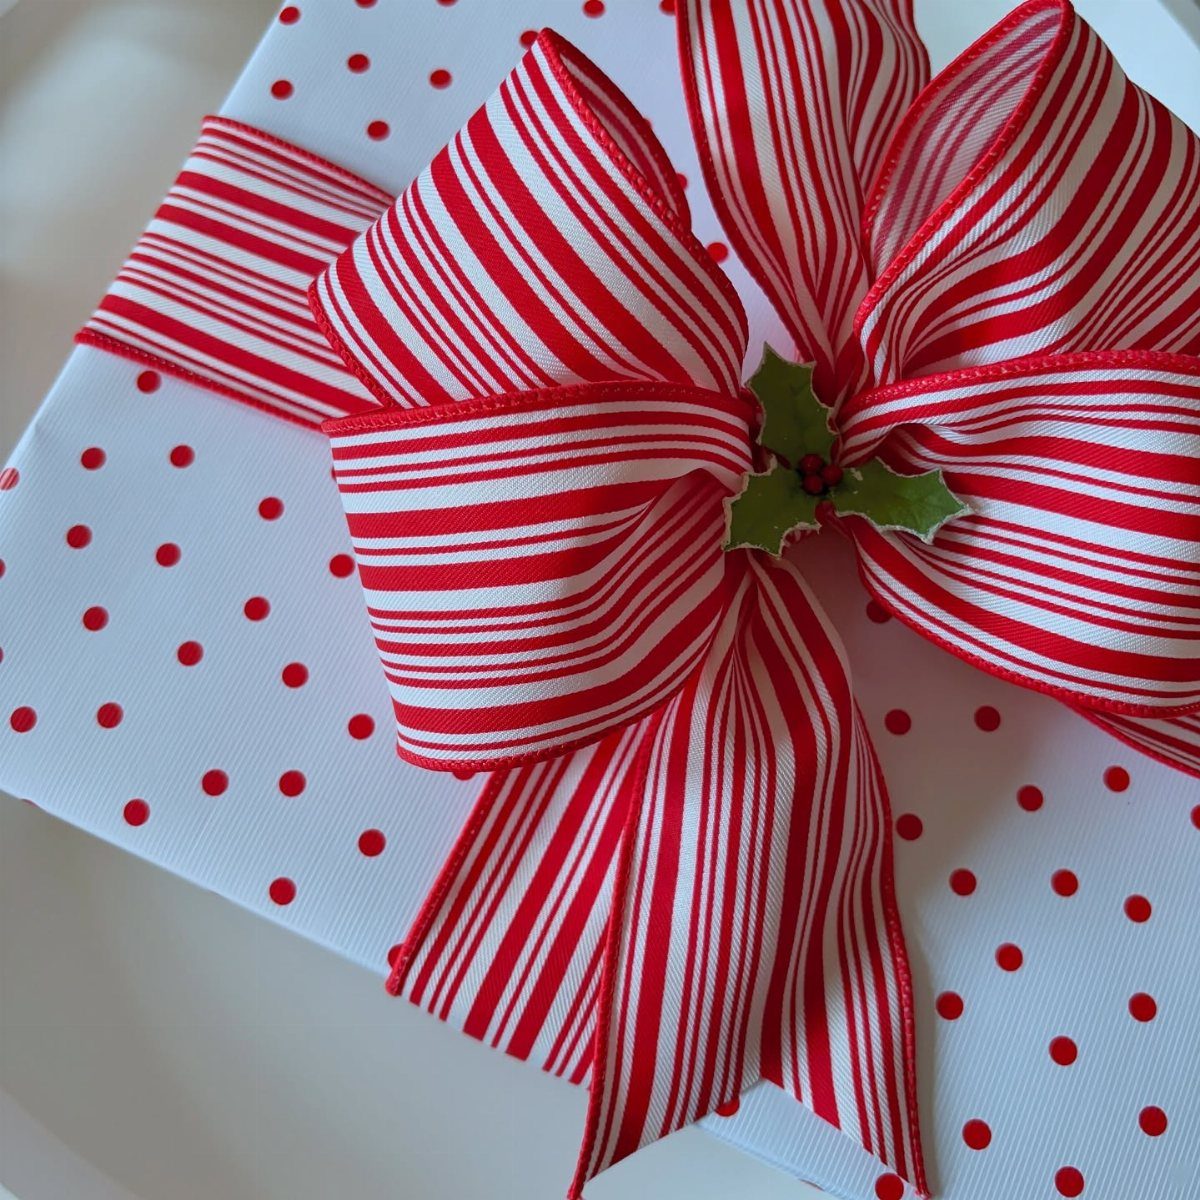
Big polka dots feel playful rather than fussy, and they suit anyone who finds traditional holiday prints a bit heavy. Red dots on white give a clean, graphic look.
A red and white striped ribbon echoes the colors without matching the dots exactly, which looks more relaxed.
A small holly leaf tucked into the bow adds the Christmas note. Cut the paper so a dot sits near the center of the lid, not split by a seam.
7. Golden Glow
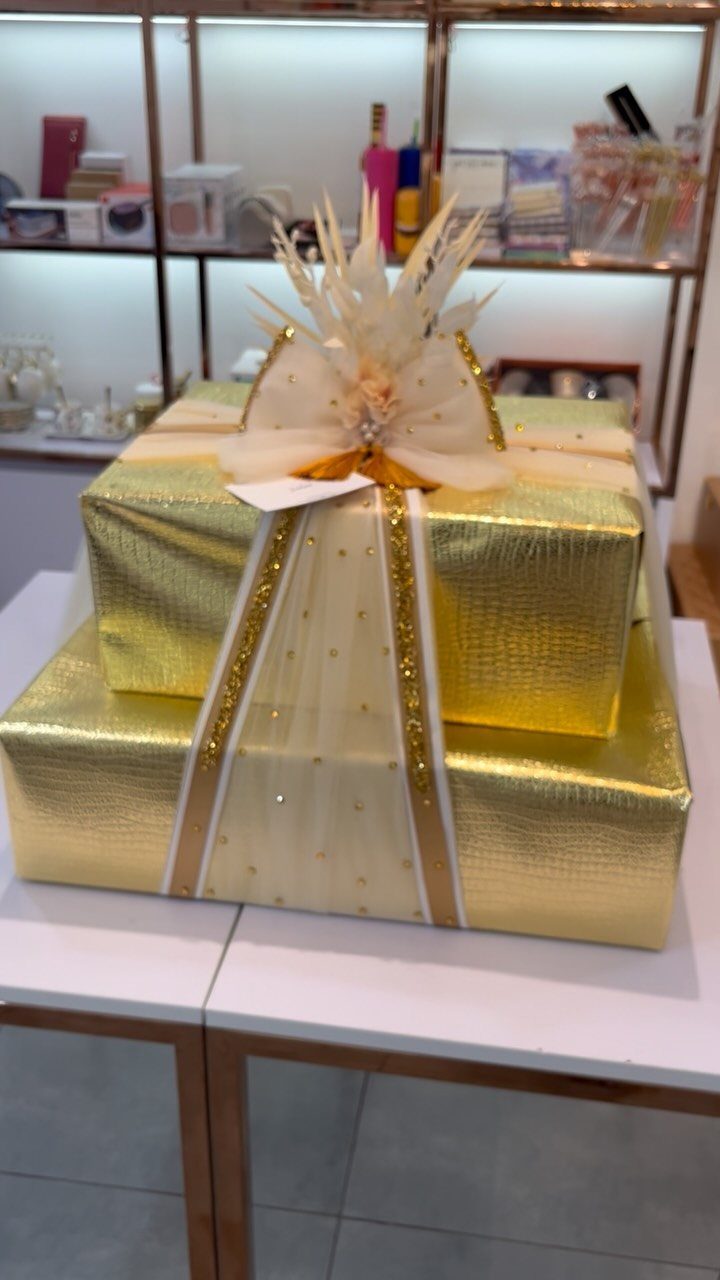
Gold paper does the decorating for you, so a sheer gold ribbon in the same tone is all the finish a box needs. Matching the ribbon to the paper keeps the shimmer looking intentional instead of busy.
I would tie one full, fluffy bow per gift and skip extra trims. Foil and metallic wrap punish sloppy folds, so crease each edge flat with your thumbnail and tape the seam where it will sit against the table.
8. Red and White Festive Paper
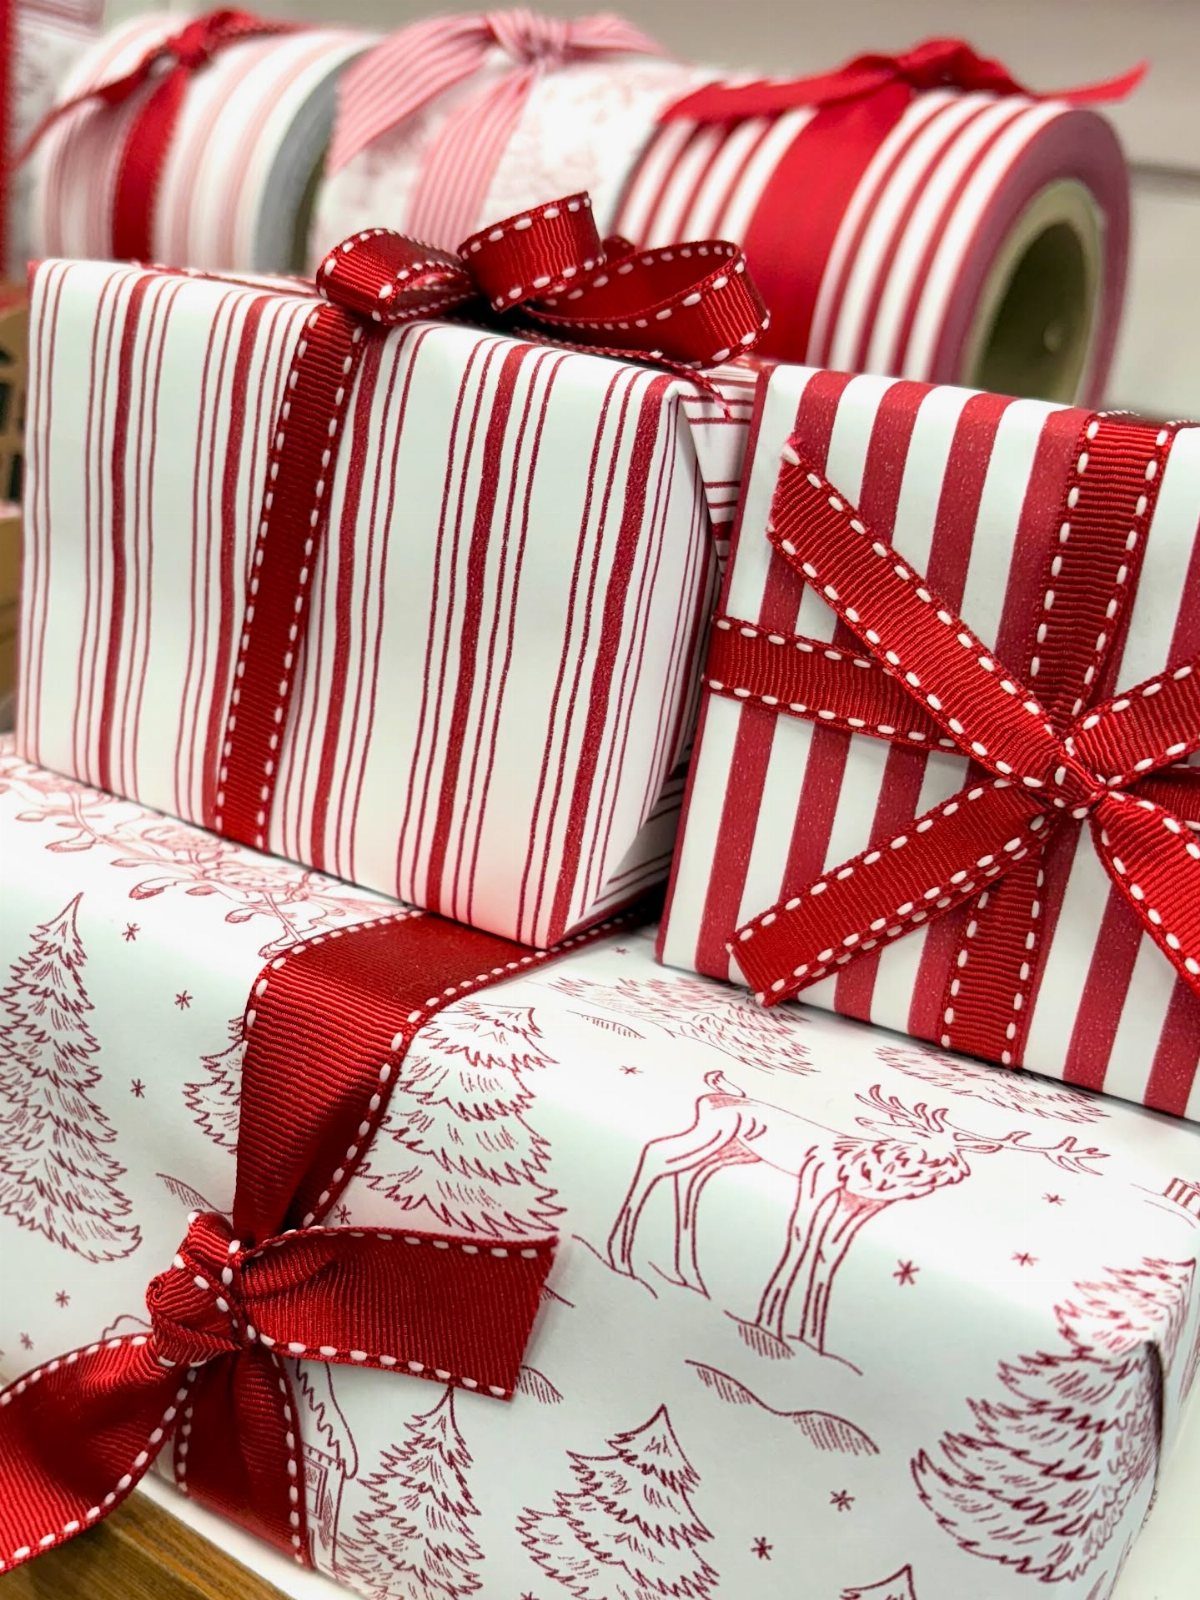
Candy cane stripes and a reindeer print can share one gift pile when the ribbon is the same red on every box. That single repeated color is what makes mixed patterns read as a set.
Buy two or three coordinating rolls instead of one, so each present gets a different pattern. I like stripes on the large boxes and the printed paper on small ones, which keeps the pile from looking uniform.
9. Metallic Copper with Velvet Ribbons
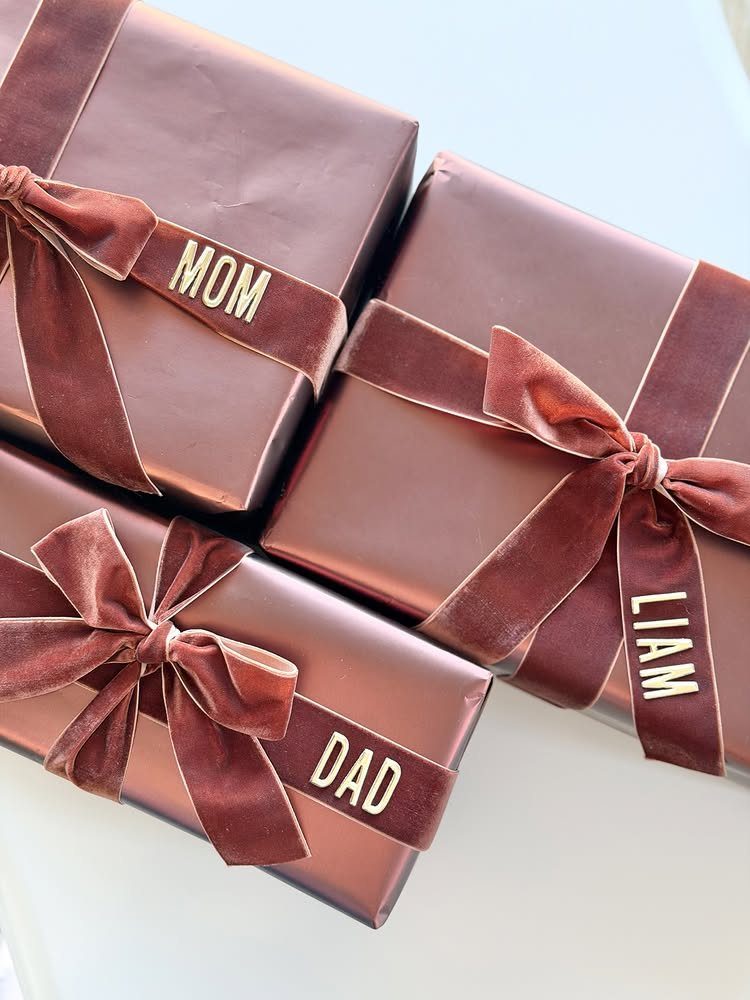
Copper paper with velvet ribbon in the same shade looks expensive because the matte velvet sits against the shine. Choose a ribbon that matches the paper closely, and let the gold tag supply the contrast.
Name tags like these double as place markers under the tree, and writing each name yourself on a blank gold tag costs far less than buying them personalized. Tie the velvet snugly; it holds a shape better than slippery satin.
10. Snowflake Paper with Pleated Fan
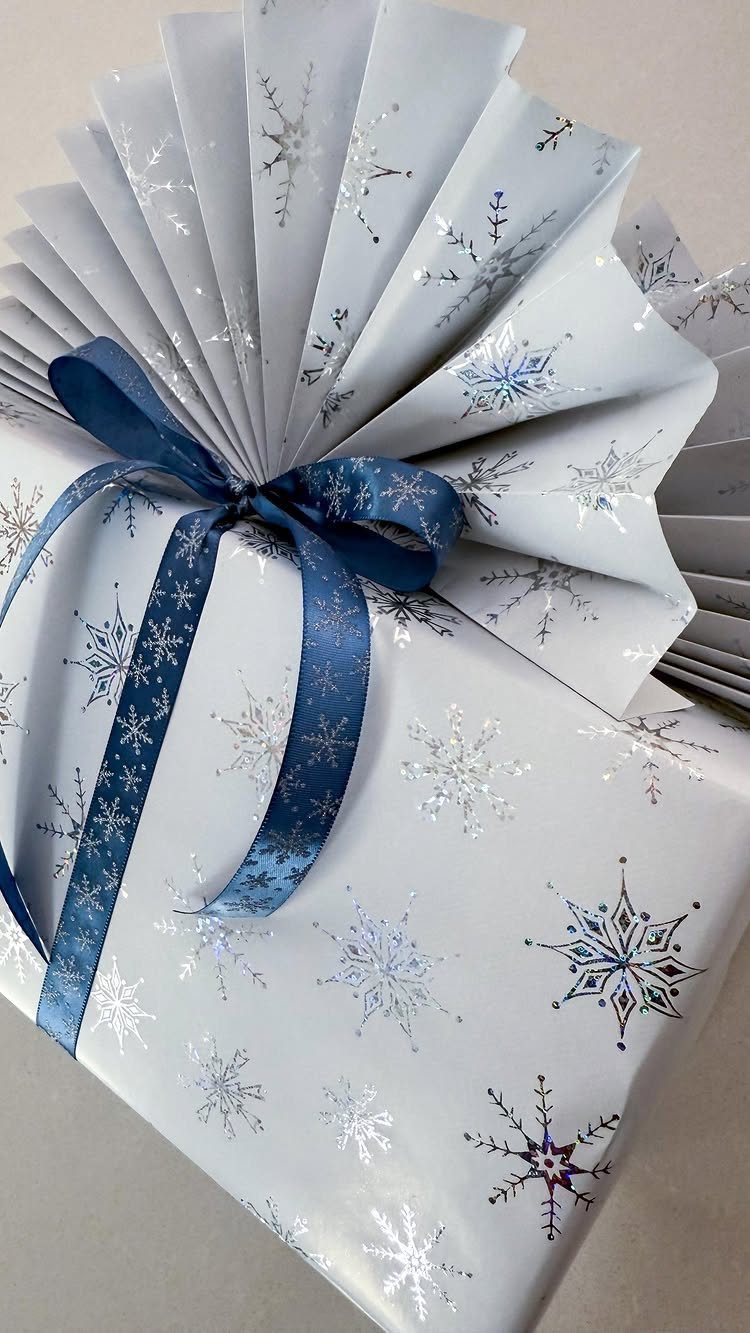
A pleated paper fan is the cheapest topper I know, and it turns a flat box into something that looks designed.
Fold a strip of paper accordion style, pinch the center, and bring the ends together to make a half-circle or full fan.
Tie it down with navy ribbon over the pinched center so the bow hides the join. Against snowflake paper in silver and blue, keep the fan in a solid color so the print stays the only pattern.
11. Iridescent Silver Metallic Wrap
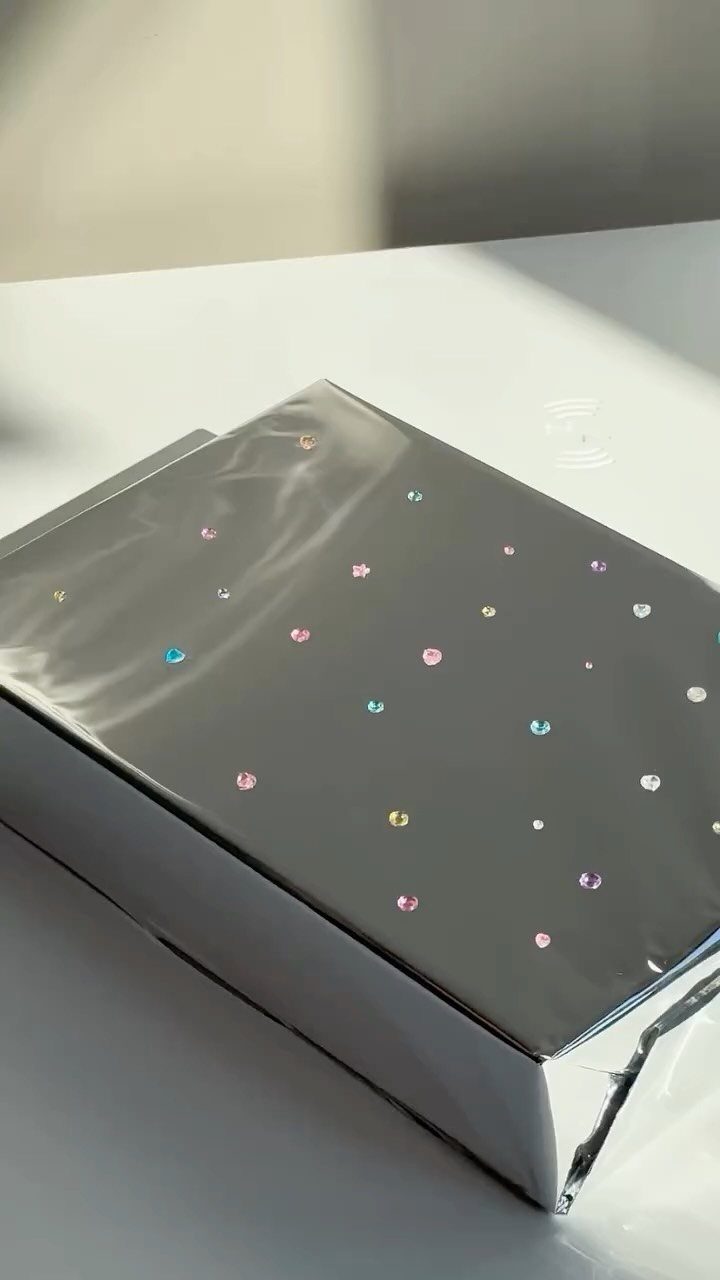
Reflective silver with small iridescent dots needs almost nothing added. The paper already throws light, so a plain white or silver ribbon, or no ribbon at all, is the best companion.
Metallic stock tears and creases easily, so use sharp scissors and tape on the underside only, since tape on the surface will show. I would use it on one standout gift rather than the whole stack.
Affordable Wrapping Supplies
Foil-pressed sheets sold in small packs run $15 for 5 sheets, which is fine for one showpiece gift but adds up fast across a whole list.
I would buy one large roll of plain paper for the bulk of the gifts and spend the savings on a single nicer item, like a spool of ribbon you will use on every box.
Plain paper gives you room to add things, and natural pieces from the yard cost nothing. Wrapping in short sessions, a few gifts at a time, also keeps the work easy and the folds neat.
Creative Embellishments
Ribbon choice changes the feel more than most people expect. Satin is smooth and shiny; grosgrain is more textured and sturdier, so it holds a knot better.
Size the bow to the box: big and fluffy for large gifts, mini bows or handmade fabric bows for small ones.
Washi tape is an easy upgrade over clear tape. It holds the seam and adds a stripe or pattern, so pick one that matches your paper or contrasts with it on purpose.
Stickers or wax seals can close a flap or finish a corner.
For awkward shapes like a plush toy, skip the fight with paper and use a sturdy gift box.
Tucked into a gift bag, tissue paper adds a soft pouf at the top; wrapped under the paper, it also pads breakables and keeps thin wrap from tearing at the corners.
Pick a tape or tissue that echoes your paper and ribbon, or layer 2–3 patterns in the same color family when you want a looser, more playful feel.
Easy Wrapping Techniques
Start by setting out everything you need: paper, scissors, tape and ribbon. Having it all in reach stops the fight with the paper before it begins.
Set the box on the paper and wrap it around to check the fit.
The paper should cover the box with a little overlap, about an inch or two, and no more. Extra paper makes bulky corners.
Fold the cut edge under before you tape it so the seam looks clean. Use small pieces of tape rather than long strips, and keep them out of sight.
At the ends, fold the sides in, crease the top and bottom flaps into sharp triangles, and tape them down. Run your thumbnail along every edge for a crisp line.
If a corner goes wrong, start over with a fresh sheet; a torn fold rarely hides well.