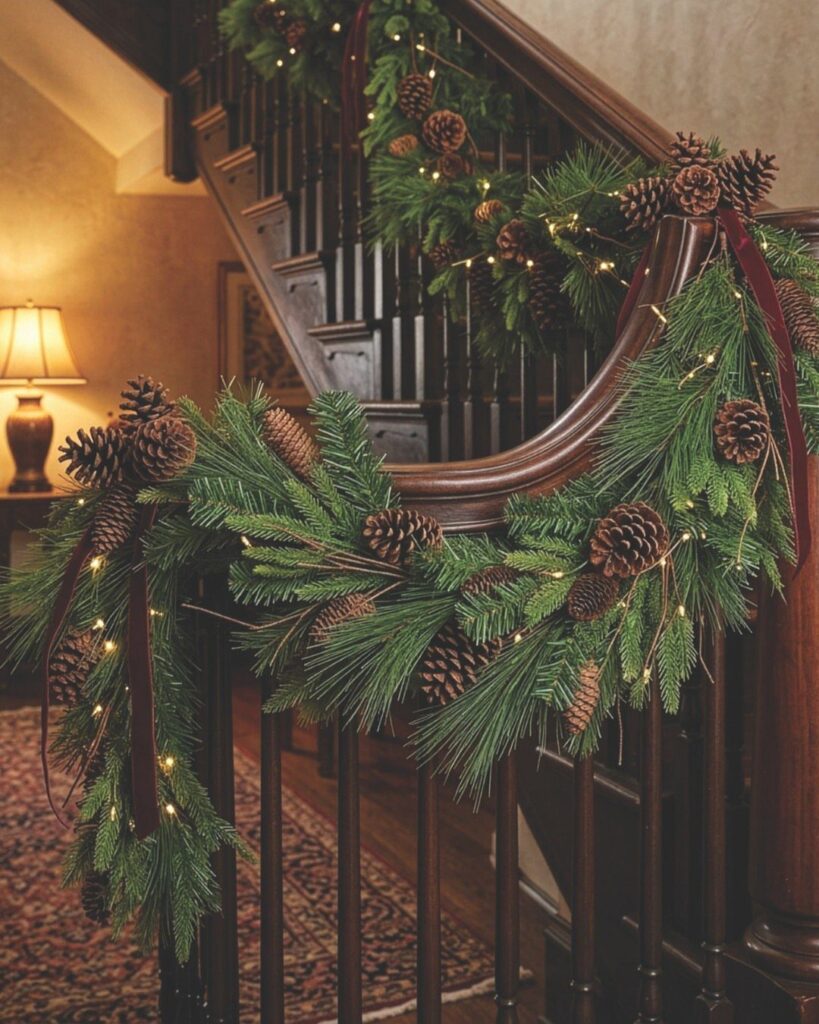
The ideas here run from a toilet paper roll star made out of your recycling bin to a tree-shaped wooden wine shelf wrapped in fairy lights.
Time decides more than taste does: a busy December favors small projects like the Pipe Cleaner Mini Christmas Tree and the DIY Christmas Bookmarks, which fit inside a 30-minute window, over the Tiered Fabric Ruffle Tree.
If kids are at the table, I’d start with the Toilet Paper Roll Christmas Crafts, the DIY Christmas Cards or the DIY Gift Tags, which need little more than paper and glue.
1. Toilet Paper Roll Christmas Crafts
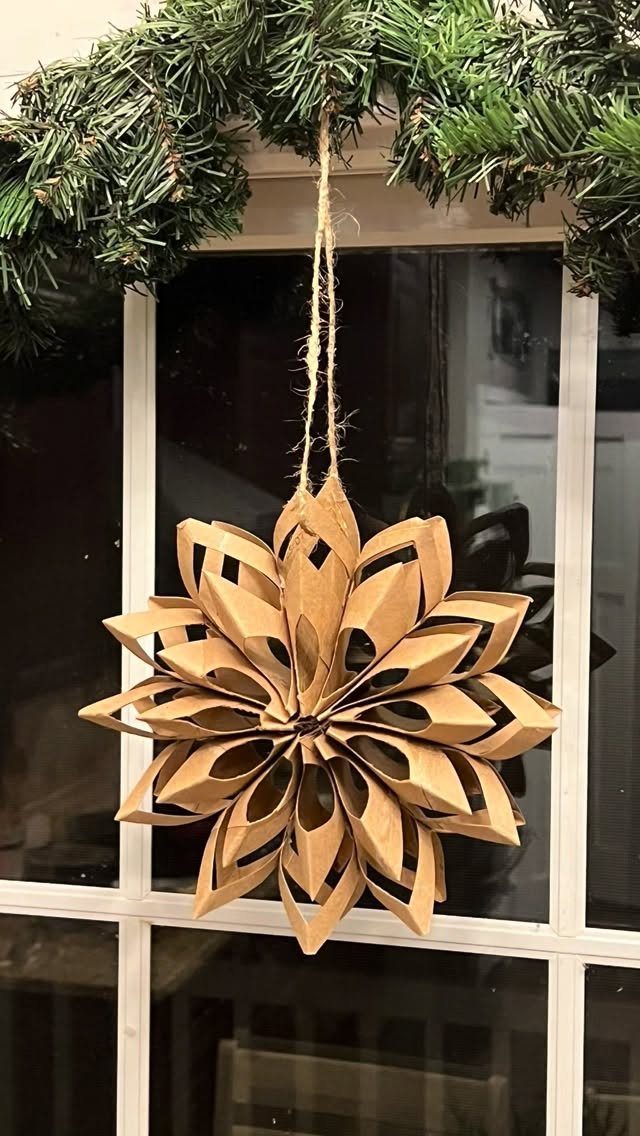
A star cut from toilet paper roll strips is about as cheap as a Christmas ornament gets, since the cardboard is already in your recycling bin.
The brown, natural look suits a pine garland, so I would skip paint and let the kraft color do the work.
Flatten a few rolls, cut strips, and glue them into points.
Add a loop of string and hang it. One maker called the appeal of it plain: it’s made from something that would have been "trash."
2. DIY Christmas Ornaments
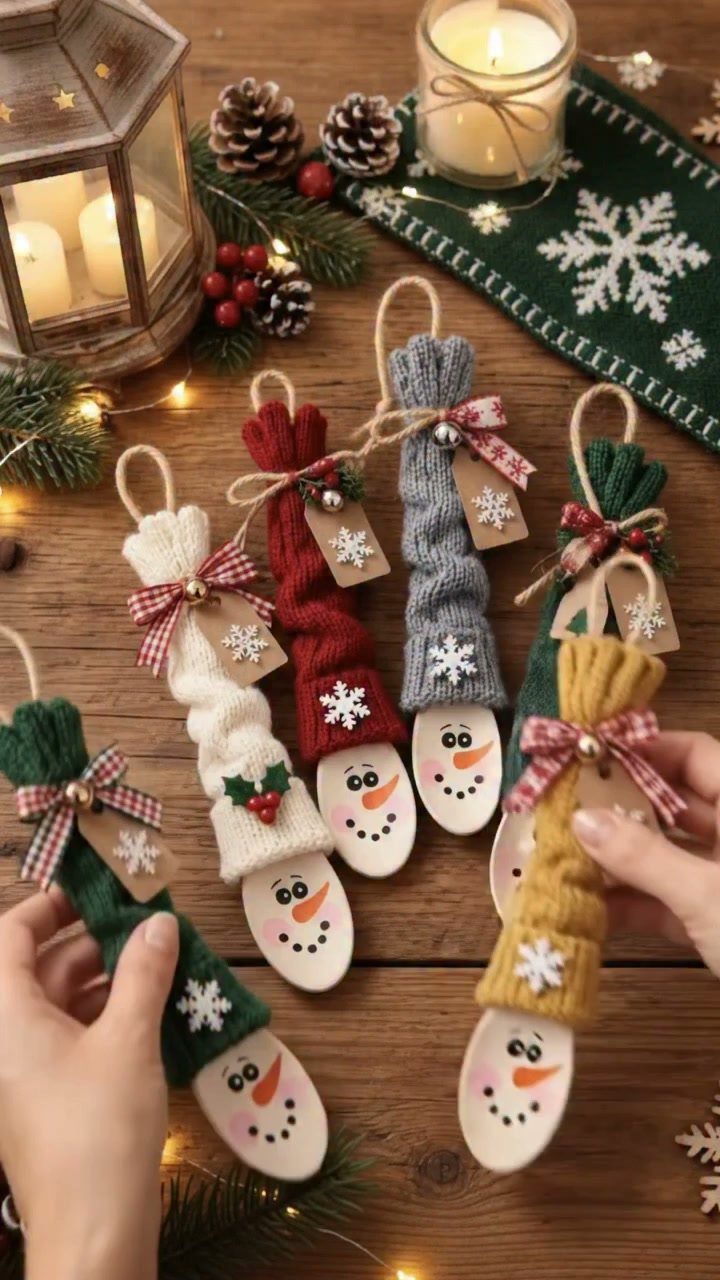
Snowmen built from wooden discs and a small knitted sock make an ornament that looks bought and costs very little. I like the sock as the hat or body fabric because the knit gives texture a painted face never will.
Pick colorful socks and you get a different look on every one. Set a few on a table beside a candle and pinecones, and they work as decor even before they reach the tree.
3. DIY Christmas Wreaths
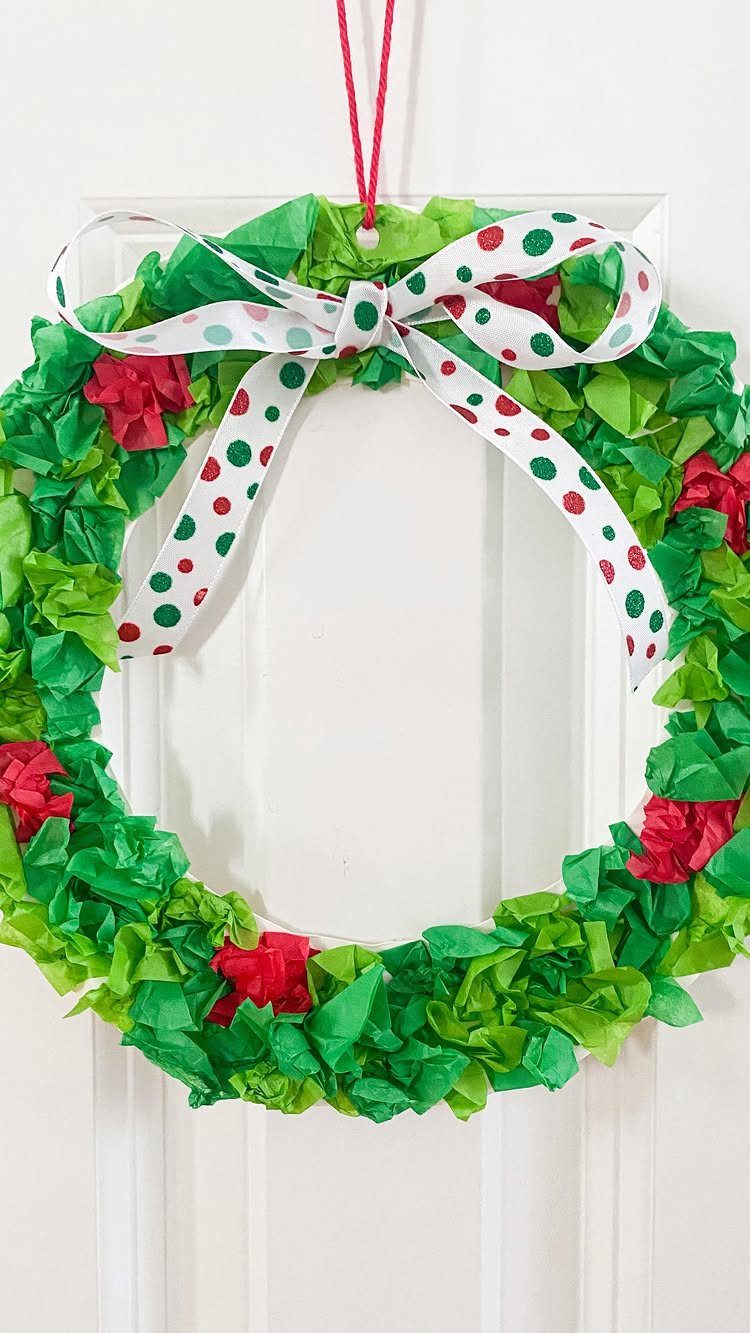
Tissue paper is a surprisingly good wreath material: light, cheap, and easy to bunch into a full green ring. Add red accents and finish with a white polka-dot bow, and the whole thing reads as intentional rather than crafty.
Because paper is lightweight, a loop of red string over a door is all the hanging it needs. I would keep it indoors or under cover, since tissue paper and weather don’t mix.
4. Mason Jar Christmas Crafts
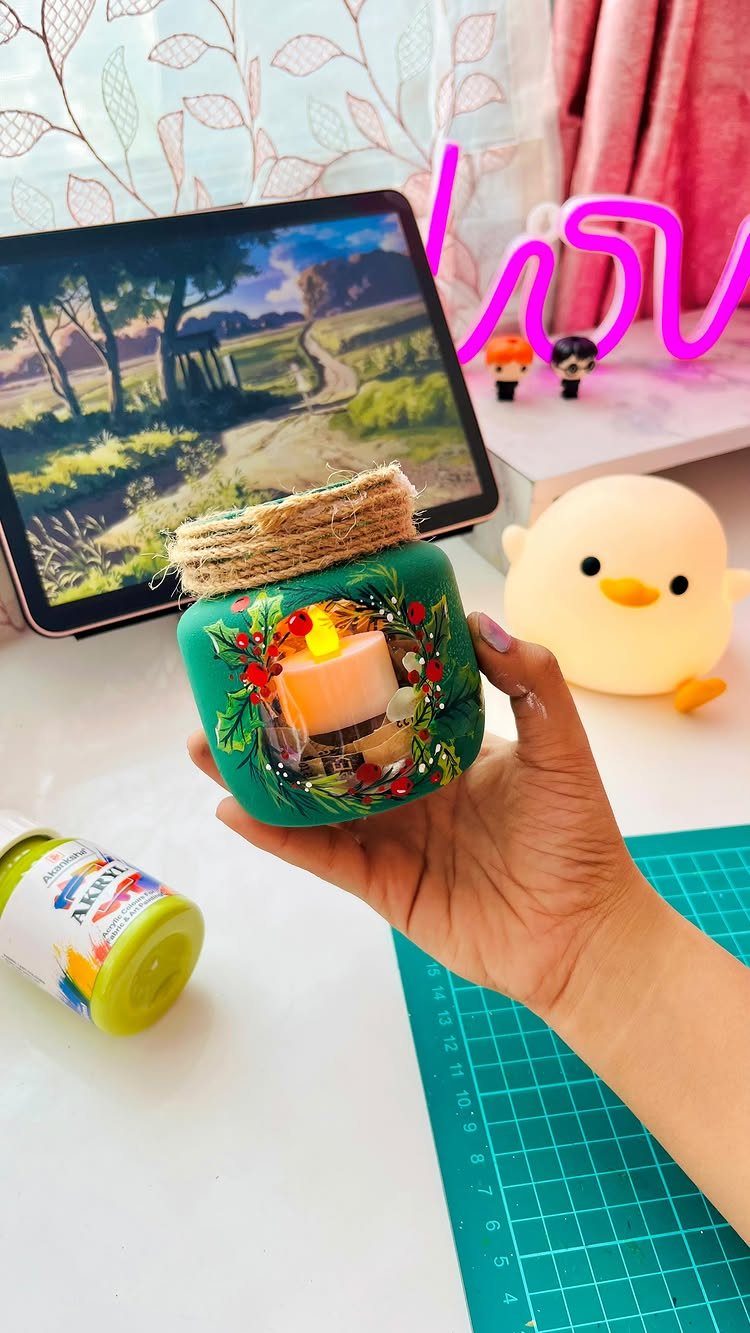
Paint a small jar green, wrap twine around the neck, drop in a candle, and an old mason jar becomes a holiday light.
Acrylic paint is the material to reach for; the maker of this one used acrylics on an old jar.
It suits anyone with limited time, because there is little to buy and no skill beyond a steady brush. Thin coats look better than one thick one, so let each dry before the next.
5. DIY Christmas Cards
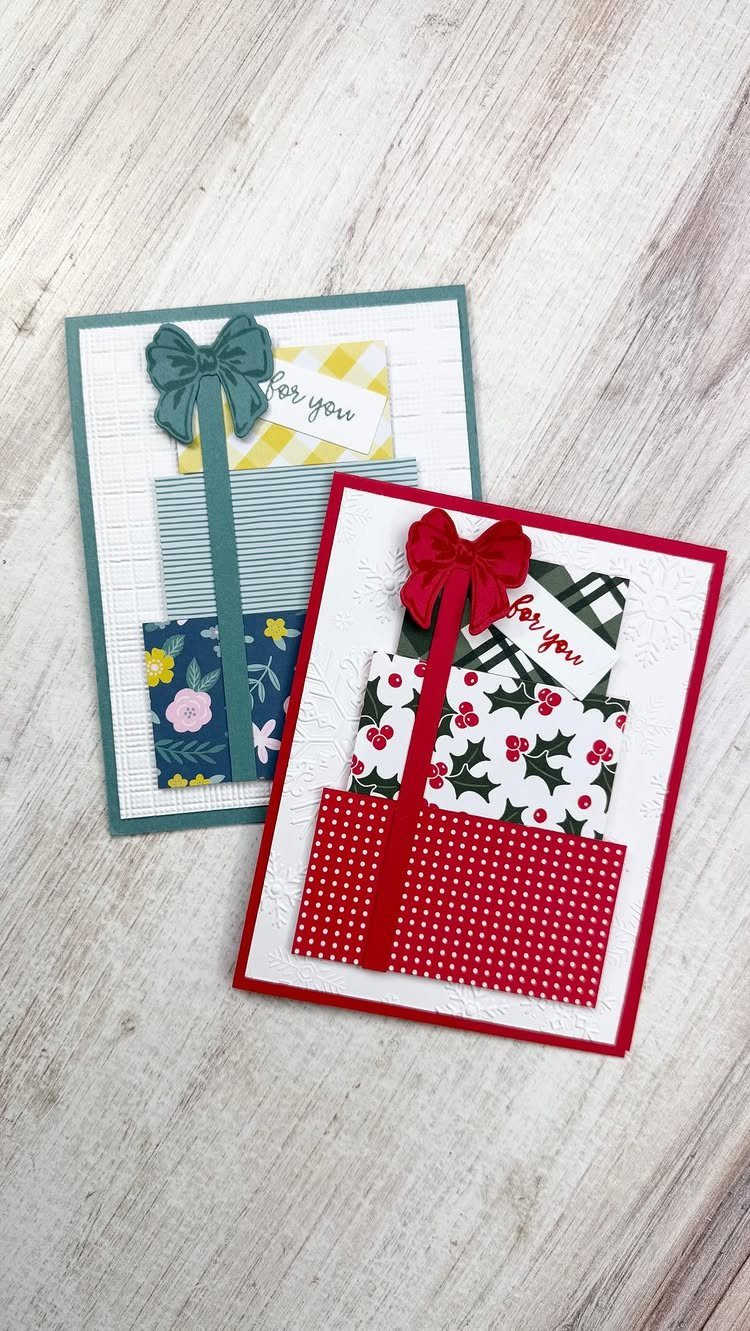
Limit the palette to 2–3 paper colors, like teal and red, and cut the boxes in graduated sizes so the pile looks built.
The tag is where I would put my effort, since a handwritten message there does the job of the card’s greeting. Glue each layer flat, then add the bow last.
6. DIY Gift Tags
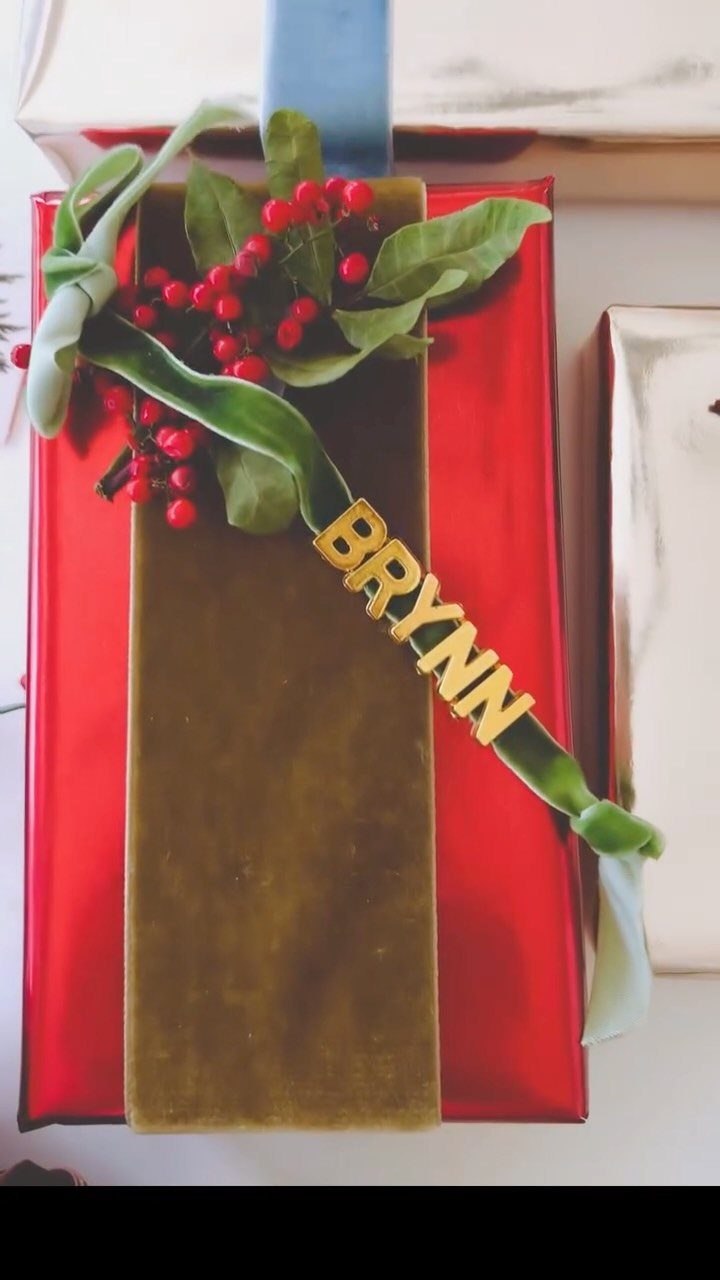
Name tags in gold lettering do double duty: they label the present and decorate it. A tag that spells out the recipient’s name, like a BRYNN cut from letters, tells the person the gift was chosen for them.
3 colors, nothing more. Tie the tag on last so the berries and ribbon sit around it, not over it.
7. DIY Pine Cone Garland
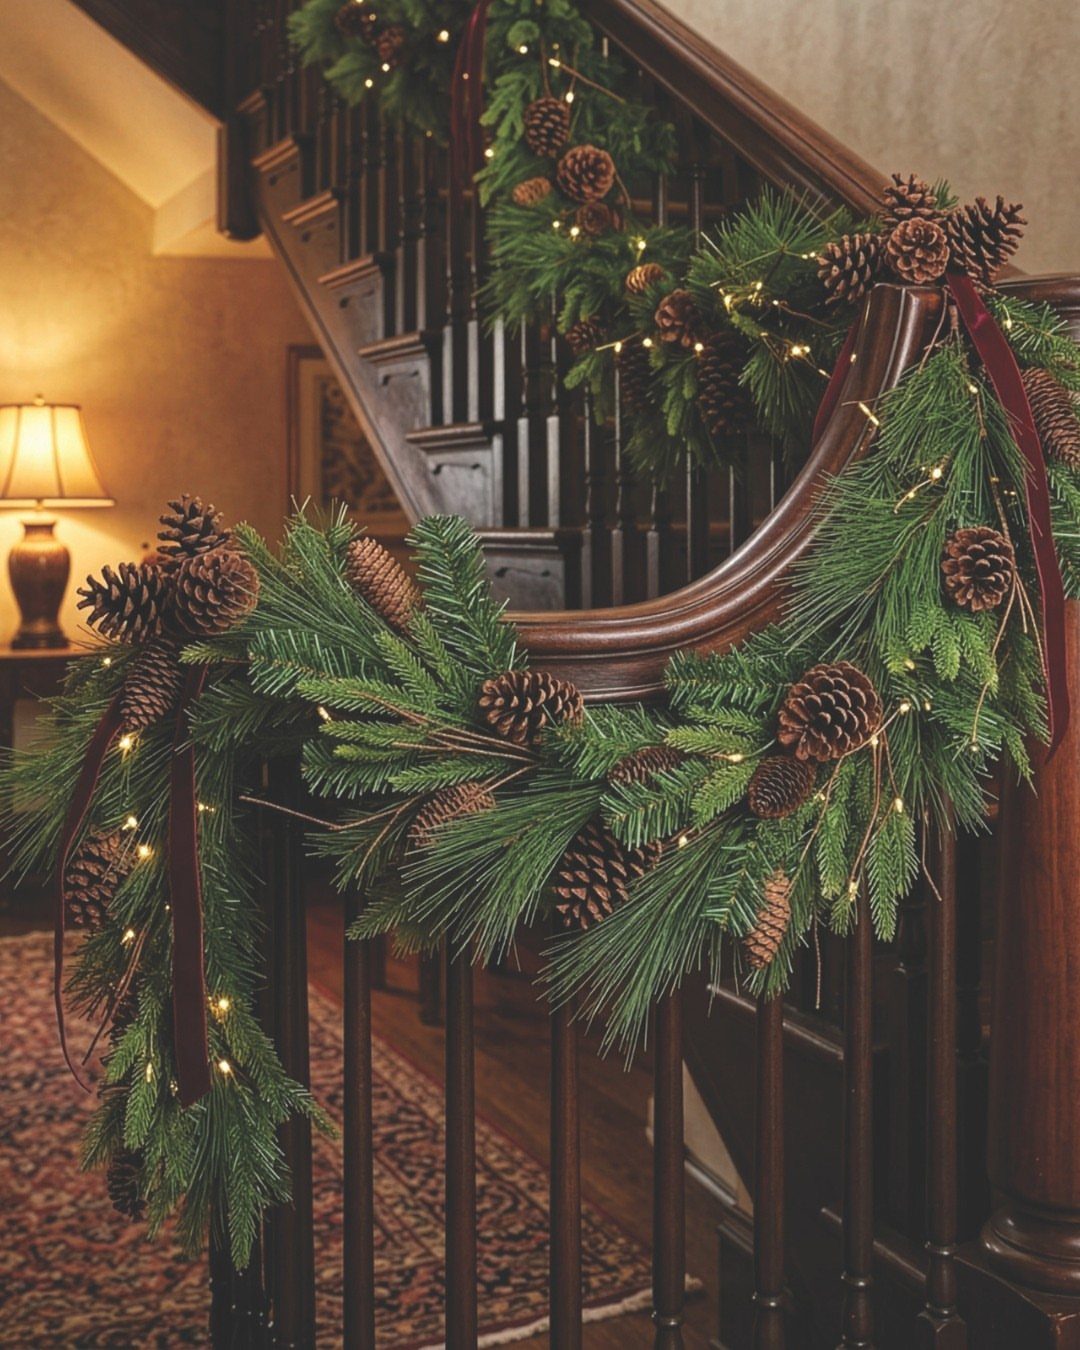
Pine cones and evergreen look best when the lights go in first. Wind the fairy lights through the greenery, then tuck cones in among the branches and add red ribbon last so the bows stay visible.
Wire is easier than glue for fixing cones to a garland, and it can be undone in January.
8. Cinnamon Candle
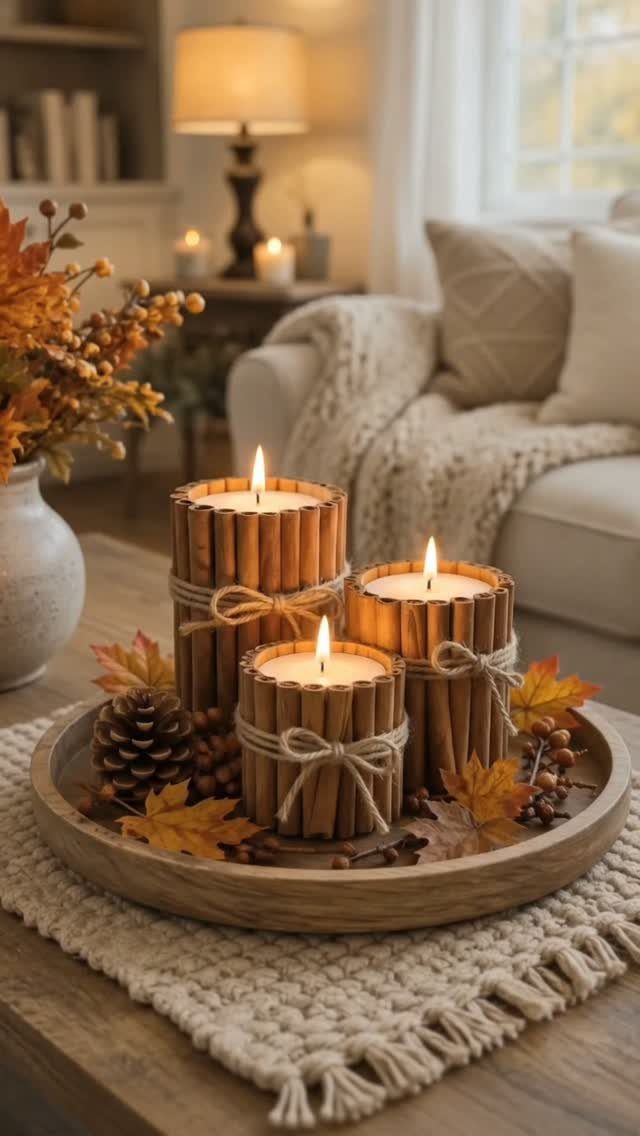
Cinnamon sticks tied around a pillar candle with twine give you a centerpiece that smells as good as it looks.
Cut the twine long enough to wrap twice, knot it, and press the sticks snug against the glass or wax so they stand straight.
Group 3 candles on a wooden tray with a few pinecones tucked between them, and the arrangement is finished. I would keep the sticks short of the flame and never leave the candles burning unattended.
9. Clothespin Snowflakes
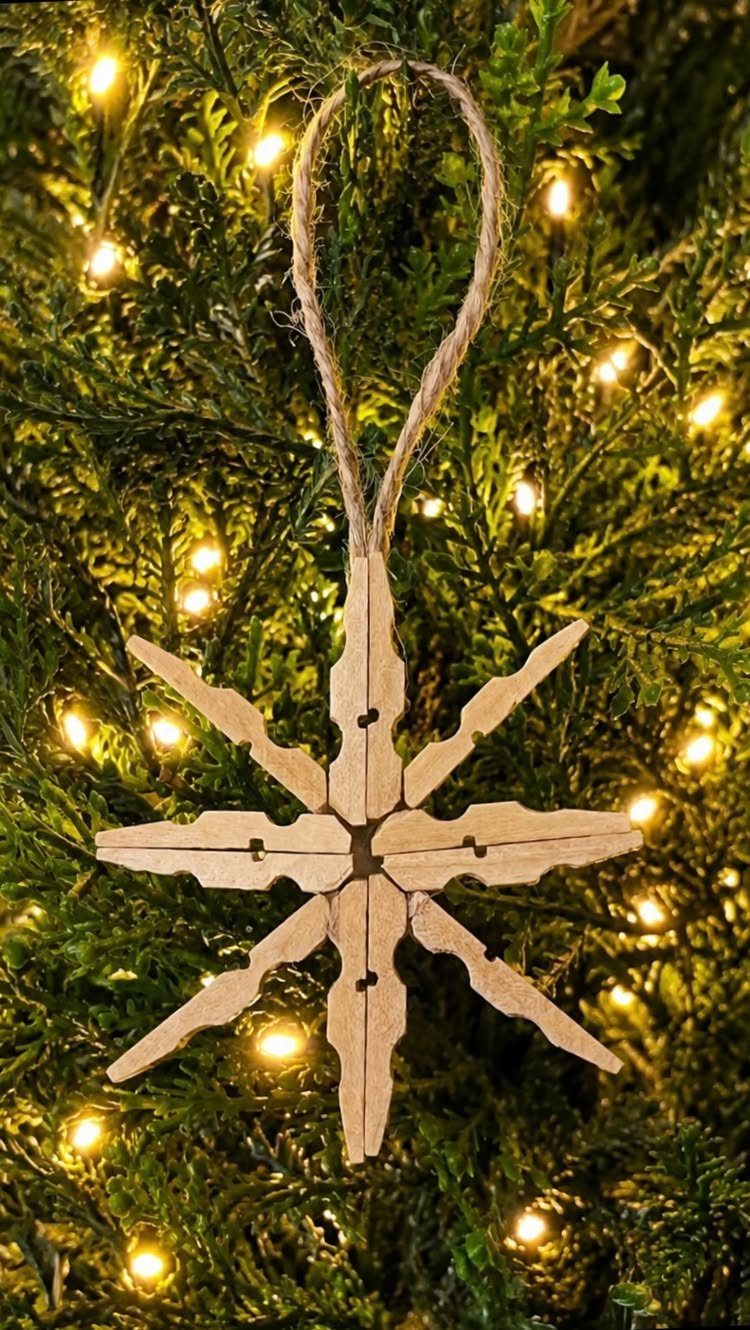
Clothespins snap together into a six-point snowflake with very little effort, and the plain wood suits a rustic tree better than any paint would.
Glue the pins in a ring, add a twine loop, and hang it on a branch near the lights.
For little hands, the maker of this one suggests larger clothespins and white craft glue instead of hot glue. I agree: it dries slower, but nobody gets burned.
10. Cute Norwegian Christmas Gnomes
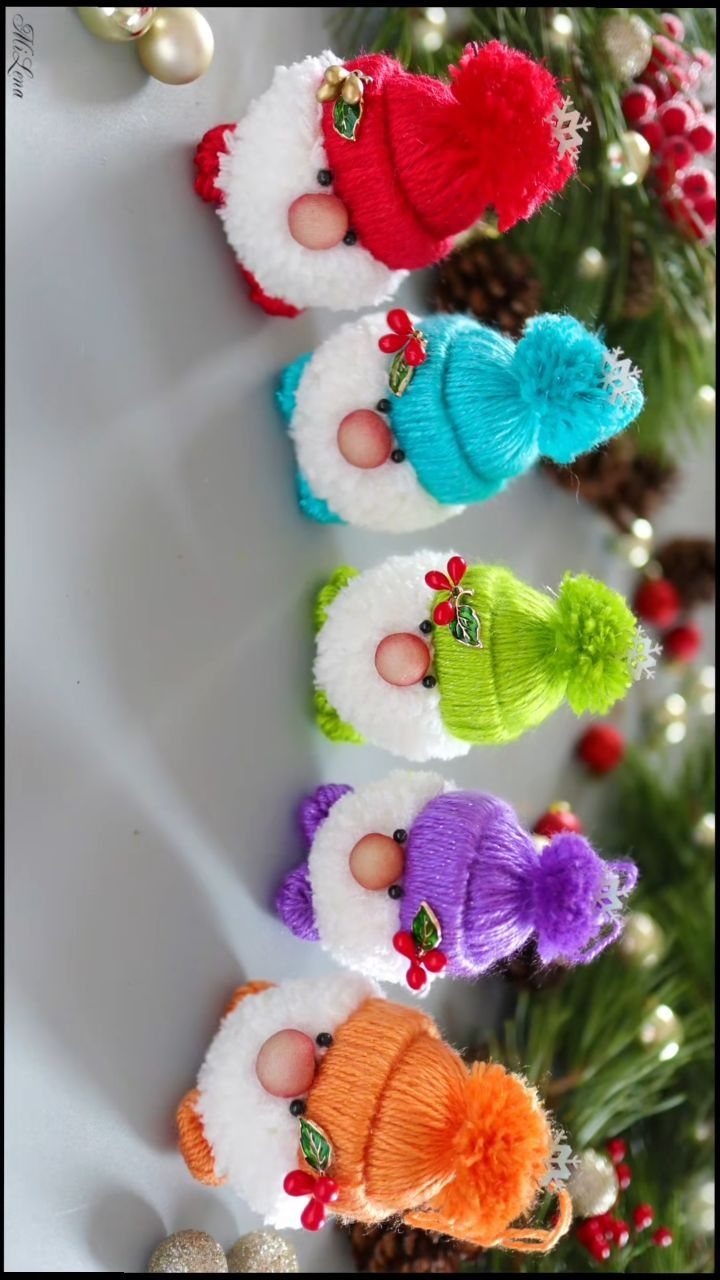
Gnomes are really just a hat, a beard, and a body, which makes them forgiving for beginners.
Make a batch in different yarn colors and line them up beside pine branches and berries; the variety is what makes a row of them look intentional.
A pom-pom hat pulled low over a fuzzy white beard gives the face its character, so spend your effort there. Five small gnomes read better as a group than one big one, and they make easy gifts.
11. DIY Vintage Bells Christmas Swag
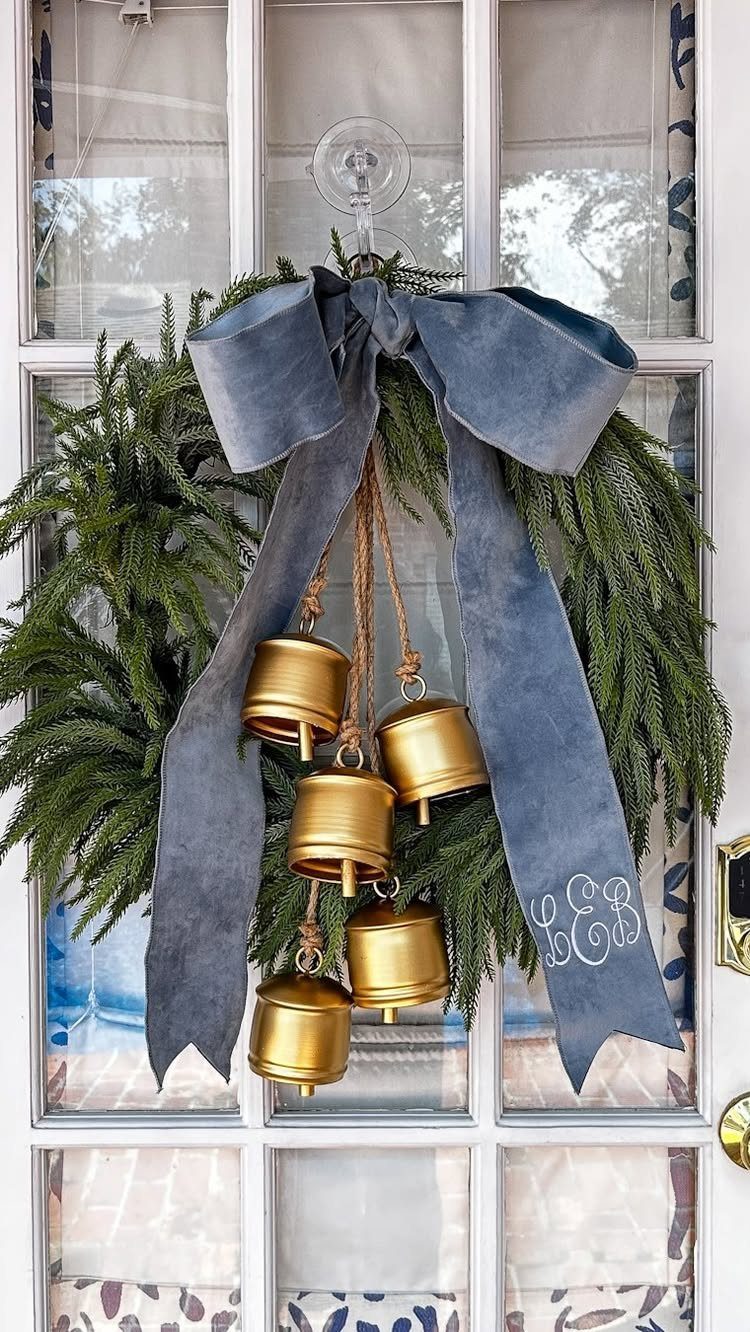
A big velvet bow does most of the work on a plain evergreen wreath, so spend your money on wide, wired ribbon rather than extra decorations.
Blue gives a different look from the usual red, and gold bells on twine add the vintage feel.
Hang the bells at different lengths so they catch the eye one after another. I would tie the bow on last, then adjust the bells around it until the spacing looks even.
12. DIY Christmas Tree Boho Wall Hanging
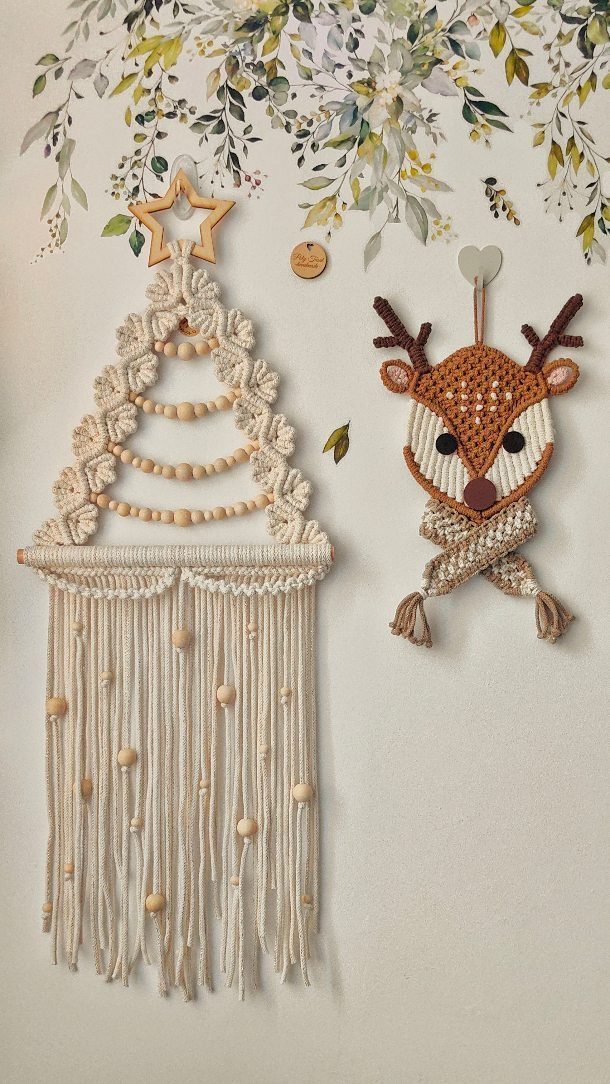
Yarn can be shaped into a Christmas tree for a wall, a good choice if you’d rather not put up another tabletop piece. The bohemian look comes from the fringe and the plain, neutral texture.
The DIY Christmas tree boho wall hanging looks best on a plain wall, where its strands stand out clearly.
13. DIY Orange Pomanders
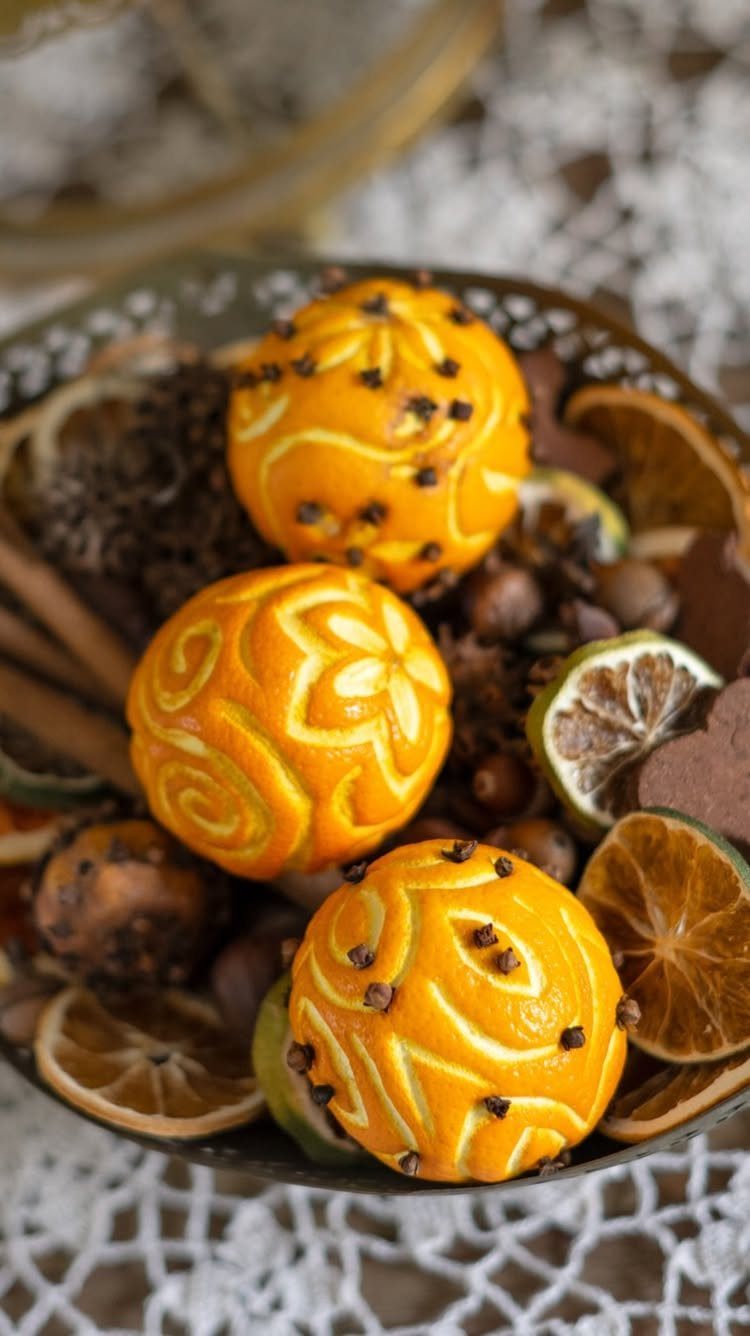
Cloves pressed into an orange turn it into a fragrant decoration that costs a few dollars. Poke the cloves in close rows or patterns, and the peel becomes the design.
I would use a bowl with some height, so the fruit sits up and the slices tuck around it.
A lace or plain white surface keeps the orange the brightest thing on the table.
14. DIY Wooden Christmas JOY Sign
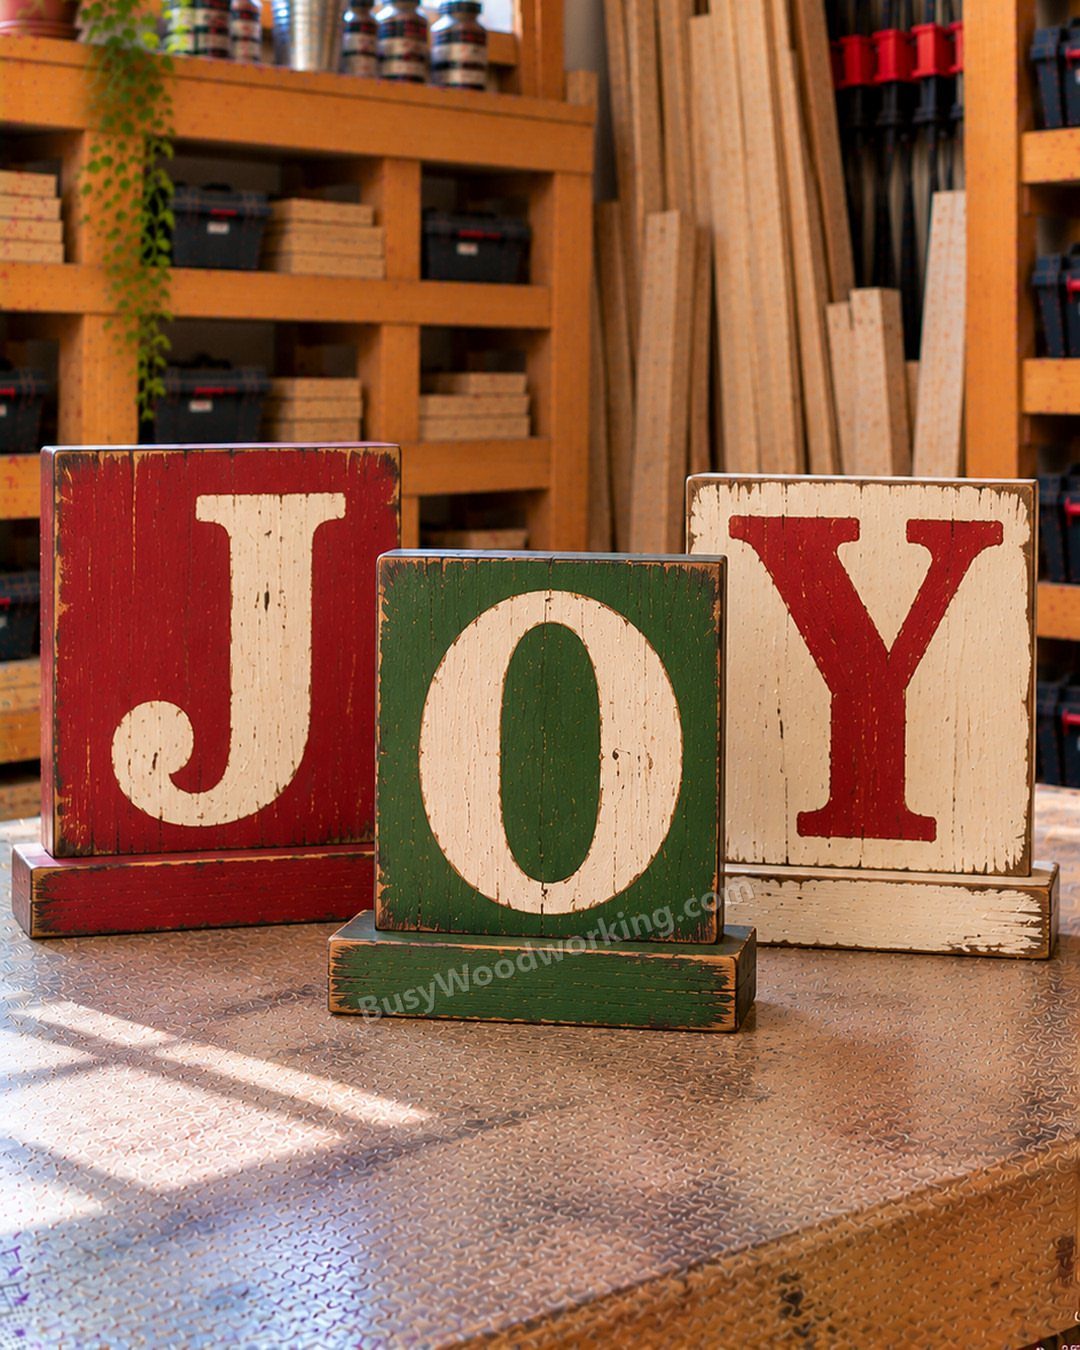
Three wooden blocks, one letter each, make a sign that reads from across a room. Paint J, O and Y in different colors, red, green and white, so the word looks playful and not stenciled.
Rustic, slightly uneven paint suits the wood better than a perfect coat, so I would not sand it smooth. Prop the blocks on a mantel or shelf, and the sign is done.
It takes little skill and little money, which makes it a good first woodworking project.
15. DIY Christmas Tree Stand Planter
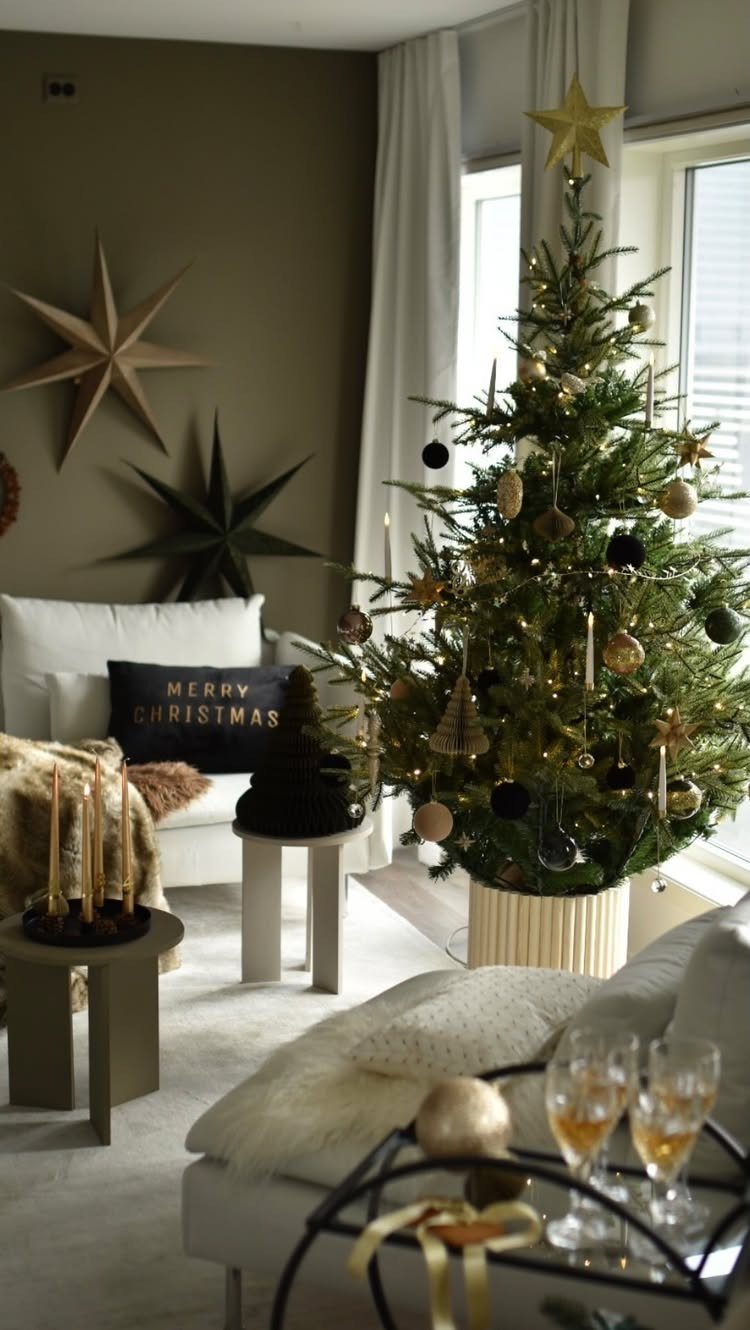
A tree stand can be the best-looking part of the tree if you swap the usual skirt for a white ribbed planter. The cylinder hides the base and gives the trunk a clean, modern finish.
Choose a planter wide enough that the tree sits steady, and pick white if the room already has color, as a pillow or wall might. It works as a stand year-round for a plant, too.
I would skip the tree skirt entirely. The planter makes it unnecessary.
16. DIY Christmas Bookmarks
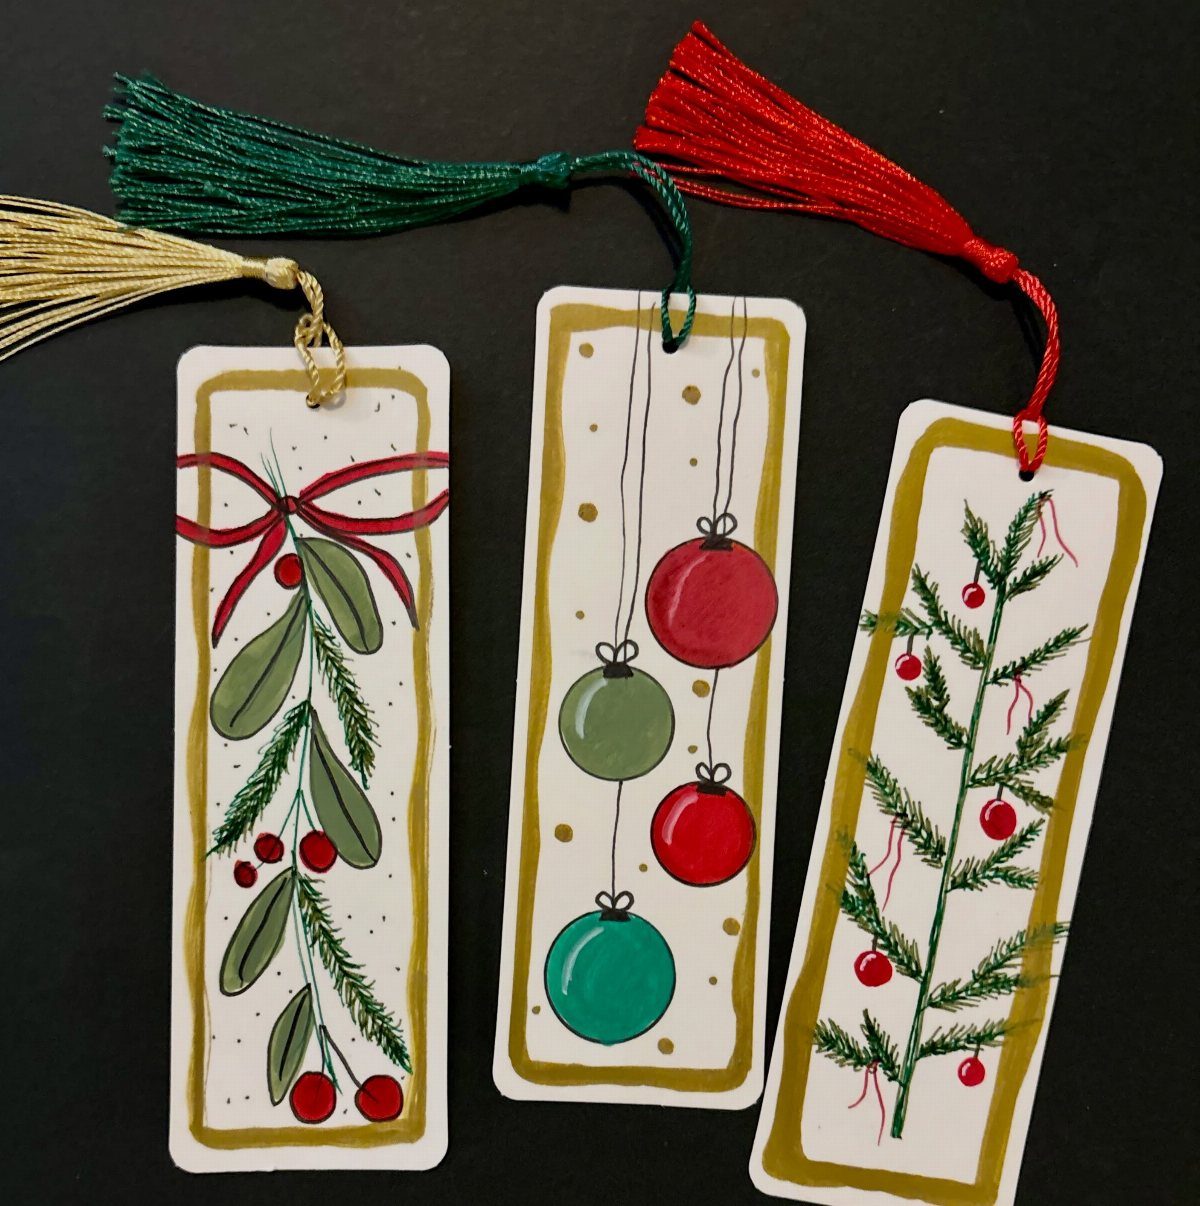
Draw mistletoe, ornaments or a pine branch on a strip of heavy paper, punch a hole at the top, loop a tassel through it, and the bookmark will get used all season.
Each one takes minutes, so making three or four in a sitting is realistic.
Ink on light paper stands out, and a tassel in a matching color finishes the top. Keep the drawings small and simple; a bold single motif beats a crowded one on a narrow strip.
They slip into a card or tuck beside a paperback, so they suit readers on your list.
17. DIY Holiday Christmas Crackers
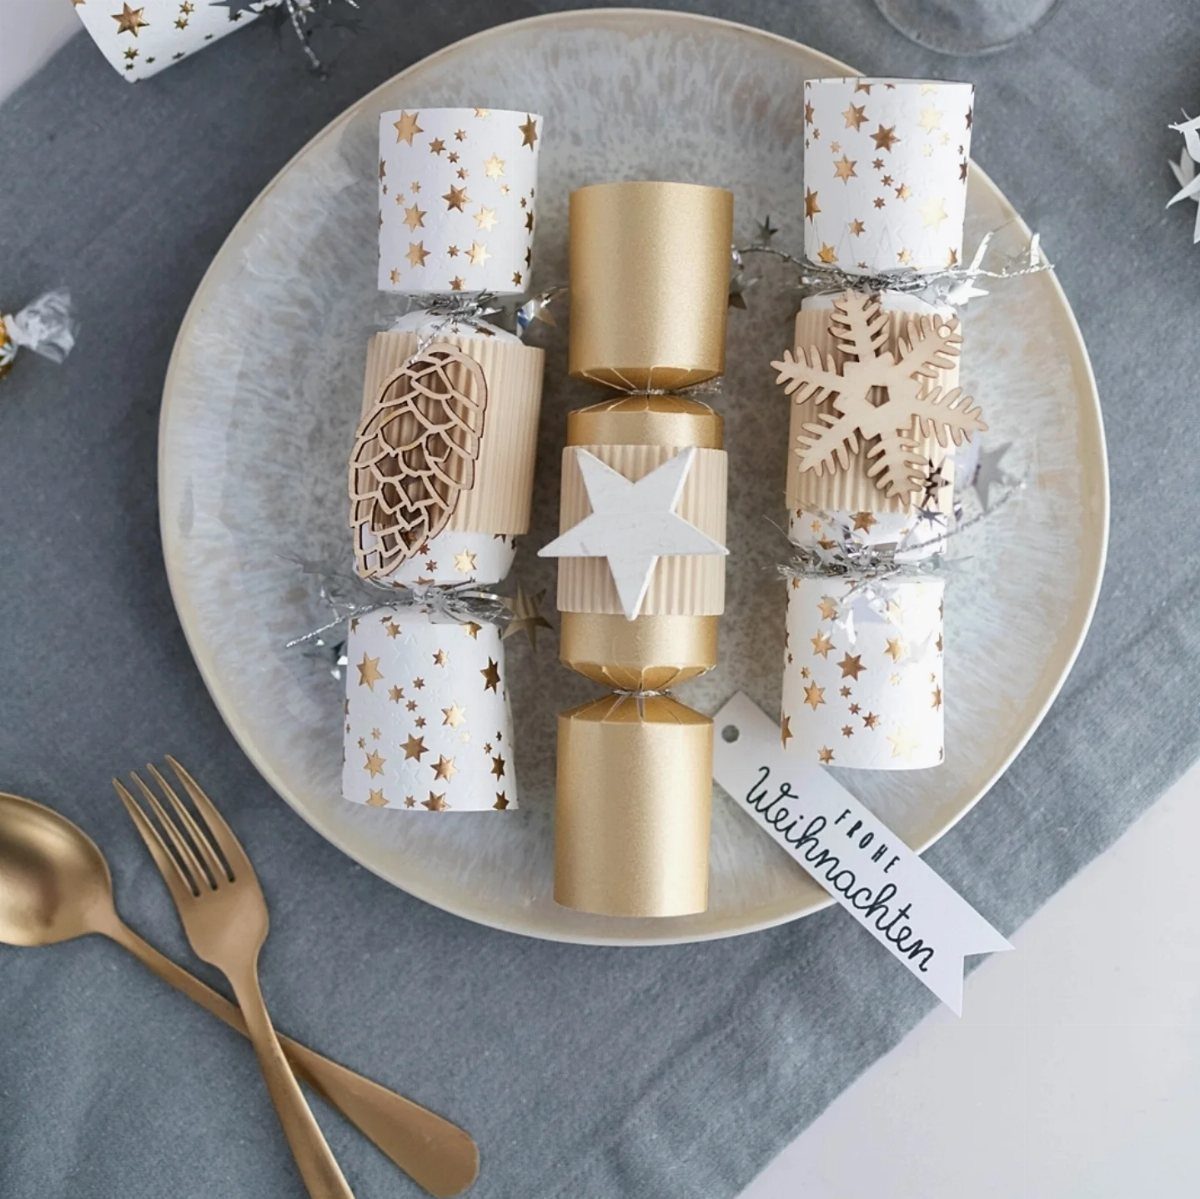
Homemade crackers let you decide what goes on the outside, and wooden cutouts do the most for the least effort.
Glue a gold star, a small pinecone or a paper snowflake to the front, then tie ribbon at each end so the tube holds its shape.
Patterned paper wraps the tube, and a handwritten tag, like "Frohe Weihnachten," makes each one personal. I would keep the decorations flat enough to sit on a plate without rolling.
Make one per place setting. Gold cutlery beside them looks right, and the table is mostly set.
18. Framed Winter Landscape Art
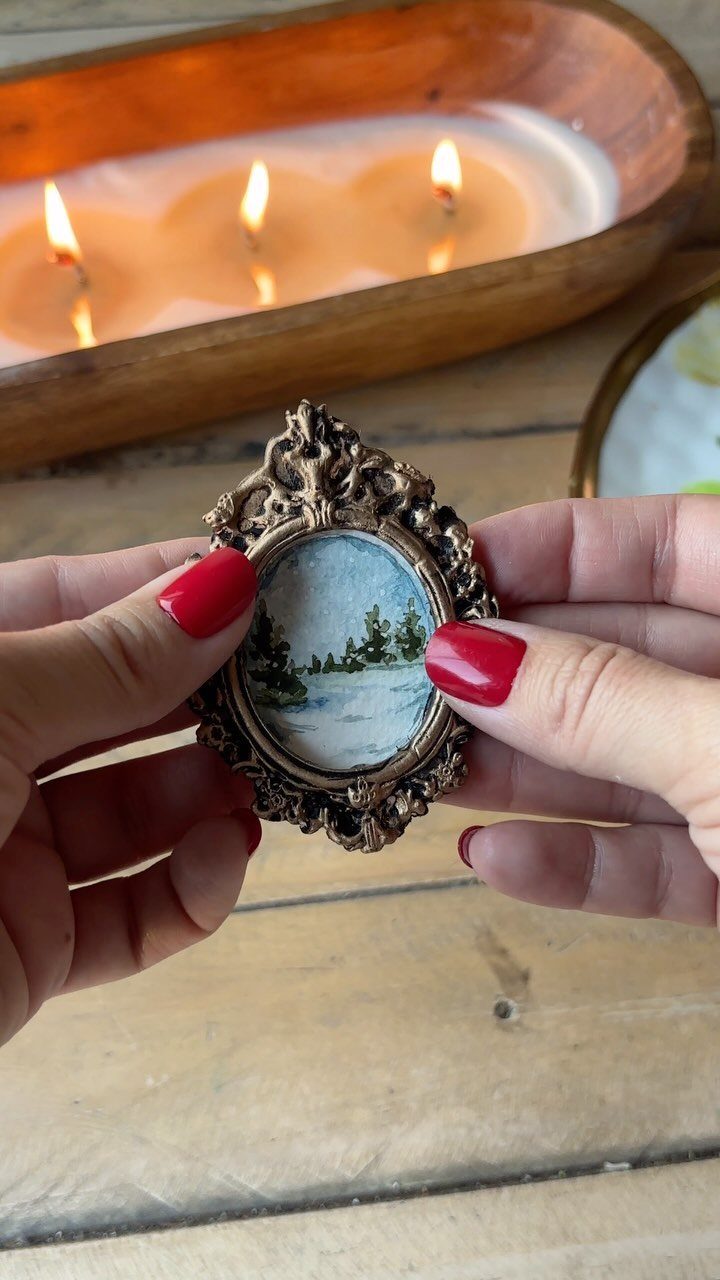
A small ornate gold frame does half the work of a painting. Paint a snowy landscape on a tiny canvas or card, fit it in, and the frame gives it the weight of an heirloom.
Keep the scene simple: a white ground, a darker sky, a few strokes for trees. Small paintings forgive shaky hands, since detail barely shows at this size.
Look for the frame at a thrift shop and measure it before you cut anything. Prop it beside a candle tray, and it reads as decor and a gift both.
19. Tree-Shaped Wooden Wine Shelf

A tree-shaped wooden shelf turns the drinks into the centerpiece, with a bottle of champagne and 2 glasses set right on the tiers. Wrap fairy lights around the frame and the whole piece glows on a side table.
I would set the glasses and bottle on before the lights go on, so you can tuck the wire around them without knocking anything over. Warm white bulbs suit the wood better than colored ones.
A shelf like this also works as a gift.
20. Pipe Cleaner Mini Christmas Tree
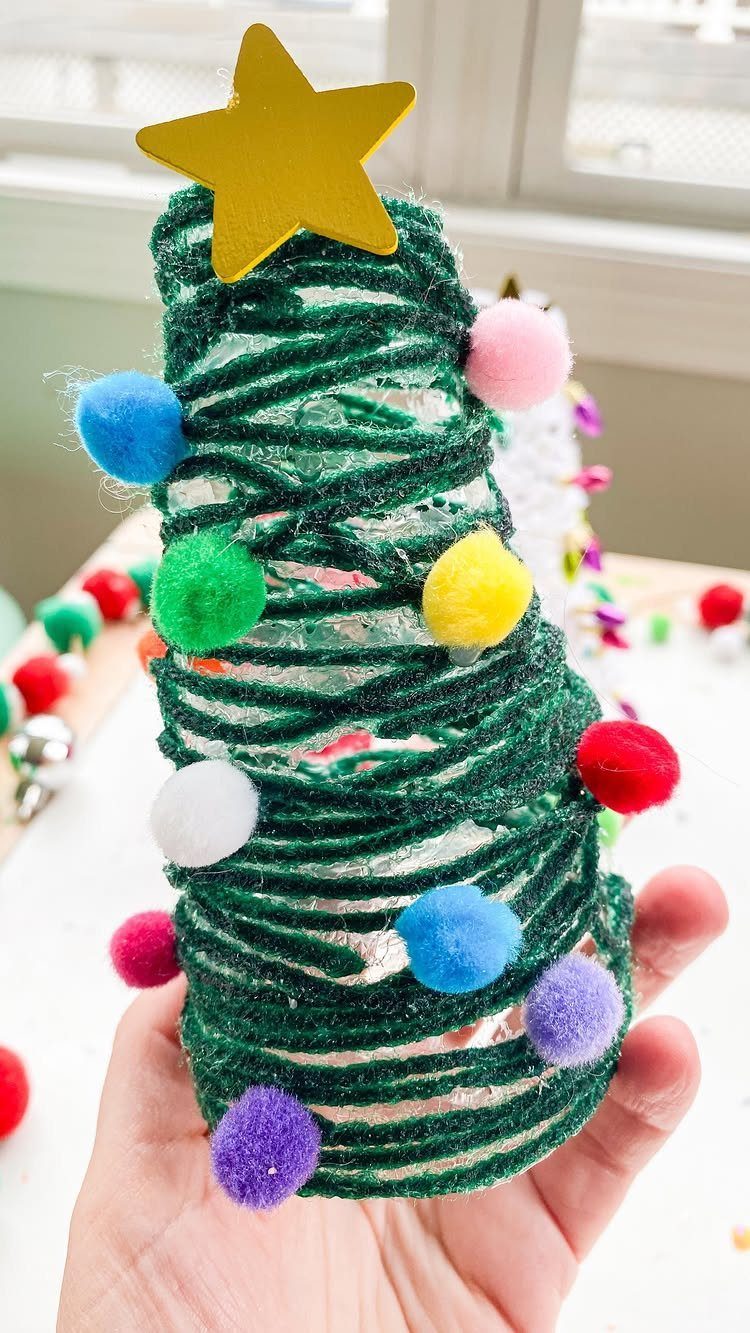
Green glitter pipe cleaners coiled into a cone make a mini tree that takes minutes and costs very little.
Wind each length a little wider at the bottom so the shape tapers, and shape the cone with your fingers as you go.
Small pom-poms in mixed colors read as ornaments, and a gold star on top finishes it. A dab of craft glue holds each pom-pom in place.
It’s a good project for kids, since nothing needs cutting beyond the stems.
21. Framed Miniature Gingerbread Village
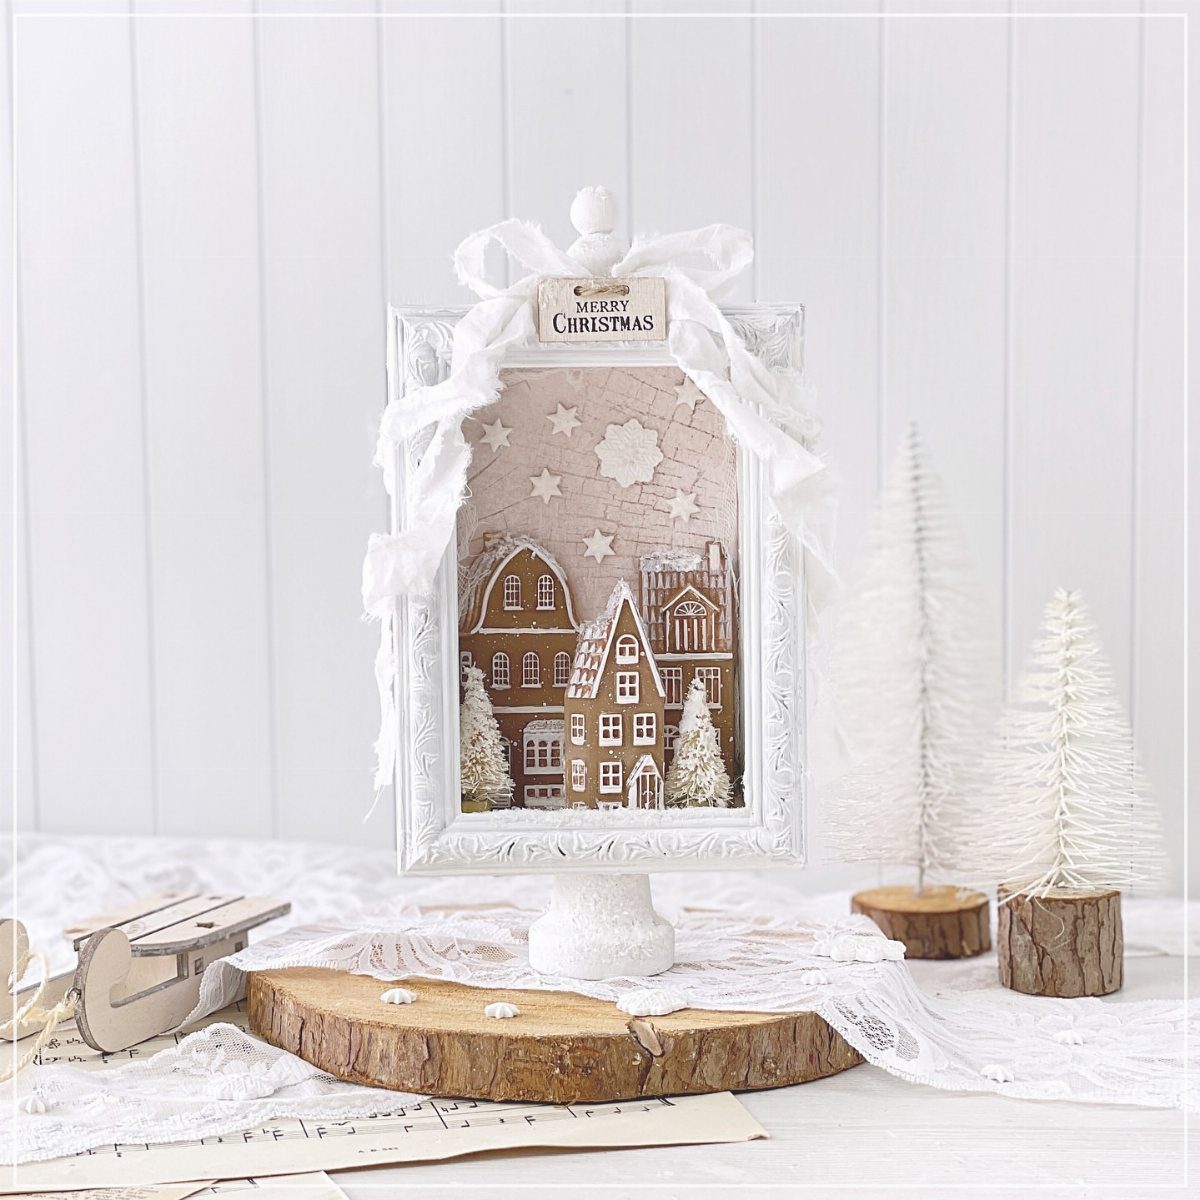
A white ornate frame turns a tiny gingerbread village into a scene you can stand on a shelf. Keep the houses small and the snowy trees few, so the frame doesn’t look crowded.
A "MERRY CHRISTMAS" sign gives the scene a clear message, and I like the village resting on a wood slice over lace for a rustic base. Choose a frame with some depth, and measure it before you build anything.
Use a standing frame so it needs no wall space.
22. Tiered Fabric Ruffle Tree
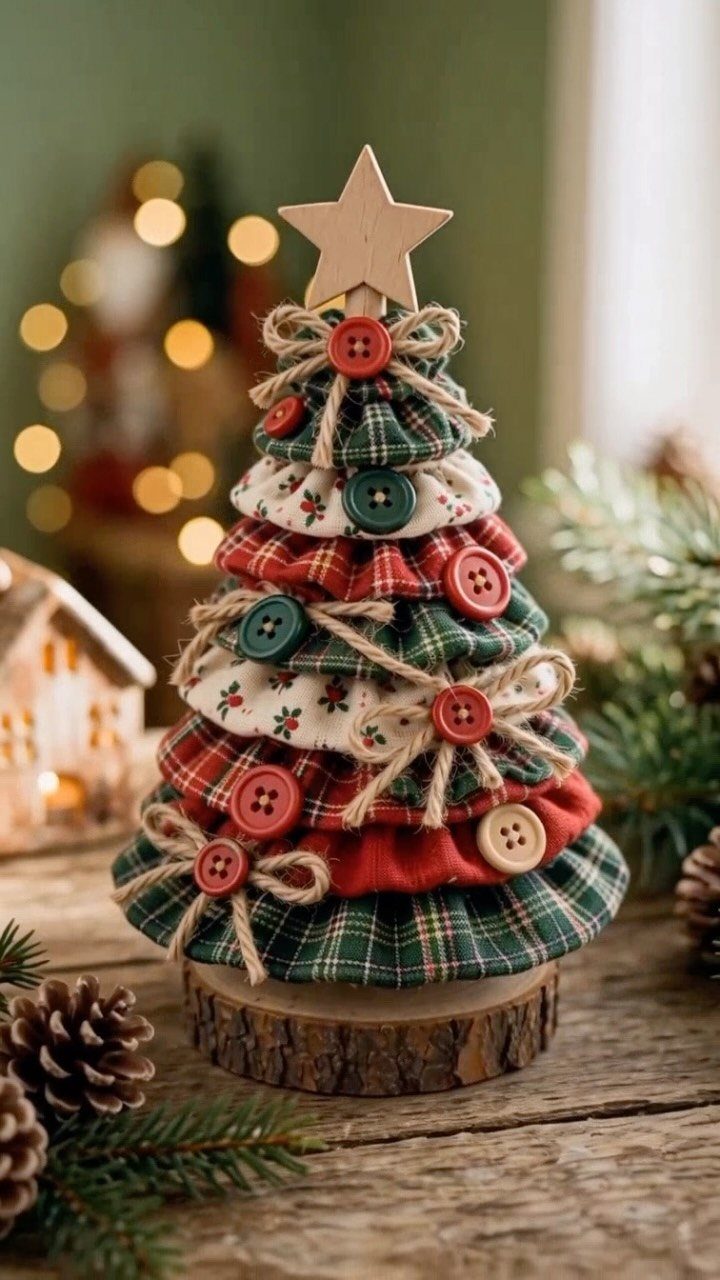
Layered fabric ruffles stack into a tabletop tree, and scraps are all you need. Cut strips, gather each one along its length, and attach them in tiers, with the widest at the bottom.
Buttons and twine add small details between the layers, and I would finish with a wooden star on top. A wood slice makes a steady base and suits the rustic fabric.
Mixing a few prints looks better to me than one solid cloth, since the ruffles show off the pattern.
23. Miniature Christmas Shadowbox Dome
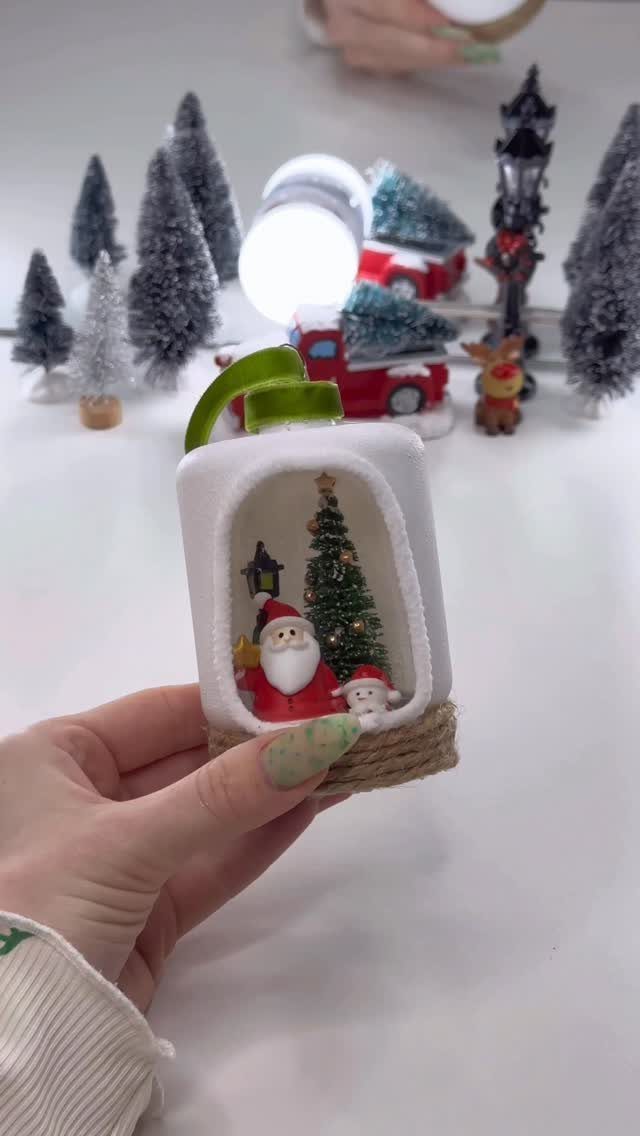
A small white arch makes a stage for Santa, a snowman and a tree, and the shape alone gives a handful of miniatures a finished look. Keep the figures few, so each one reads clearly inside the opening.
Set the tallest piece, the tree, toward one side and place the shorter figures beside it. Dab a little glue under each base so nothing tips when the box is moved.
Plain white keeps the attention on the figures, so I would not paint the arch.
Budget-friendly Crafting Tips
Paper, fabric scraps, acrylic paint, wood and a glue gun cover most of what a handmade holiday project asks for. The dollar store sells much of it cheaply, and a thrift shop fills in whatever else you need.
I buy basic supplies and skip the equipment that costs more than the project is worth. A basic set of tools is enough, and it lets you try several kinds of craft without buying a new kit for each.
Homemade decor doesn’t have to look cheap, and the savings add up fast. Repurposed items and small inexpensive touches carry a lot of the look, and a cozy, nostalgic style doesn’t go out of date.
Time-efficient Crafting
Thirty minutes is a realistic limit for many Christmas crafts, and it works in your favor on a busy December calendar. Pick projects that need little material and little skill, and you can finish one in a single sitting.
I would set a timer before starting. Lay out every supply first so the half hour goes to making, not hunting for scissors.
Keep a short stack of quick projects ready for evenings when energy is low. Finishing one small thing beats leaving a big one half done.
Involving Kids in Crafting
Craft time with kids works best when the project matches how much adult help you can give. Preschoolers need more hands-on support, while older children can work on their own for longer.
If supplies are basic, stick to paper crafts. They need little more than paper and glue, and they keep the setup simple.
I like a dark, cozy afternoon for this: everyone huddled at one table, one project at a time. Kids can also make gifts, so a few finished pieces can go straight onto your gift list.
Frequently Asked Questions
What are some cool Christmas craft ideas?
Ornaments, wreaths and mason jar lights are the easiest places to start.
If you want a project that looks store-bought, start with the wooden-disc snowman dressed in a knit sock hat, then try the tissue paper wreath finished with a polka-dot bow, or paint a glass jar green, wrap it in twine and set a candle inside.
All three need little skill and few supplies.
What is the hottest craft right now?
Small, rustic pieces in natural materials are what I would point to: yarn gnomes in mixed colors, cinnamon-wrapped candles, clove-studded oranges and pine cone garlands.
They lean on cozy, nostalgic texture, which doesn’t go out of date. A row of 5 small gnomes reads better than one big one.
What handmade items sell best at Christmas?
Handmade ornaments and gift tags are the popular picks.
Both are small, cheap to make and easy to personalize. A tag spelling out the recipient’s name in gold lettering, for example, labels the present and decorates it too.