The tags here run from a printable card that costs only paper and ink to embroidered stitching and wood, and the real difference between them is how much time each one takes per gift.
With a whole pile to label, I’d pick something that comes together in one batch, like the printable or DIY tags, and save the embroidery, layered snowmen and velvet ribbon for the few presents people will see first.
1. Printable Gift Tags
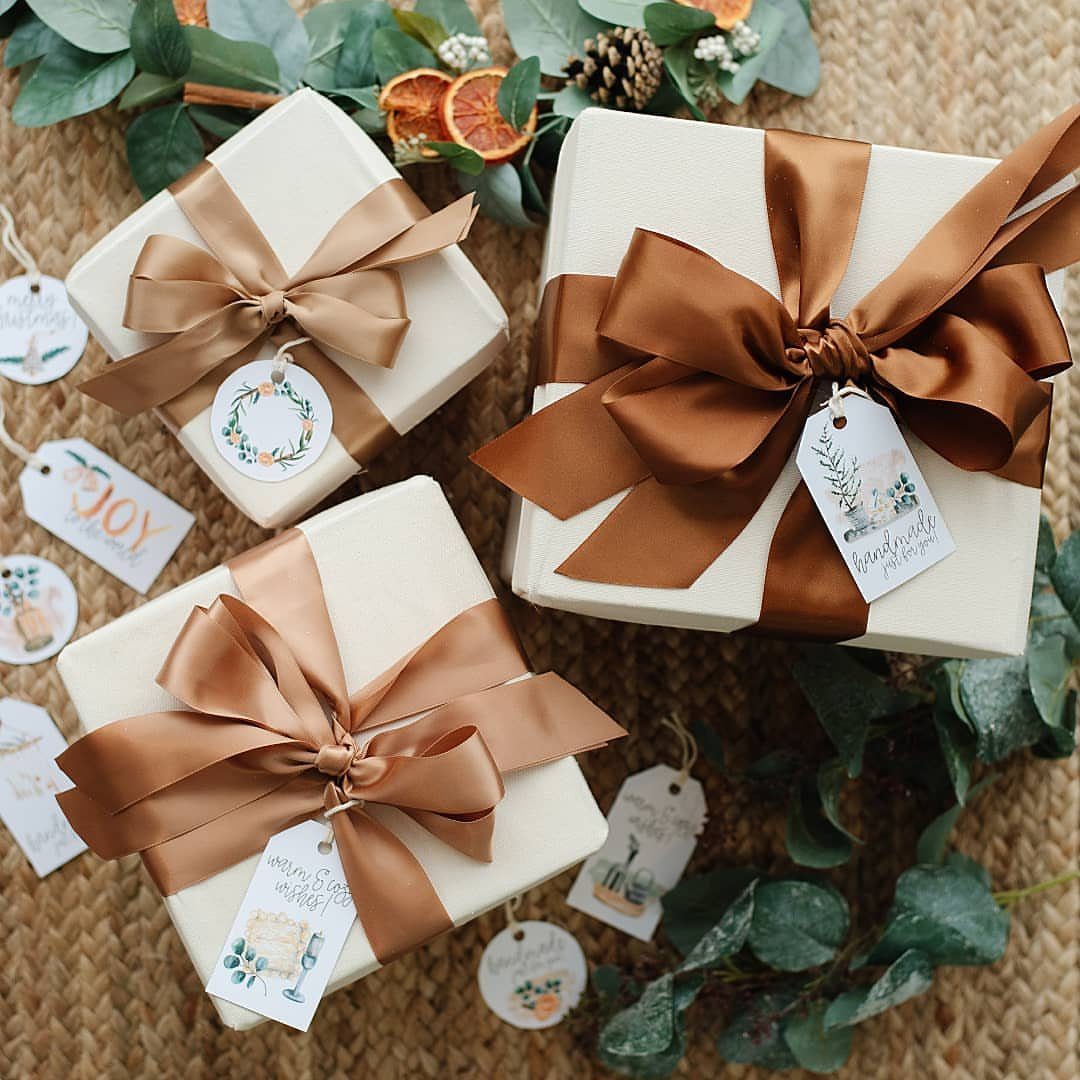
Printed tags are the fastest way to get a stack of gifts looking like a set. One short word like "JOY" or "handmade" does more than a paragraph of script would.
I’d pick a single palette, here brown and bronze with a little floral, and print every tag in it. Matching ribbon to the tag color makes the whole pile read as planned, even when the wrapping paper varies.
Cost stays low because you only pay for paper and ink.
2. DIY Gift Tags
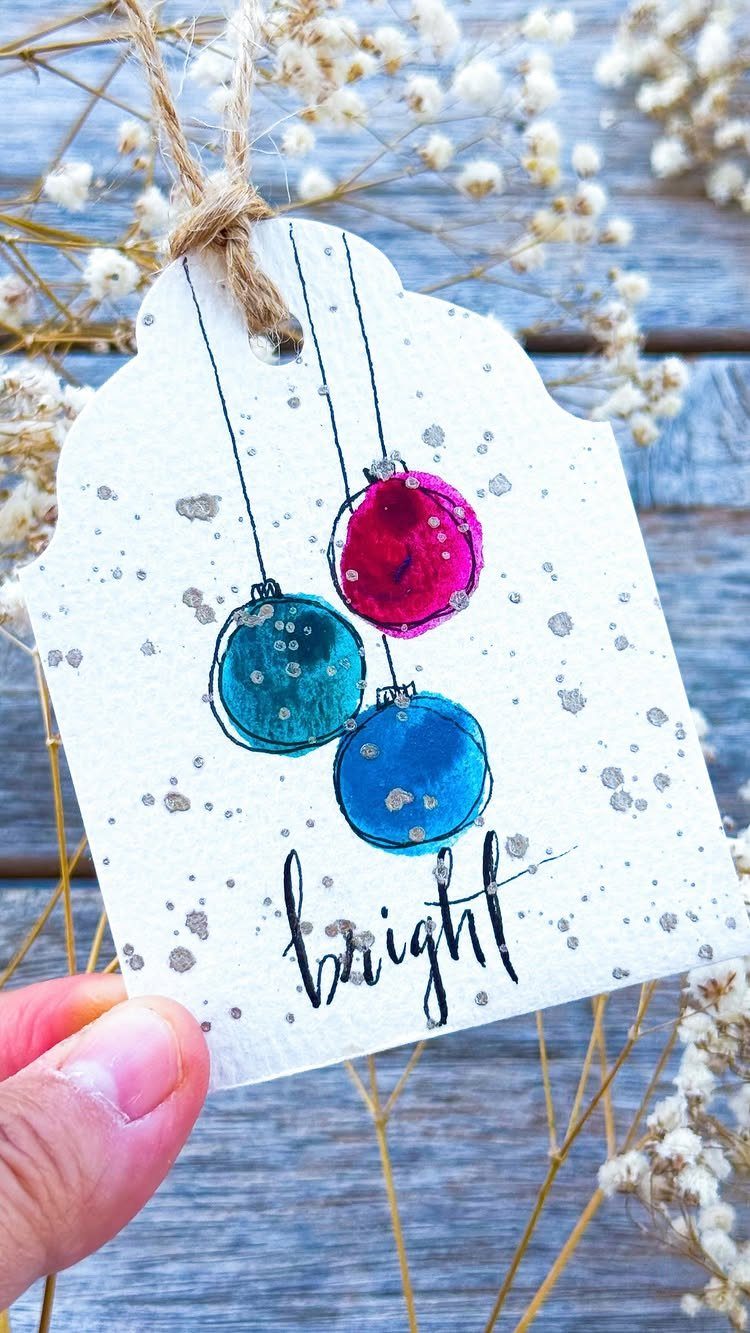
A painted tag is a small piece of art, and "bright" over 3 watercolor ornaments proves it needs very little. Three simple shapes and one word are enough.
Paint on white tags so the colors stay clean, and let each one dry flat before you write. Handmade tags also suit kids: ornaments are forgiving shapes, and a wobbly one still looks charming.
I’d keep the lettering simple, since the paint is the star.
3. Embroidered Gift Tags
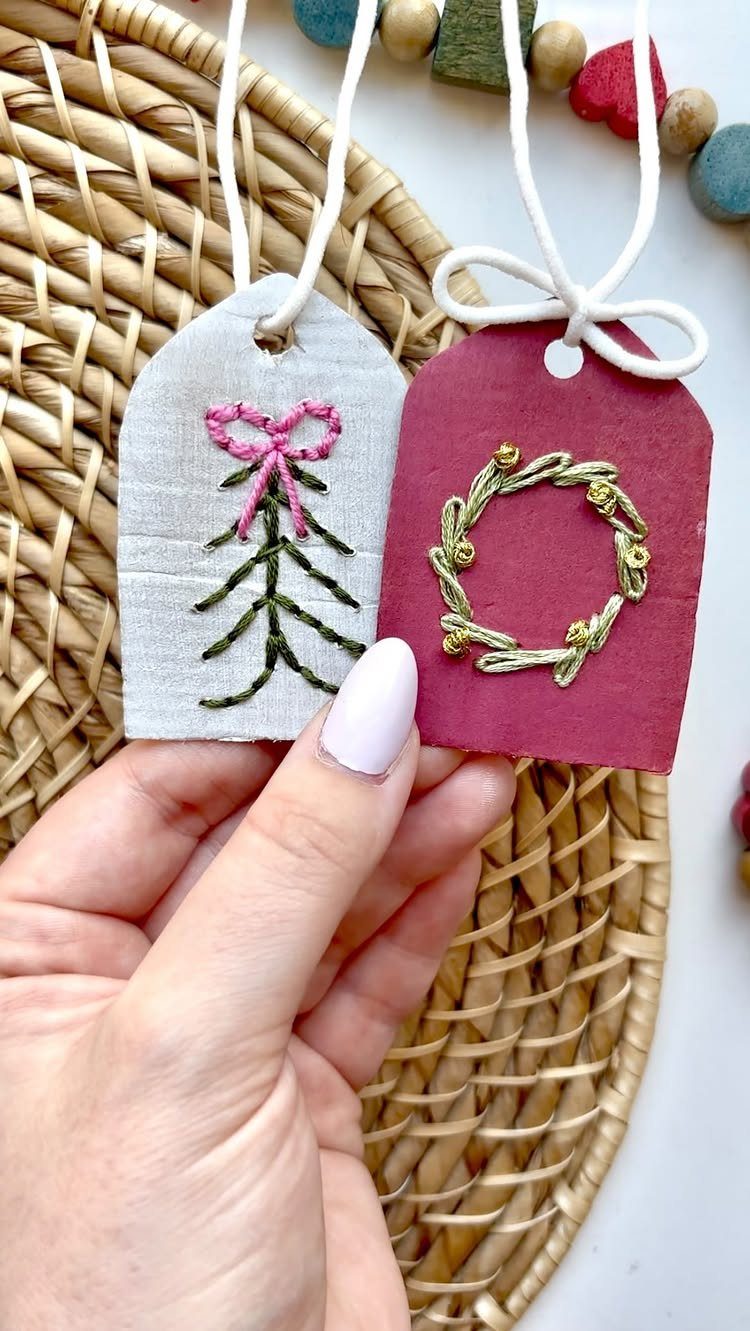
Stitched tags feel different the moment someone picks one up.
Stitched tags give you a fabric texture paper can’t, and a simple motif like a small tree or a wreath on felt or cotton reads as handmade in the best way.
Choose one simple motif per tag, because thread shows every extra detail as clutter. Red and white pair well, and the tag can double as a keepsake the recipient hangs on the tree afterward.
Expect it to take more time than printing or painting, so save embroidery for the gifts that matter most.
4. Wooden Tree Tags
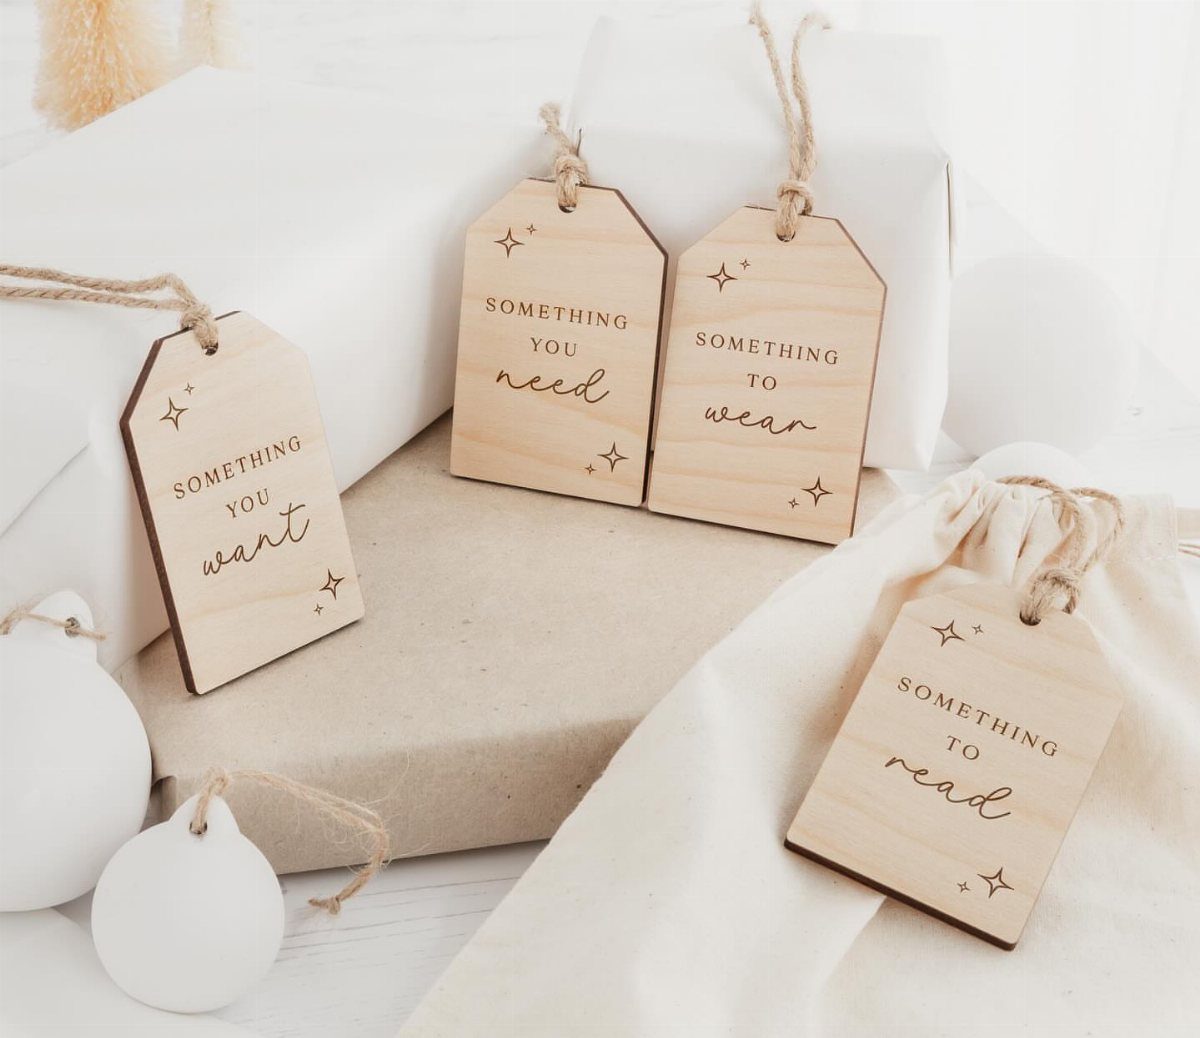
Wood tags turn a label into a small object. Engraved lines such as "Something you want," "need," "to wear" and "to read" make one set work as a four-gift system, and twine ties them on easily.
That wording suits a family that gives a set number of presents each year, and it keeps the tags useful across several boxes. Natural twine against white and brown paper keeps the look rustic.
I like this one for anyone who dislikes handwriting their tags.
5. Vintage Christmas Gift Tags
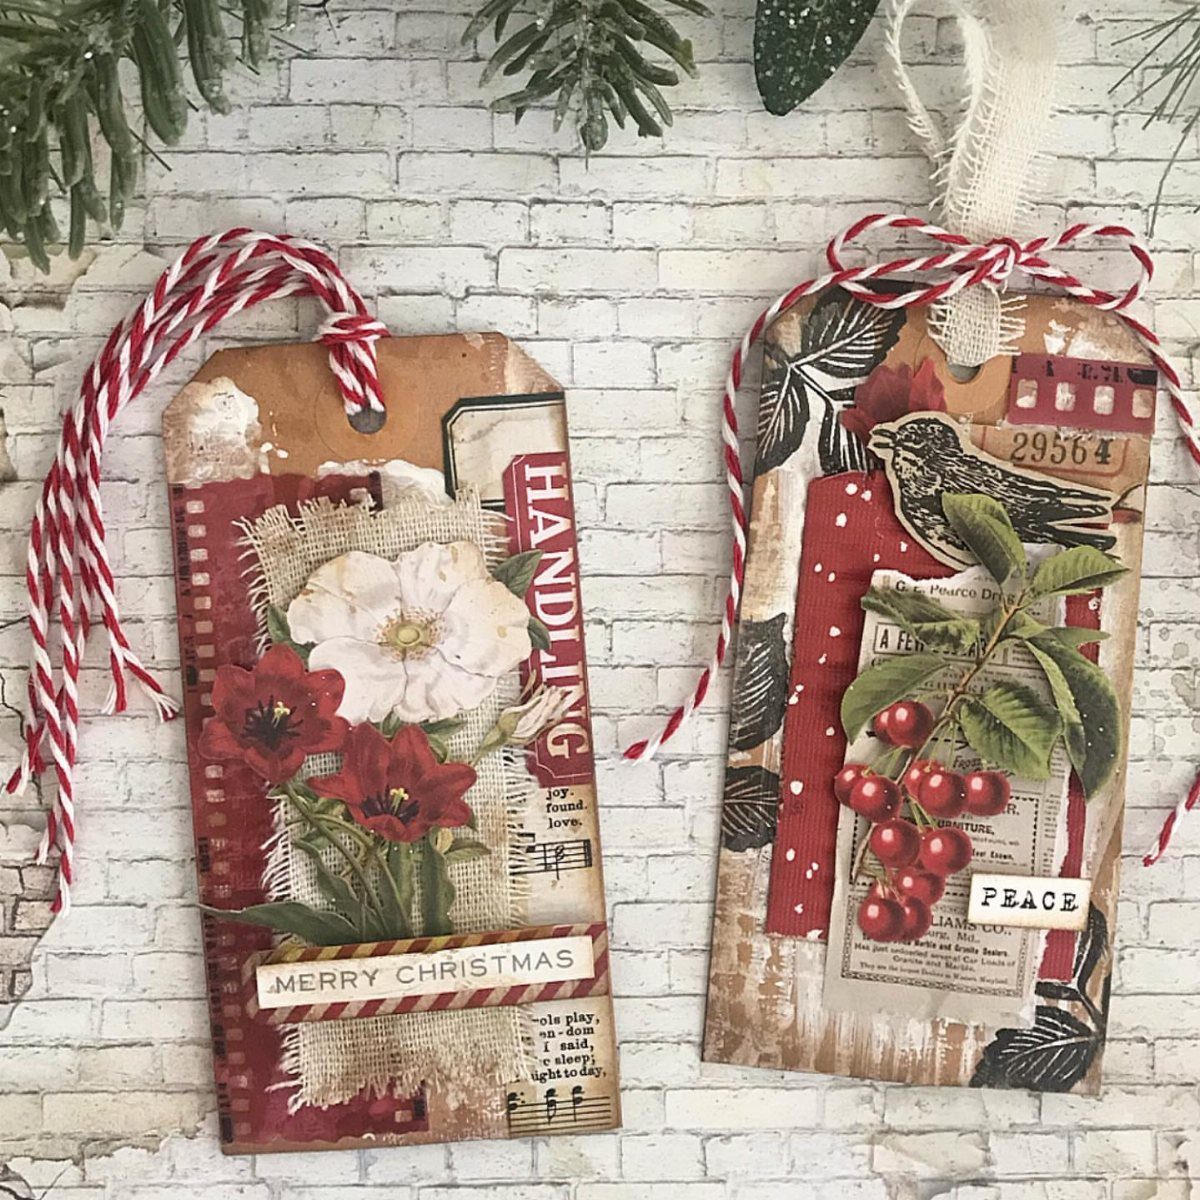
Old-fashioned botanical prints and birds give a gift a quiet, nostalgic look. Words like "MERRY CHRISTMAS" and "PEACE" fit that mood, and red and white twine ties it together.
Stick to one twine color so the tags carry the vintage feel. These look best on plain white or kraft wrapping, where nothing competes with the artwork.
White brick is a fine backdrop, but any plain wrapping works just as well.
6. Photo Tags
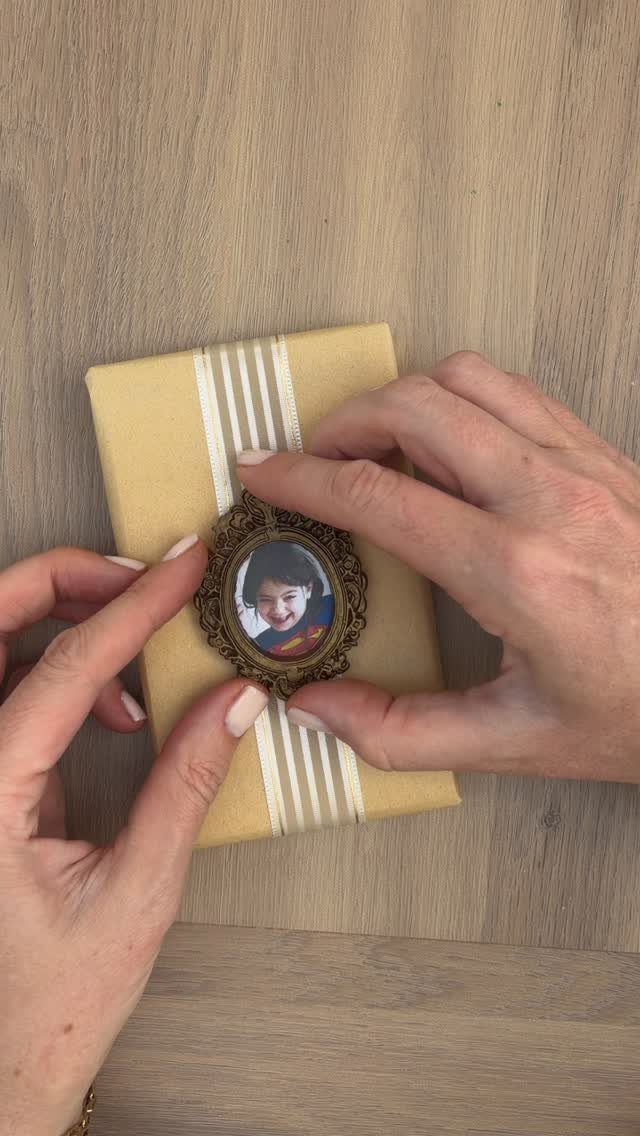
A tiny framed photo of a child can be the gift’s best part, since the tag itself gets kept. An oval frame tied to brown paper with a white ribbon looks warm and finished.
Choose a photo that works small: a close crop of one face reads better than a group shot. This suits grandparents especially, who get a present and a keepsake in one.
Pick a frame light enough to hang from the ribbon without tugging the bow loose; a thin wood or cardstock frame under an ounce or so works, and a heavy glass one will pull the knot sideways.
7. Snowman Gift Tags
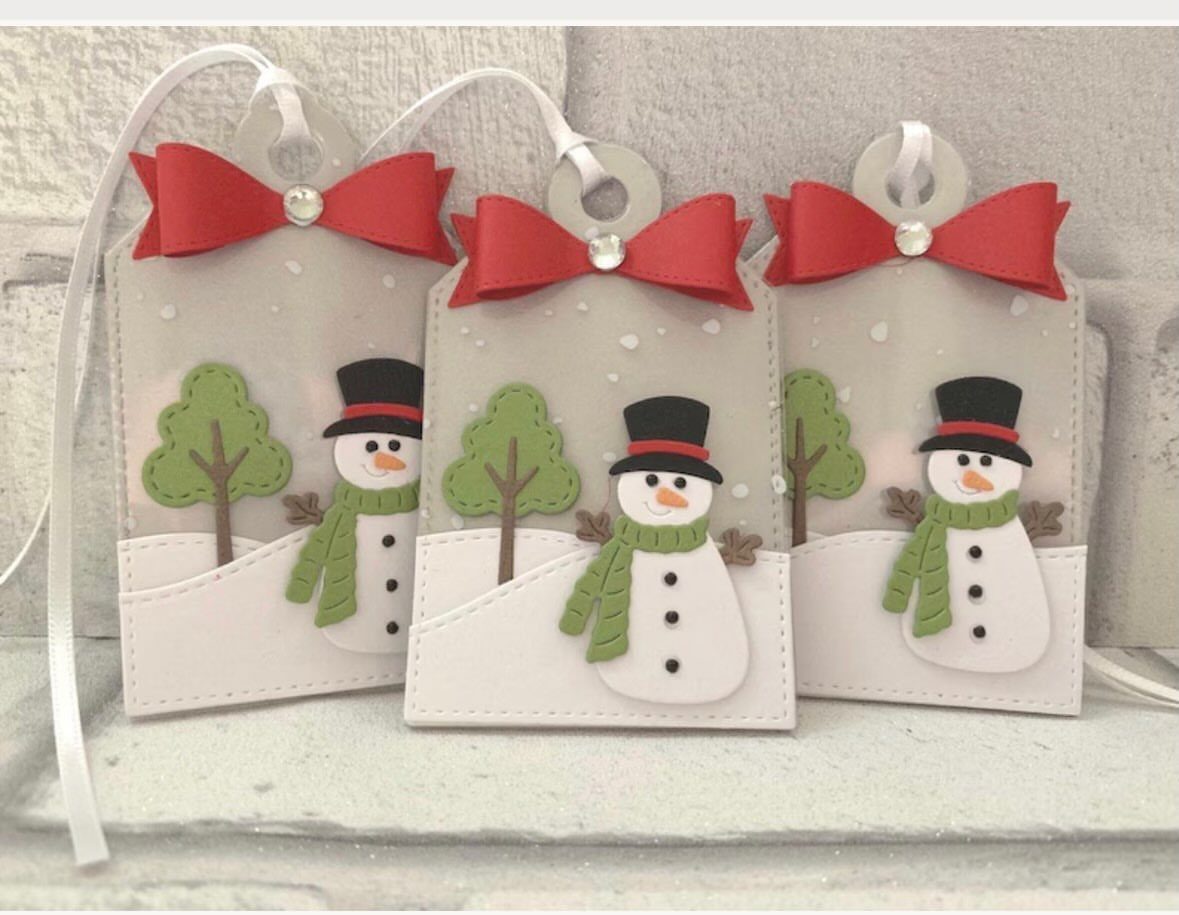
A snowman tag with a raised, dimensional figure gives a flat gift something to look at from the side. Layering a white body, a green scarf and a small red bow on white cardstock is what builds that depth.
Keep the ribbon white so the snowmen stay the focus. Three tags in a matching set look better to me than one lone figure, so make them in a batch.
Dimensional pieces take longer than a printed tag, so save them for the presents people will see first.
8. Penguin Gift Tags
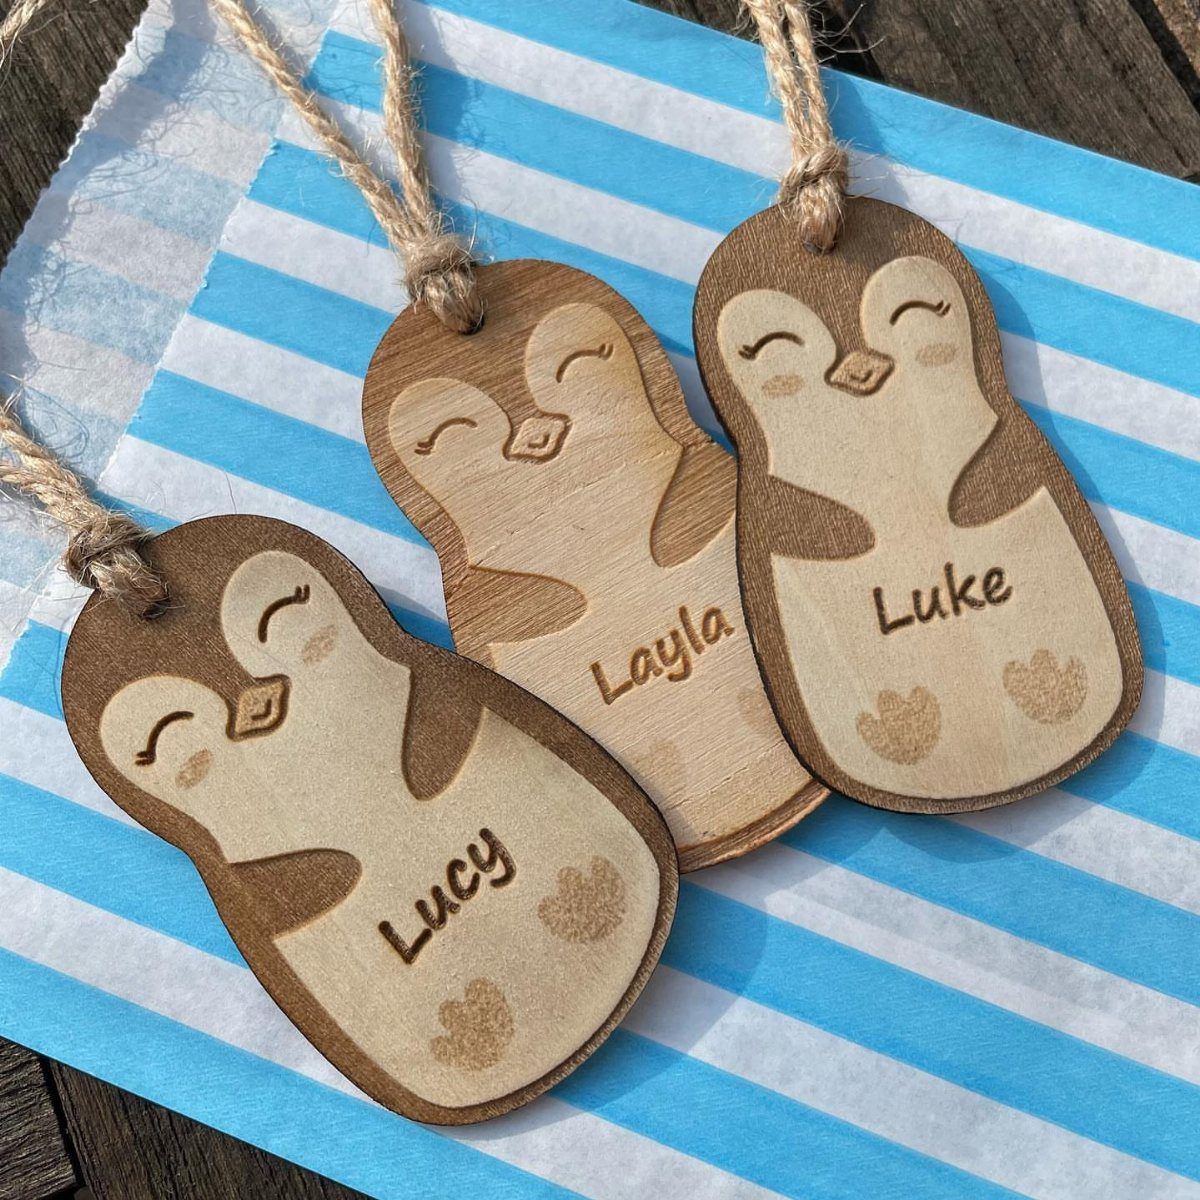
Wooden penguins with a name engraved across the front do 2 jobs at once: they label the gift and become an ornament the child keeps. Names are the right wording here, since a penguin shape already says Christmas.
Pick a plain, light backdrop like blue and white stripes, which makes the dark wood read clearly. Tie each tag on with a short loop so it hangs from a branch later.
Wood costs more than paper, so I’d use these for kids rather than a whole gift pile.
9. Candy Cane Gift Tags
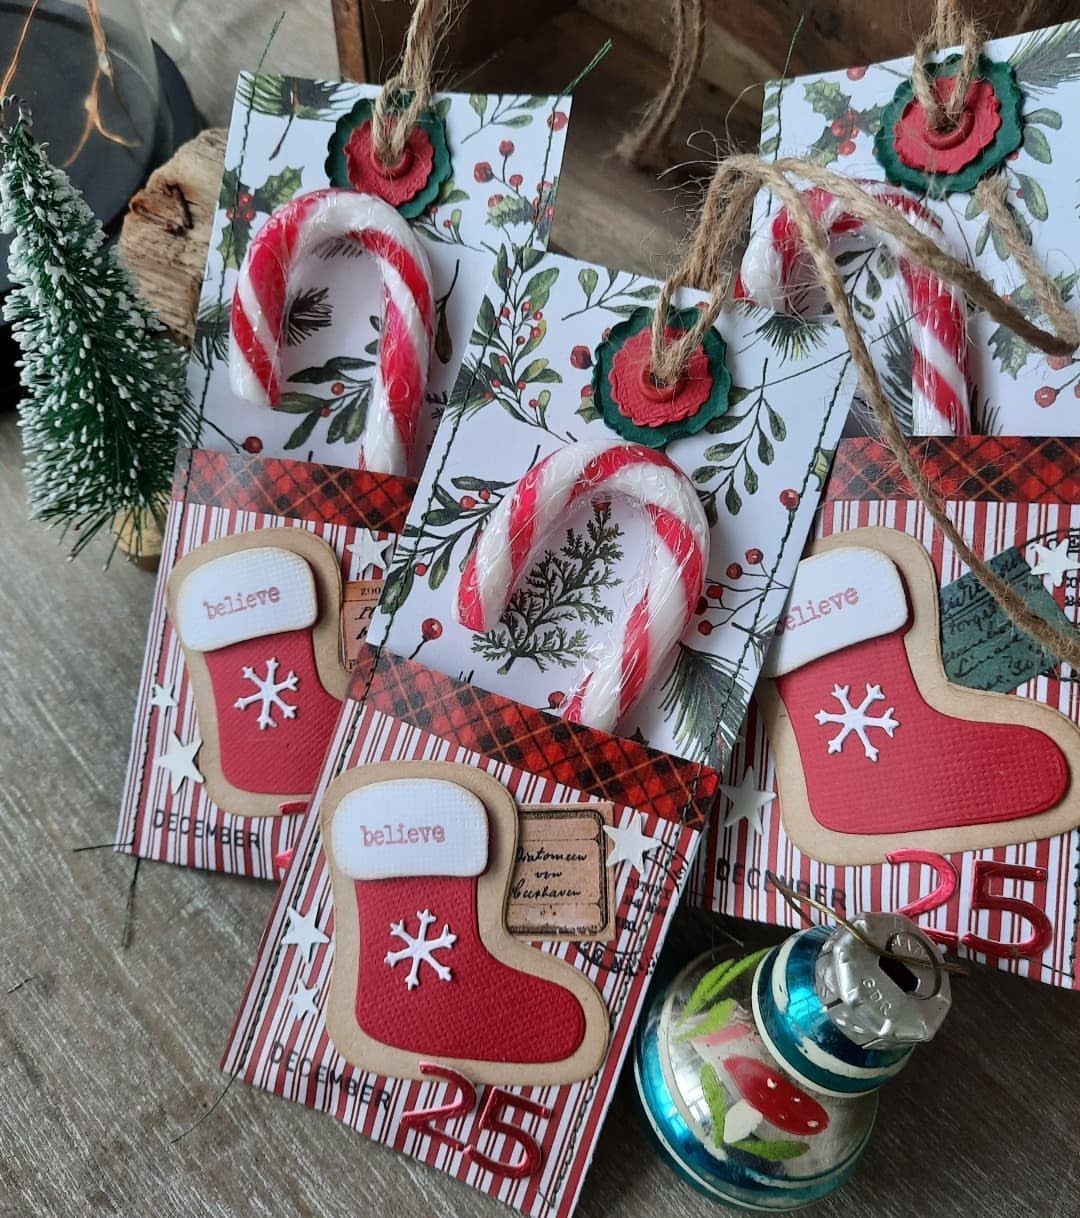
Candy canes, small red stockings and a "believe" label suit kids best, because the tags look like part of the treat. A number like "25" counts down the days and gives a child something to read.
Plaid backing paper adds pattern without extra drawing, which helps if little hands are making them. Cut the shapes from cardstock and glue them flat.
I’d keep each tag to one picture and one word so it stays easy to make in a batch.
10. Nutcracker Gift Tags
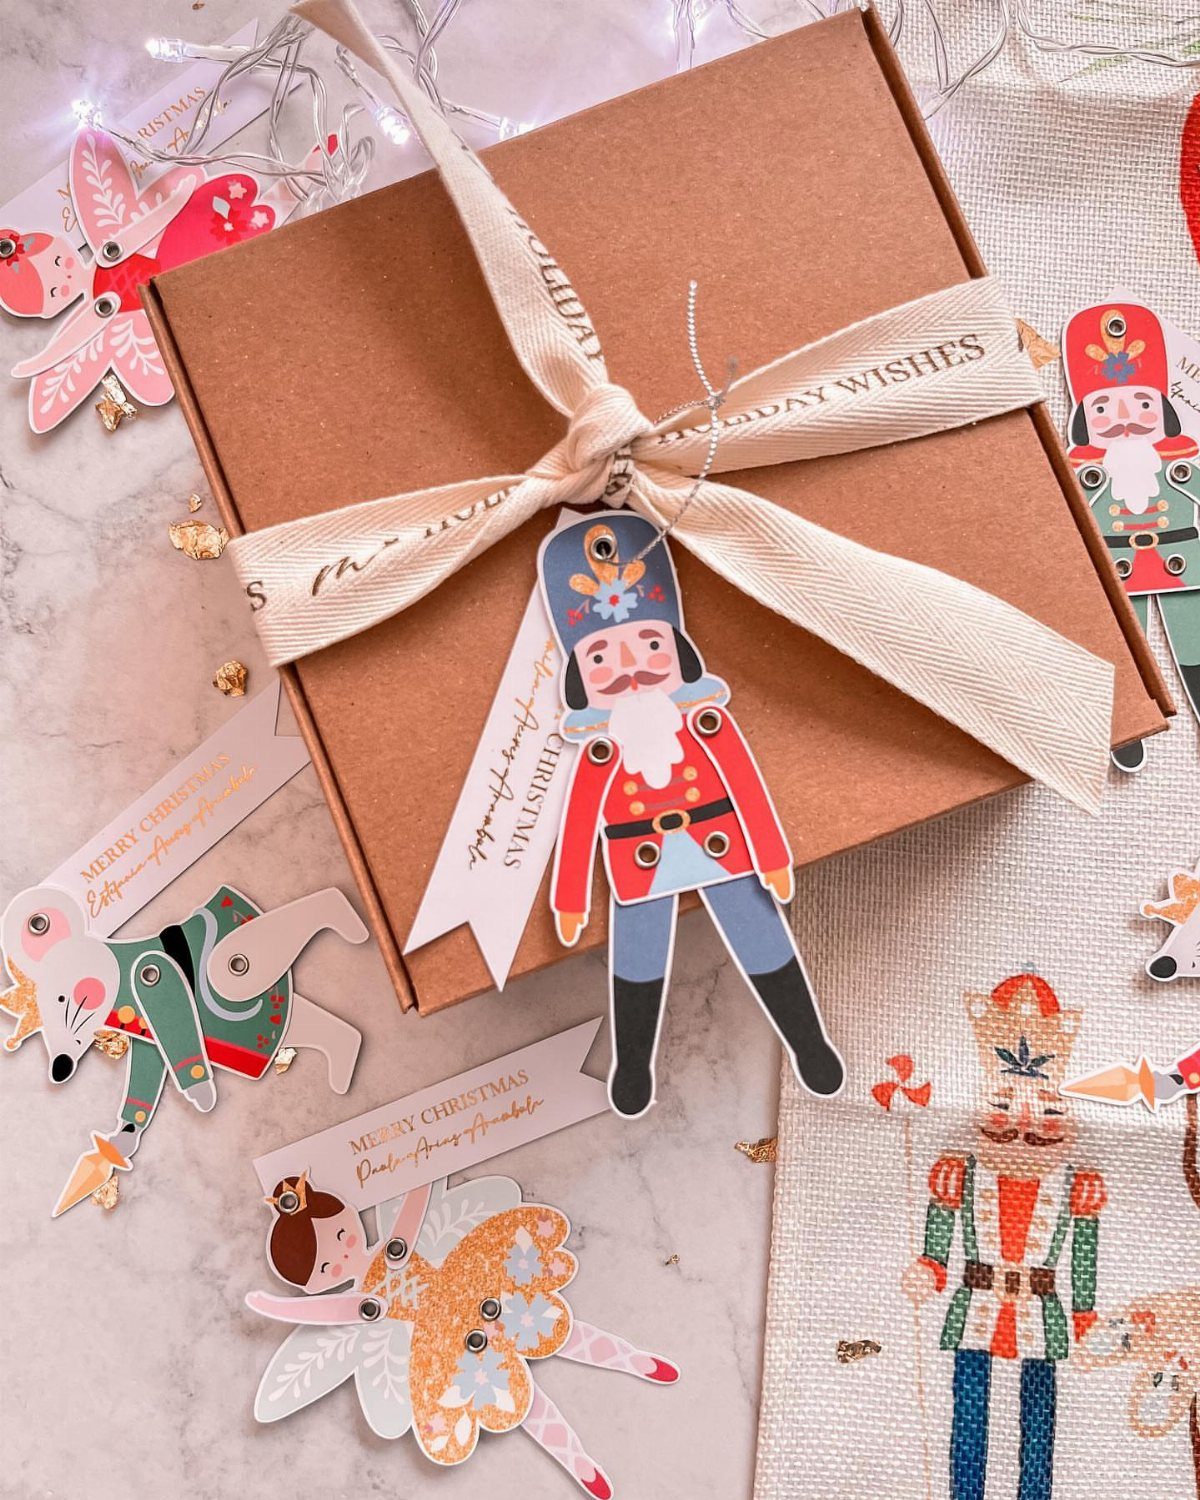
A Nutcracker-shaped tag is a silhouette, so the cut does the work and you can skip fussy decoration. Cut it from cardstock or buy a die-cut shape, then tie it on with a cream ribbon over brown paper.
Brown kraft lets the soldier’s colors stand out. Add a ballerina shape for a second tag, and the pair reads as a small story.
Trace one template and reuse it for the whole stack.
11. Glitter Christmas Gift Tags
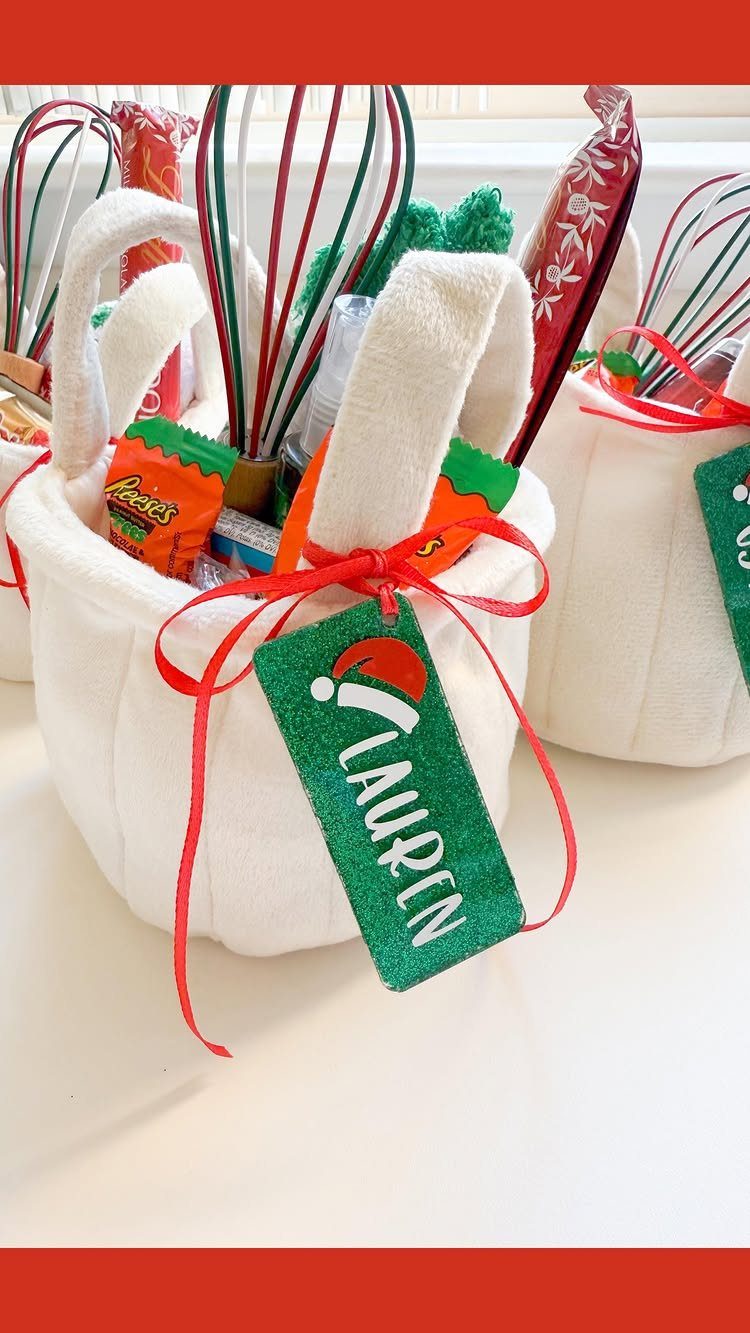
Glitter makes a name tag catch the light from across the room, which suits a gift basket or a table of similar boxes.
Use glitter cardstock rather than loose glitter, which sheds on the gift. Write or stick the name on in a flat color so it stays readable.
Save sparkle for one spot per gift; with glitter wrap too, the tag disappears.
12. Botanical Tags with Bells
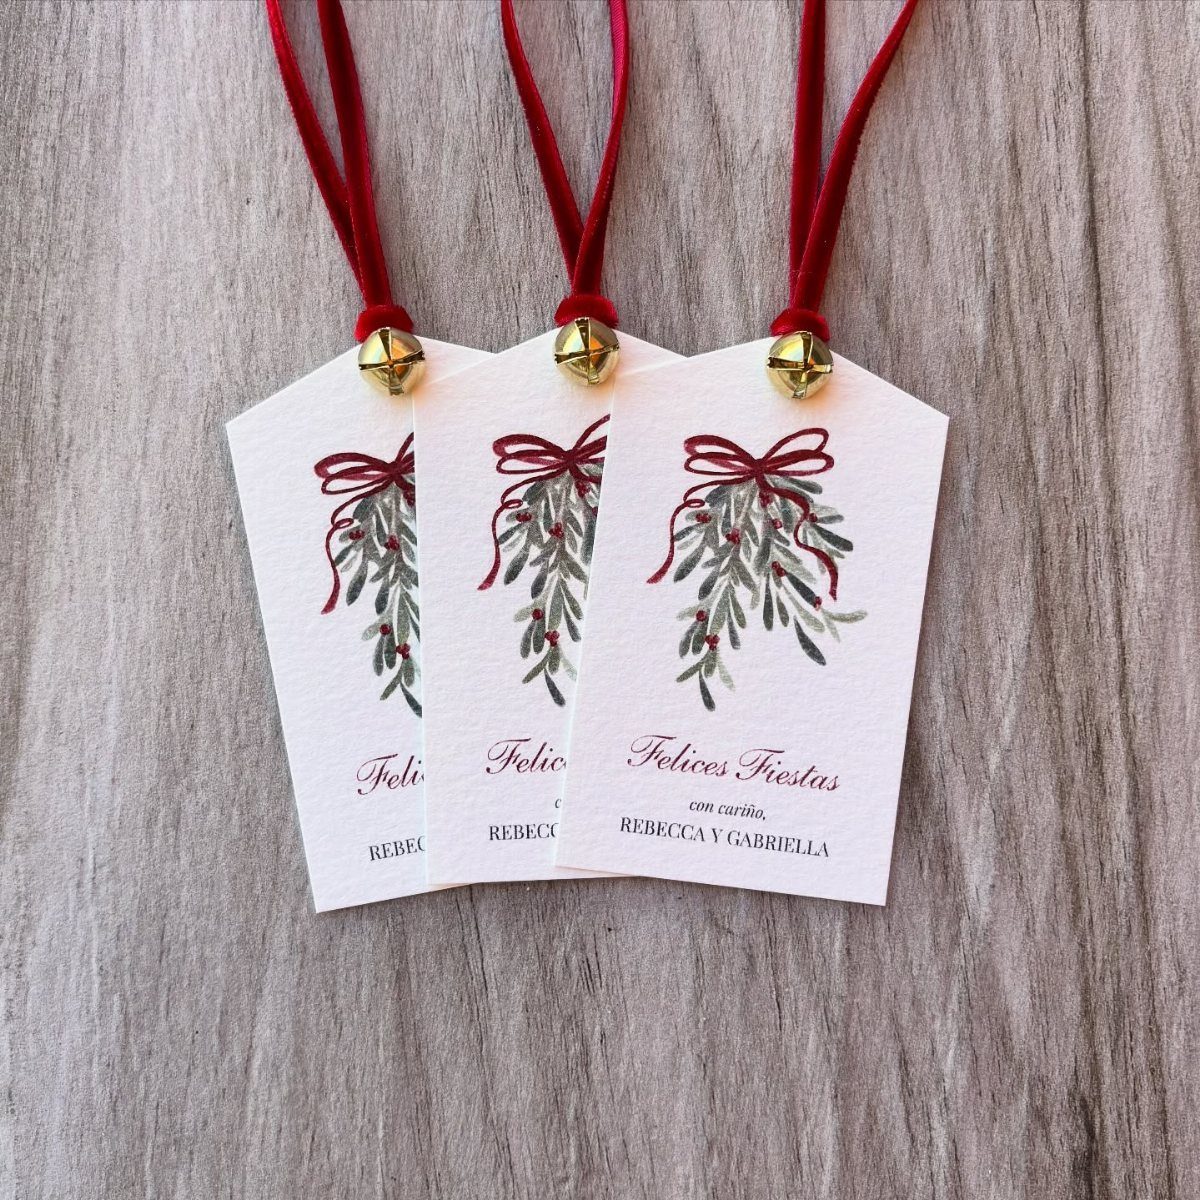
White tags painted or printed with holly-style foliage, a red ribbon and a small gold jingle bell make a tag that sounds as well as looks the part. The bell adds a little weight, so use a firm ribbon.
Write the names in simple dark lettering, and a greeting like "Felices Fiestas" works if your family likes a second language. Tie the bell on securely so it doesn’t slip off.
Kraft paper or plain white wrap works best under these, since it leaves the red and gold of the tag as the only accent.
13. Scalloped Santa Gift Tags
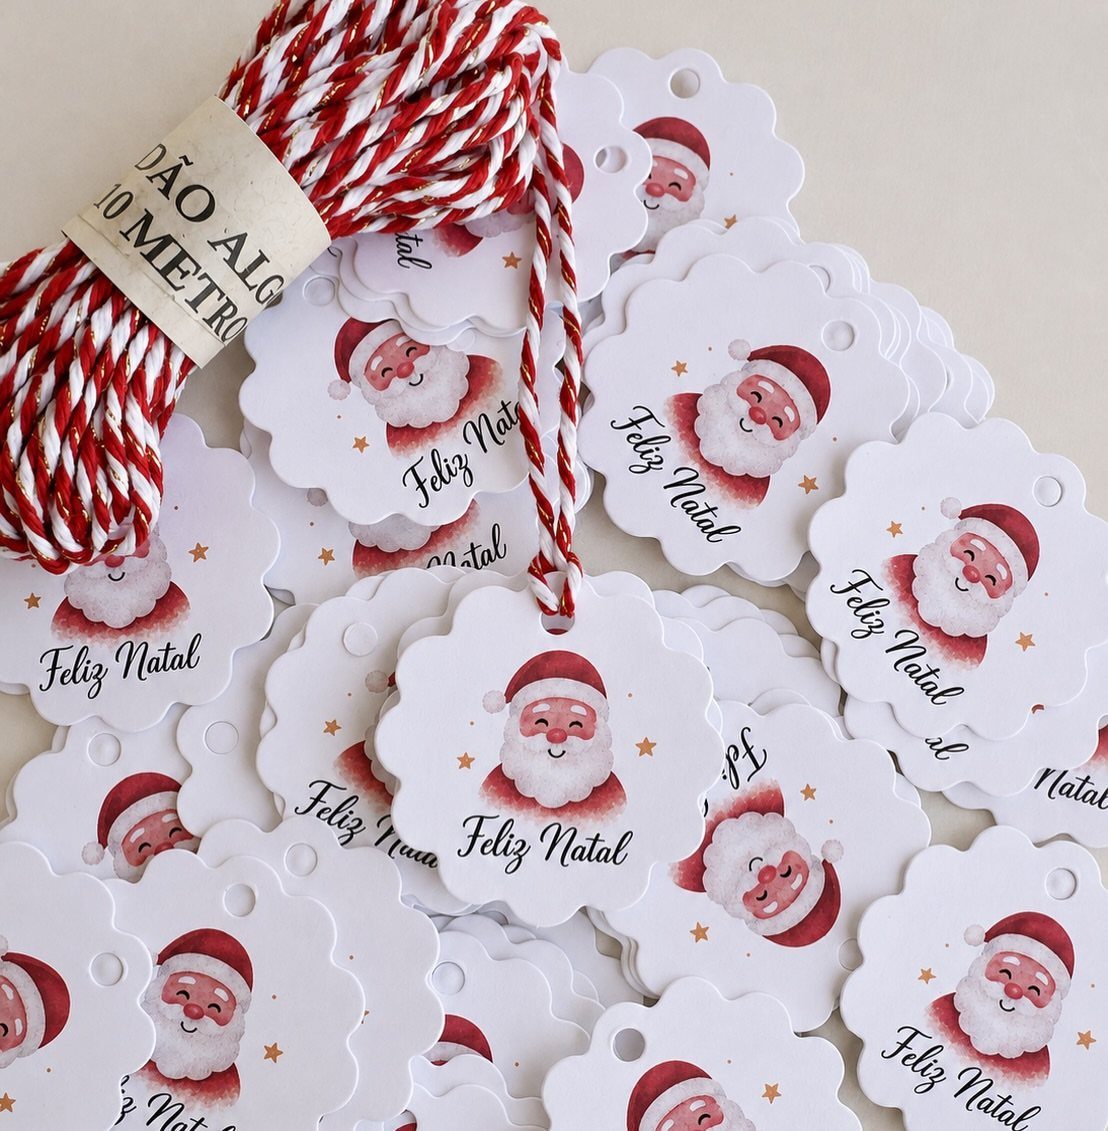
Scalloped edges soften a tag before any artwork is read, and a Santa face with "Feliz Natal" underneath says plenty in 2 lines.
Red and white baker’s twine matches the Santa’s colors, so the tag and tie look like one purchase.
Choose a second language only if your family or recipient will recognize it; otherwise keep to English.
Thread the twine through a punched hole and knot it twice. A pile of these on plain wrap lets the scallops be the detail, so I’d skip patterned paper.
14. Illustrated Tags with Velvet Ribbons
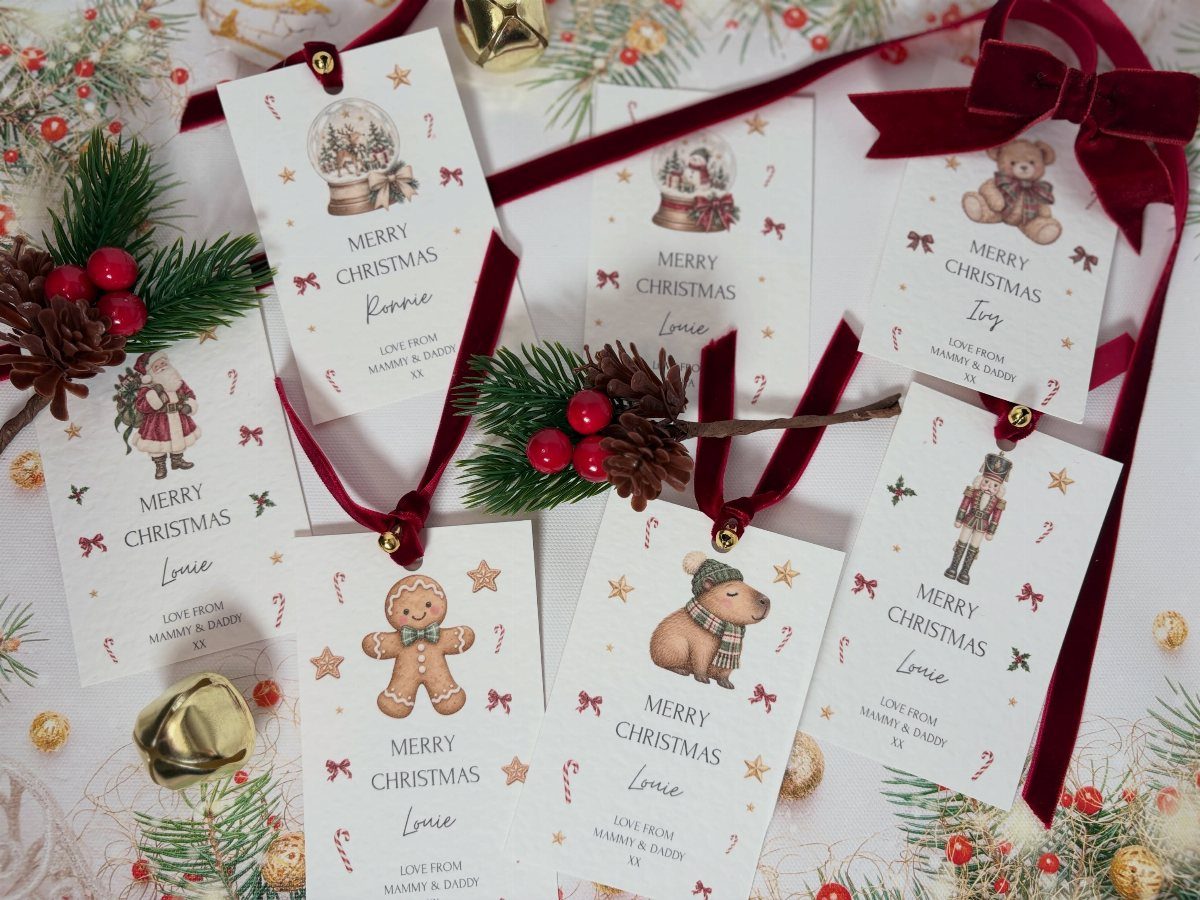
Red velvet ribbon is what makes a plain rectangular tag feel expensive. Classic motifs with a name on each, tied through the top, look more considered than the paper alone suggests.
Velvet costs more than satin or twine, so buy a single spool and cut short lengths for a small set rather than ribbon for the whole pile.
Keep the tag white and the illustrations traditional, so the ribbon is the only rich note.
Knot it flat against the tag, then trim the ends at an angle to stop fraying.
Materials Needed
A basic tag kit fits in one shoebox: cardstock in a few colors and patterns, scissors, a hole punch, markers or pens, and something to tie with, such as ribbon, twine, or string.
Add glue or double-sided tape for anything layered. Anyone who would rather not draw can lean on stickers, rubber stamps and a roll of washi tape, which decorate a plain tag in about a minute.
Craft punches are worth a look if you cut the same shape often, since they replace scissors and give cleaner edges.
Sequins, flat buttons and pressed dried flowers are extras I’d add only if you have them on hand. Pick one, not all three, so the tag doesn’t turn busy.
If you’d rather skip cutting, pre-made blank tags save time and still take paint, ink, or a pen well.
Crafting Tips
Make tags in batches. Cut, punch, and decorate a whole stack in one sitting, and the setup time gets spread across every gift on your list.
A few extras on hand rescue you when an unexpected present turns up on the 23rd.
Match the style to the recipient and the occasion. A simple tag suits a coworker, and something more detailed suits a person you want to impress.
Kids can stamp, sticker and tape, but younger ones should stay away from the hot glue. Preschoolers can handle glitter and button tags with supervision, while older children can cut, fold, and build more detailed designs alone.
Homemade tags usually cost less than store-bought ones, especially if you use leftover wrapping paper and craft supplies you already own.
A tag can also double as a small card if you leave room to write on the back.
Gift Tag Messages
A name is the minimum, but a short personal line does more. Write it in your own words: a nickname, an inside joke, or one sentence about why you chose the gift.
Keep the message short enough to read at a glance. Tags are small, and cramped writing looks worse than a few clear words.
Use a flat, dark pen on light cardstock so the message stays readable. Test the pen on a scrap first to check that it doesn’t smear.
If your handwriting makes you nervous, try letters made from a material.
Let the glue set before you stack the tags, so the letters stay put.
Frequently Asked Questions
How can I create my own Christmas tags?
Start with cardstock, scissors, a hole punch and something to tie with, like ribbon or twine. I make tags in batches: cut, punch and decorate 20 or so at once, and the setup effort is spent only one time.
Keep each tag to one simple idea, such as a single painted shape, a printed word or a die-cut silhouette, and it stays easy to repeat.
What to say on a gift tag?
A name does the job, though a short personal line from you, like a nickname or a hint about why you picked the gift, gives the tag more warmth.
Keep the wording brief, because a tag has little room and a few clear words look better than tiny, crowded handwriting.
What is a good message to write on a Christmas gift?
Write a few words in your own voice, the kind you would say out loud, such as a pet name, a running joke or what made you think of them.
Short holiday words like "JOY," "PEACE" or "believe" also work on a decorated tag.
Are homemade gift tags a good money-saving option?
Yes, and the savings are real, since a homemade tag usually costs less than a store-bought pack.
Printing tags at home costs only paper and ink, and scraps of wrapping paper and craft supplies already in your drawer cut the cost even further.
Wood and velvet ribbon cost more, so buy a single spool or use wooden tags only for a few special gifts.