Who is at the table decides which of these ideas to make: a toddler can press a hand into paint or glue pom poms onto a paper plate, while knitting a stocking or folding a paper snowflake belongs to an older child or an adult.
The projects run from nearly free, like the paper plate wreath made from what’s already at home, to an advent calendar that comes out again every year.
Pick by the youngest maker, then match the effort to the time you have.
1. Handprint Santa Claus
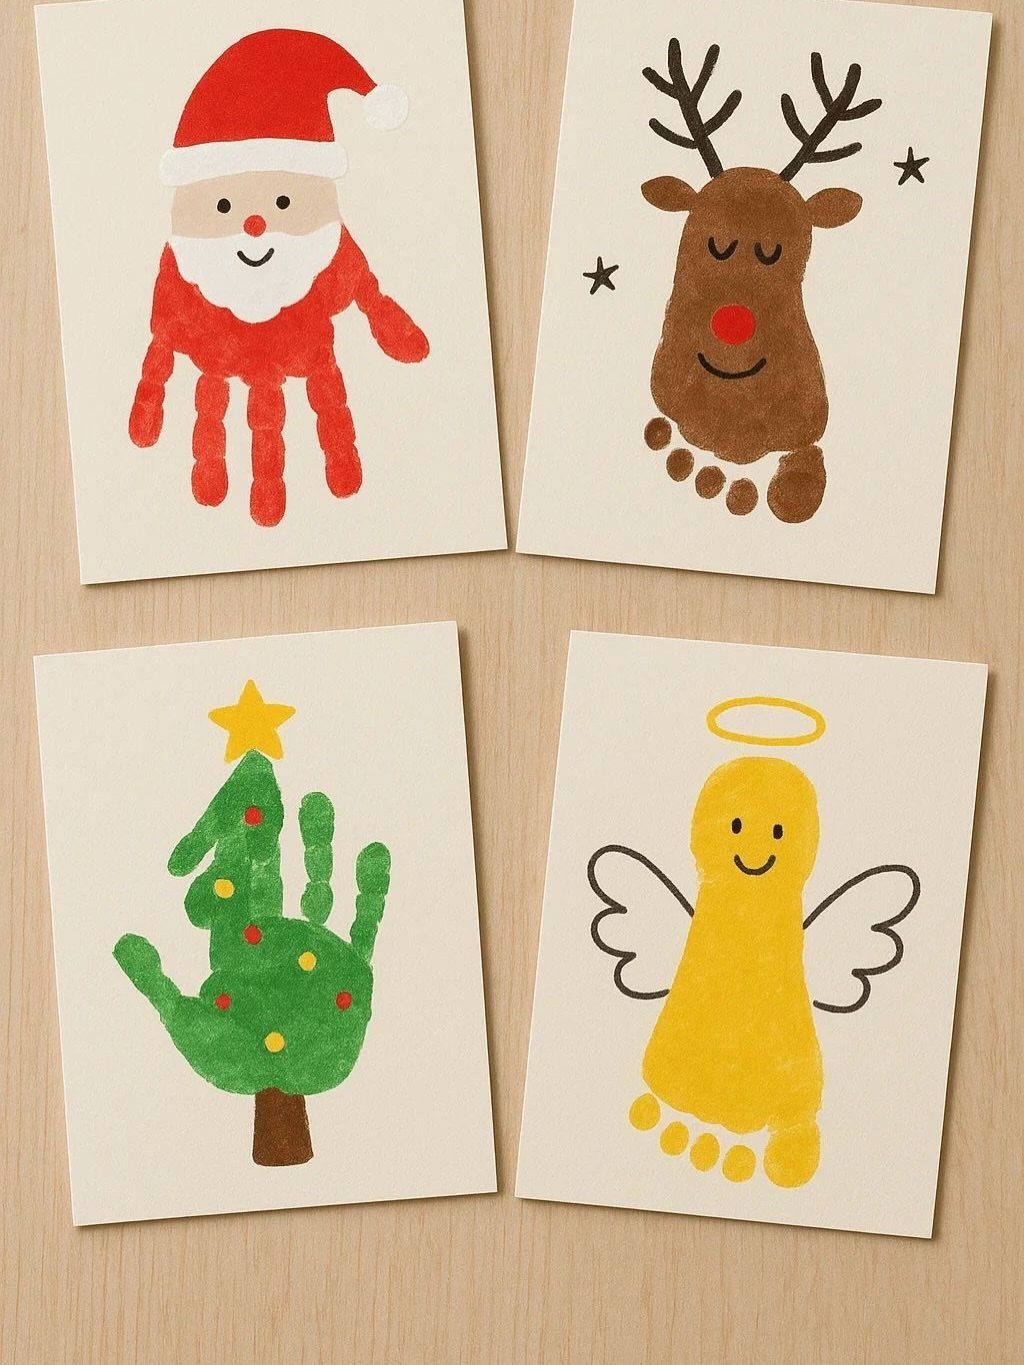
Red paint makes Santa, brown makes a reindeer, green makes a tree, and yellow makes an angel. Each color is a different paint, so set out one shallow plate per color and let a child press a hand into it.
Brush the paint on with a sponge brush for a thin, even coat. Thick paint blurs the fingers.
Add faces and details once the prints dry. I would write the child’s name and the year on the back of each card.
2. Holiday Cards
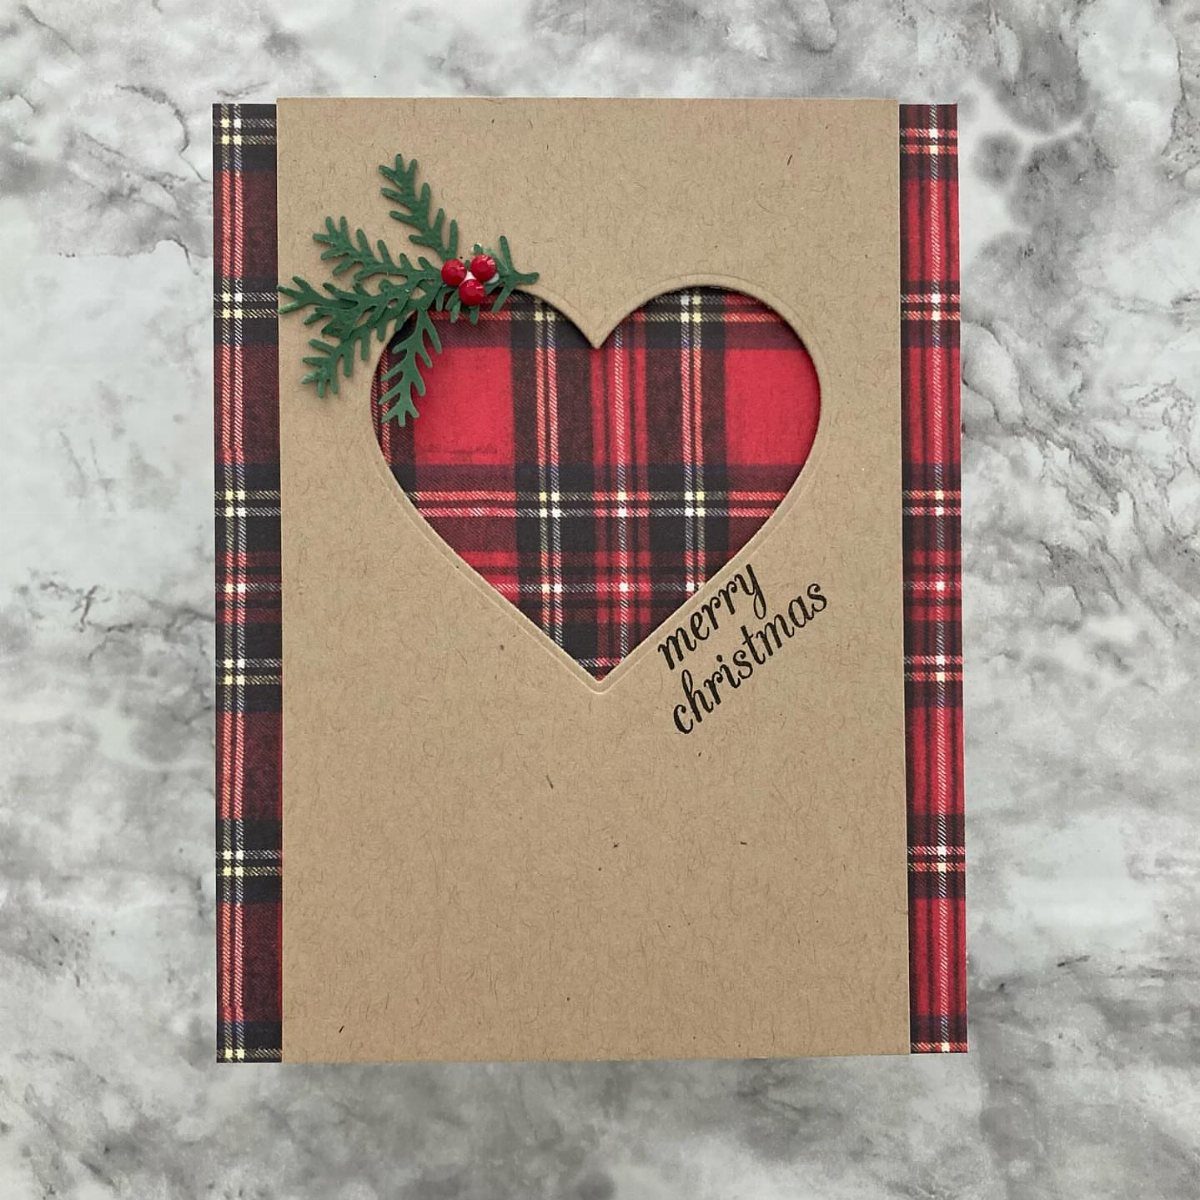
Kraft paper is cheap, folds cleanly and takes a stamped or printed greeting well.
Cut the heart before you fold, and glue the plaid paper inside behind the opening. Tuck a small evergreen sprig and a few berries at the edge.
Make one card and use it as the pattern for the rest, so every heart matches.
3. Candy Cane Reindeer
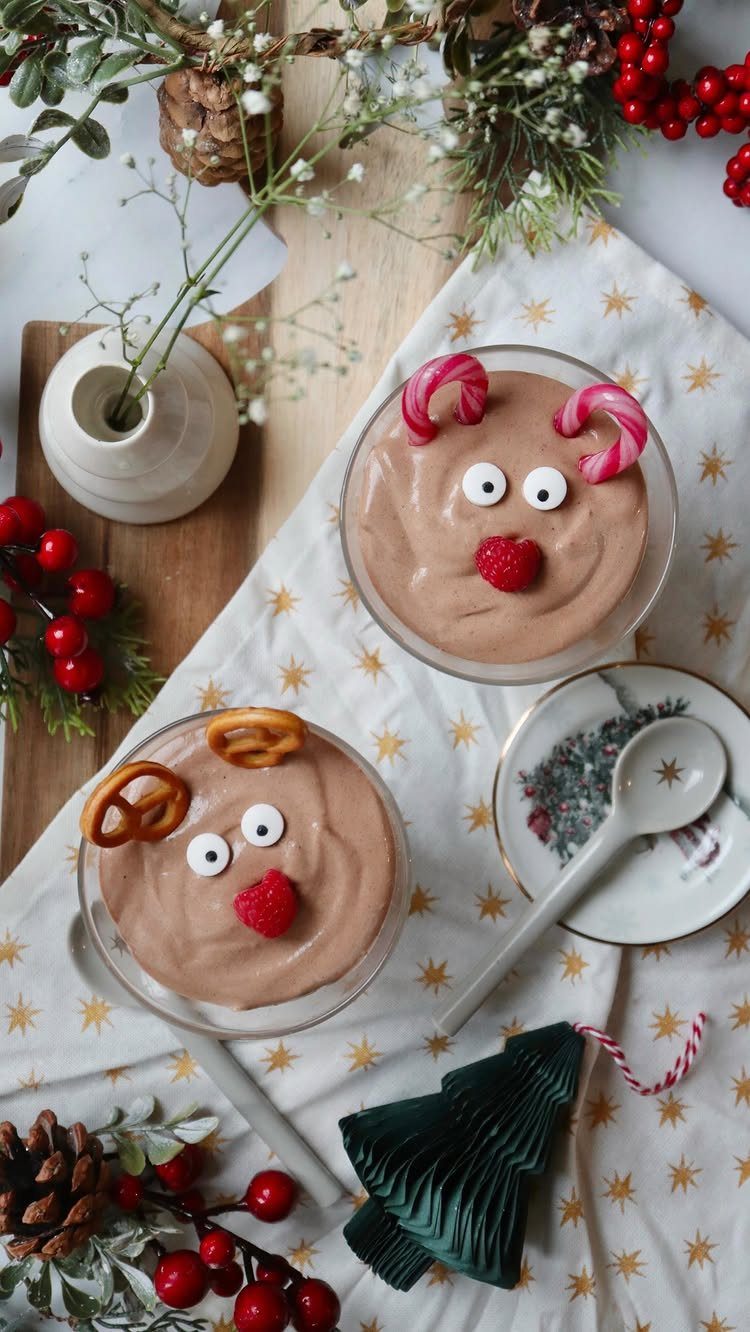
Push 2 candy canes into chocolate mousse to form antlers, then add pretzel ears, candy eyes and a raspberry nose. Mousse is easy to make ahead or buy, and the decorating takes a minute per bowl.
Add the candy canes just before serving. I would do that last because sugar can soften against moisture.
Set the toppings in small bowls and let kids dress their own reindeer.
4. Paper Plate Christmas Wreath
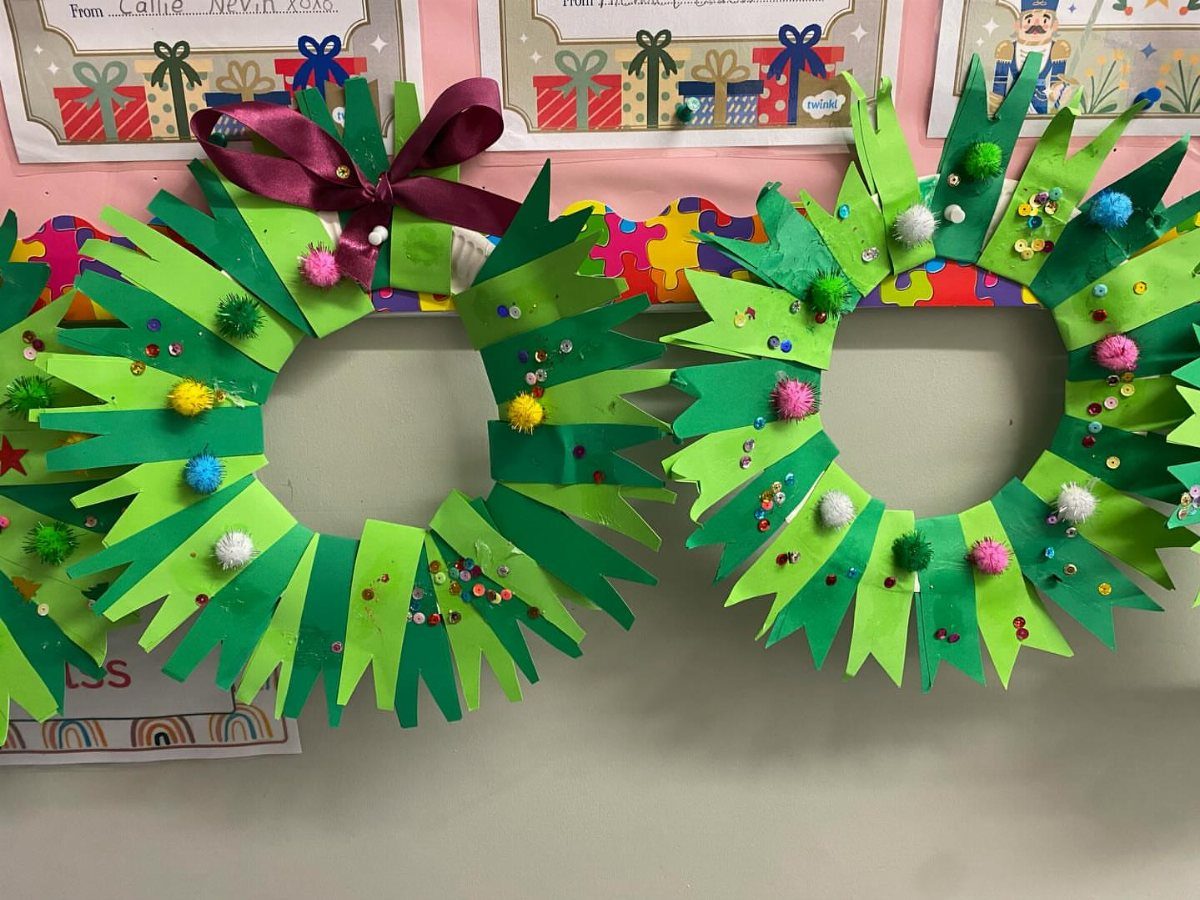
Green paper plates make a wreath base that costs next to nothing. Cut out the center of each plate to leave a ring, then let kids glue on pom-poms and sequins.
White craft glue holds pom-poms well, though it needs a few minutes to set. Lay the wreaths flat to dry before hanging.
Hang them on a wall beside the children’s drawings, with a loop of yarn taped to the back.
5. Yarn Trees
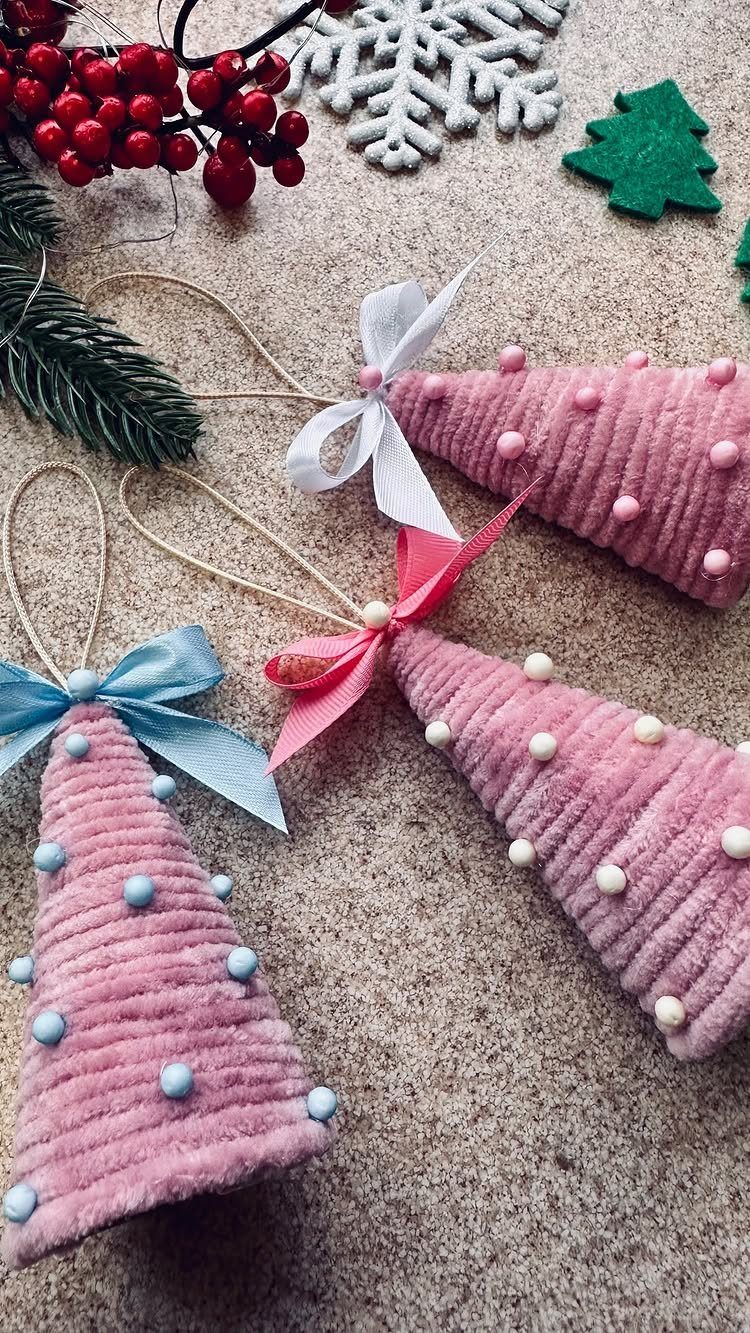
Wrap yarn around a cone and you get a small tree in any color you like. Pink works nicely, and the maker calls the result a handmade, colorful touch for the season.
Wind the yarn snugly so no cone shows, and dab glue at the start and end.
Make a few in one color and vary the trims. A felt tree or two beside them adds a texture contrast.
6. Advent Calendar
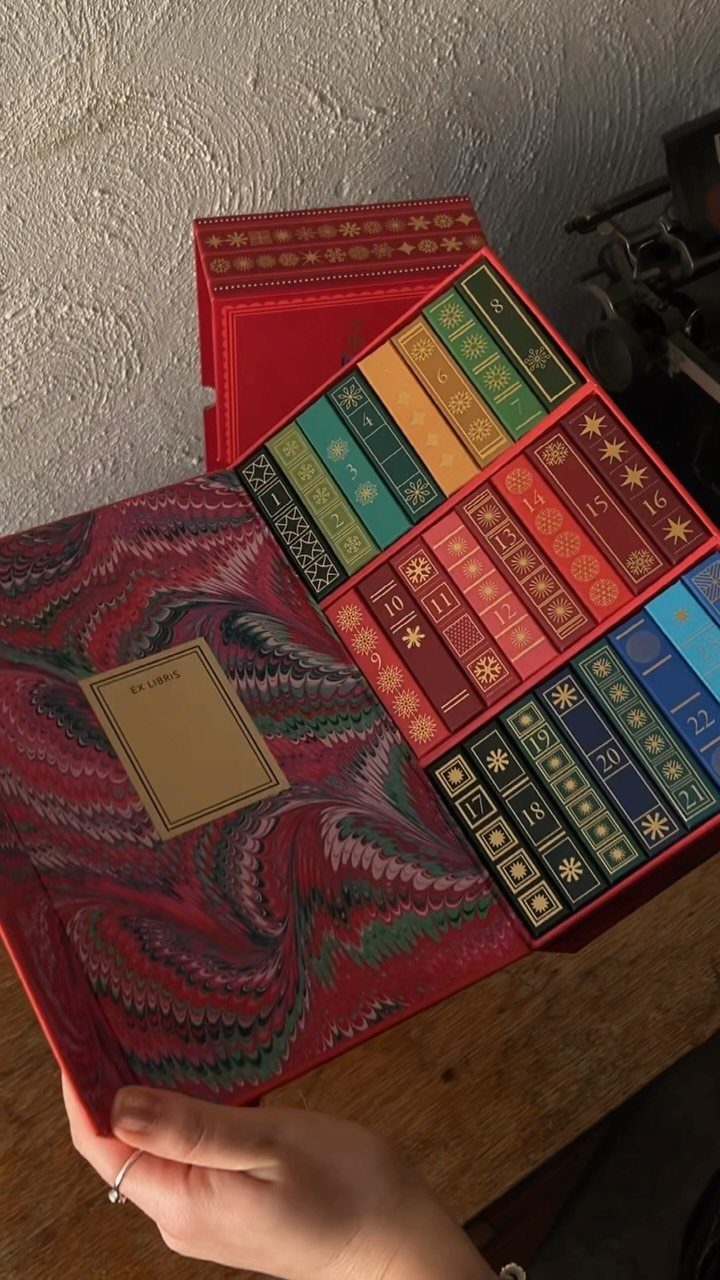
A bookshelf-shaped box with numbered drawers turns an advent calendar into a small library. Marbled paper covers the outside, and a label reading "EX LIBRIS" gives it a bookplate look.
Each drawer holds one small treat or note, so count out 24 and number them before you glue anything. Marbled paper hides seams, which helps if your cutting is uneven.
I would choose this over a bagged calendar for anyone who likes books, since it can come out again every year.
7. Gnome Ornament
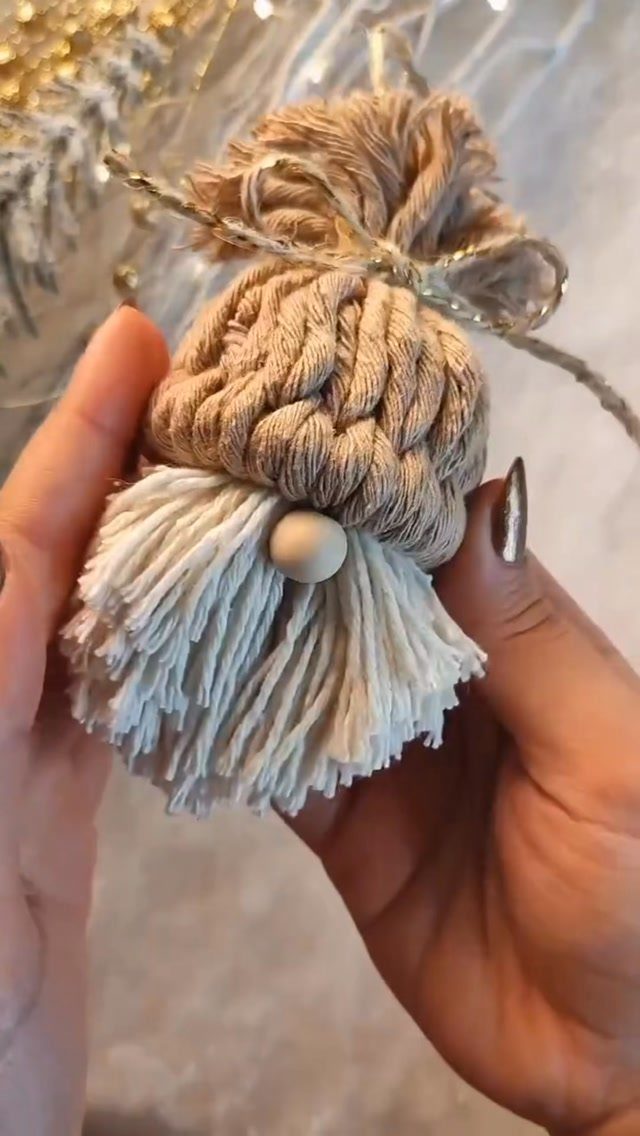
Twine, a scrap of white fabric and a small wooden bead for the nose are all this gnome needs. Cardboard and twine are likely already in a kitchen drawer or recycling bin, so the cost is close to nothing.
Wind the tan twine thickly for the body, and let it hang loose as a beard. I would tie a loop of twine at the top so the ornament is ready for a branch.
Make several in a batch; they look best hung in a cluster.
8. Christmas Stockings
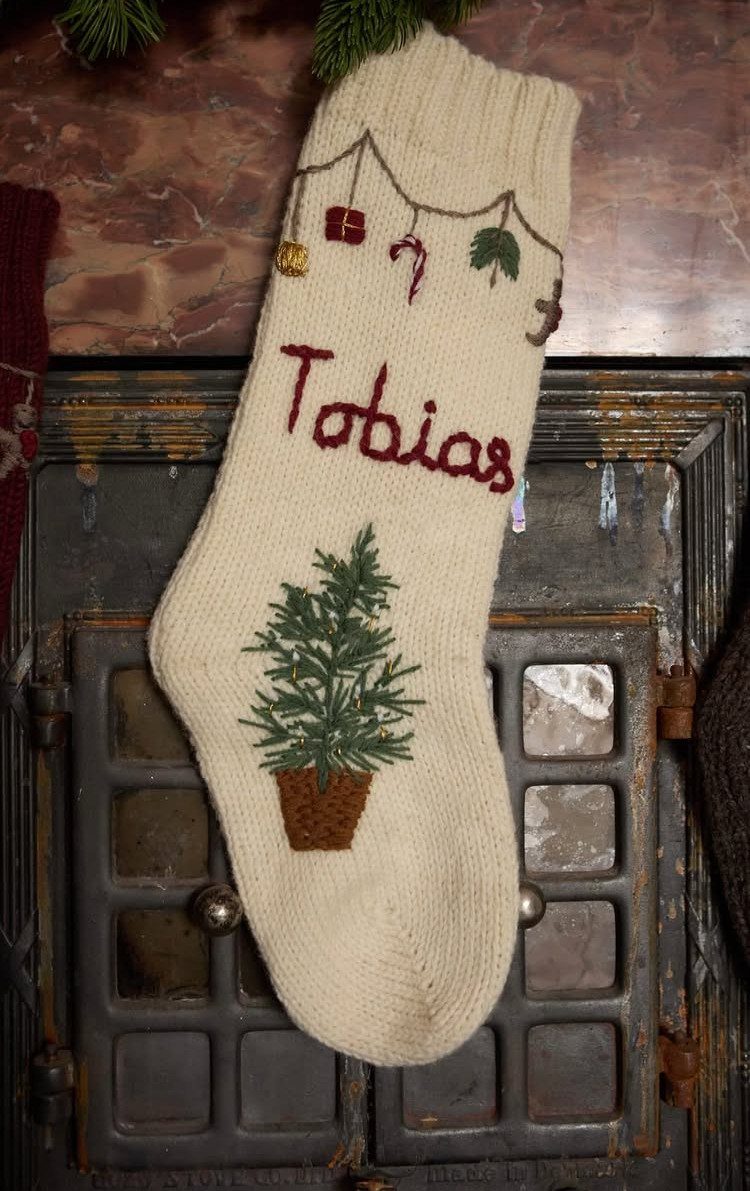
A knitted stocking with a name and a small tree on the cuff becomes the one thing a child looks for on Christmas Eve. Cream yarn keeps the look simple, and the name does the decorating.
Younger kids can’t knit, so I would suggest a felt or fabric stocking they can decorate with glue and cut-out letters. Save knitting for an adult project.
Put the name and the year somewhere easy to see. One stocking per person, made once, can hang every year.
9. Paper Snowflakes
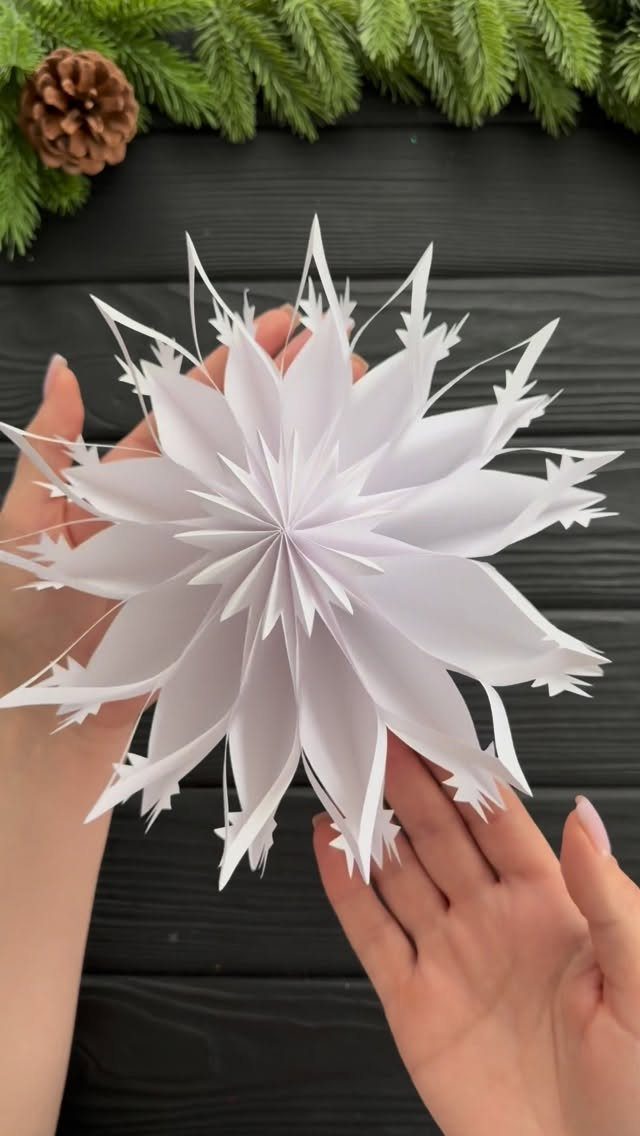
A flat snowflake is a classic, but a 3D one in white paper gives the mantel something to look at. Several folded pieces are joined into one large, layered shape, and white paper keeps it crisp against a dark surface.
Cut every piece from the same stack so the points line up. A stapler or dab of glue joins the layers at the center.
Little kids can cut a simple flat version while an older child or adult builds the 3D one.
10. Pinecone Christmas Trees
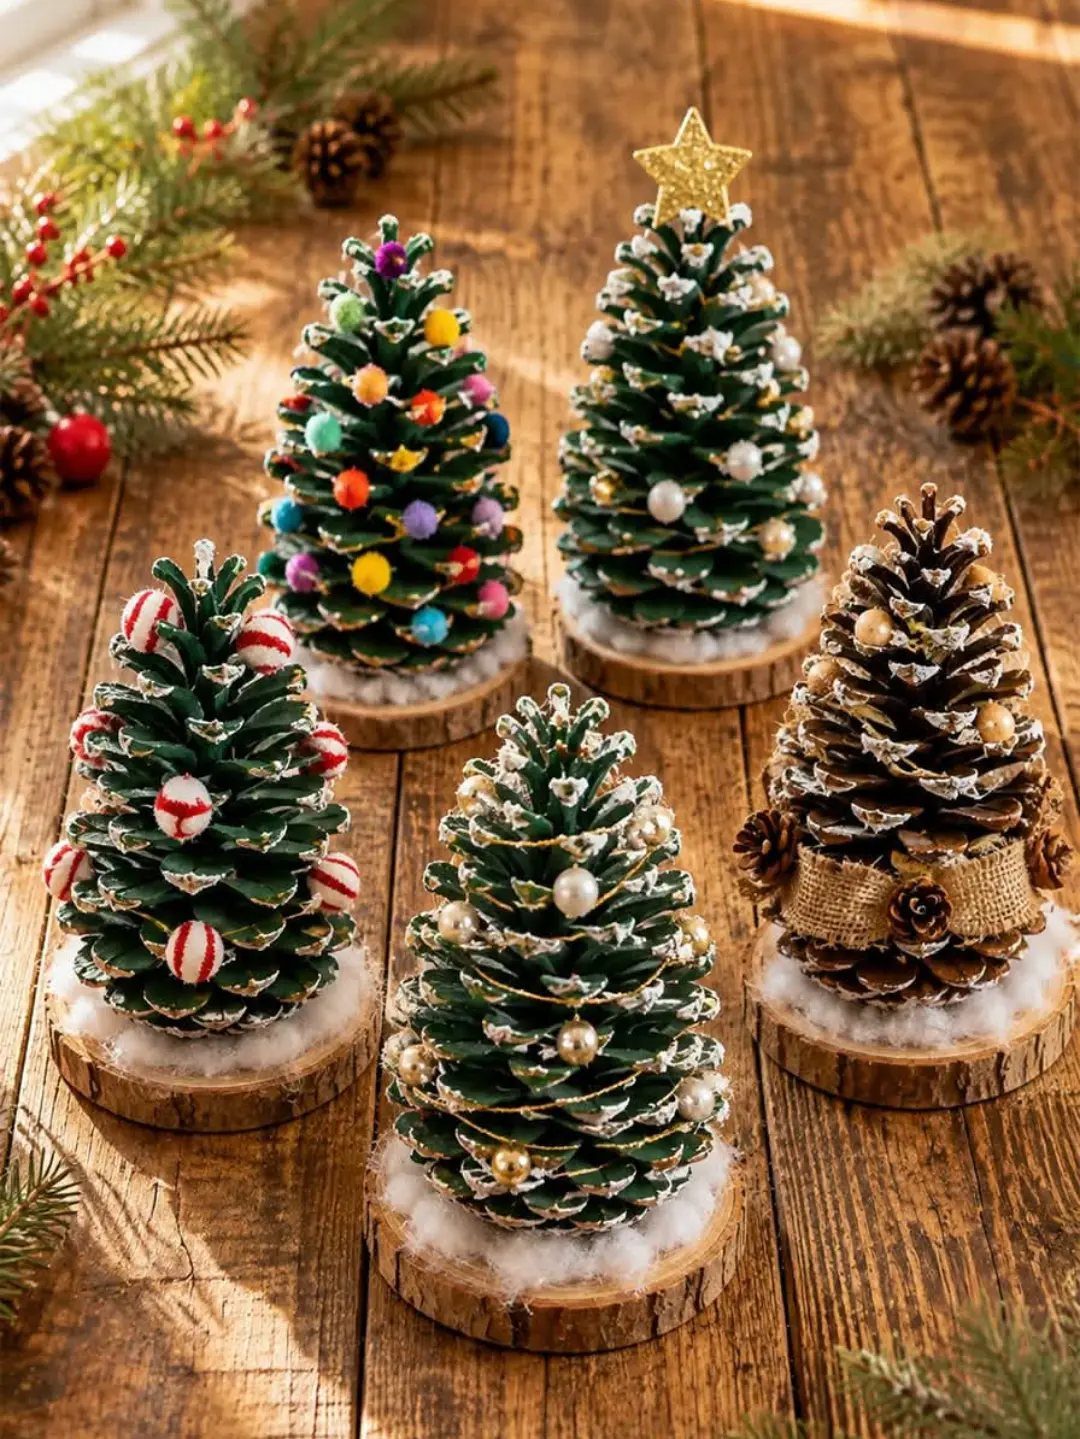
Pinecones already look like small trees, so most of the work is done before you start. Glue each one upright onto a wood slice so it stands on its own.
Decorate with tiny colorful ornaments, dotting glue where each one goes. Tacky craft glue holds better than a quick-drying type here, because it grabs the rough scales.
Gather the pinecones on a walk, then set a row of 5 on a table with a few pine branches.
11. Christmas Tree Collage
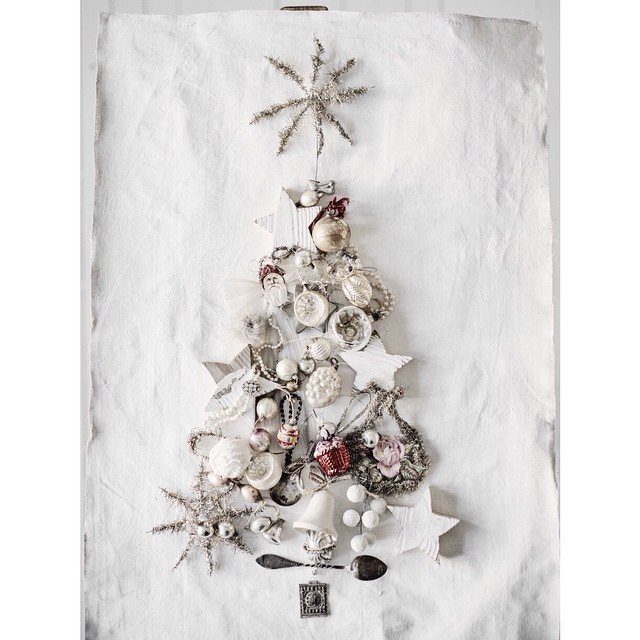
White and silver ornaments, beads and a piece of fabric are enough for a tree shape made of texture instead of color. Lay a white cloth flat as the background and build the triangle on top.
Arrange everything loose first, big pieces at the bottom, small beads toward the point. Glue down only when the shape pleases you.
I like this for kids who want freedom, since any piece can go anywhere. Broken or odd ornaments work well here.
12. Christmas Village
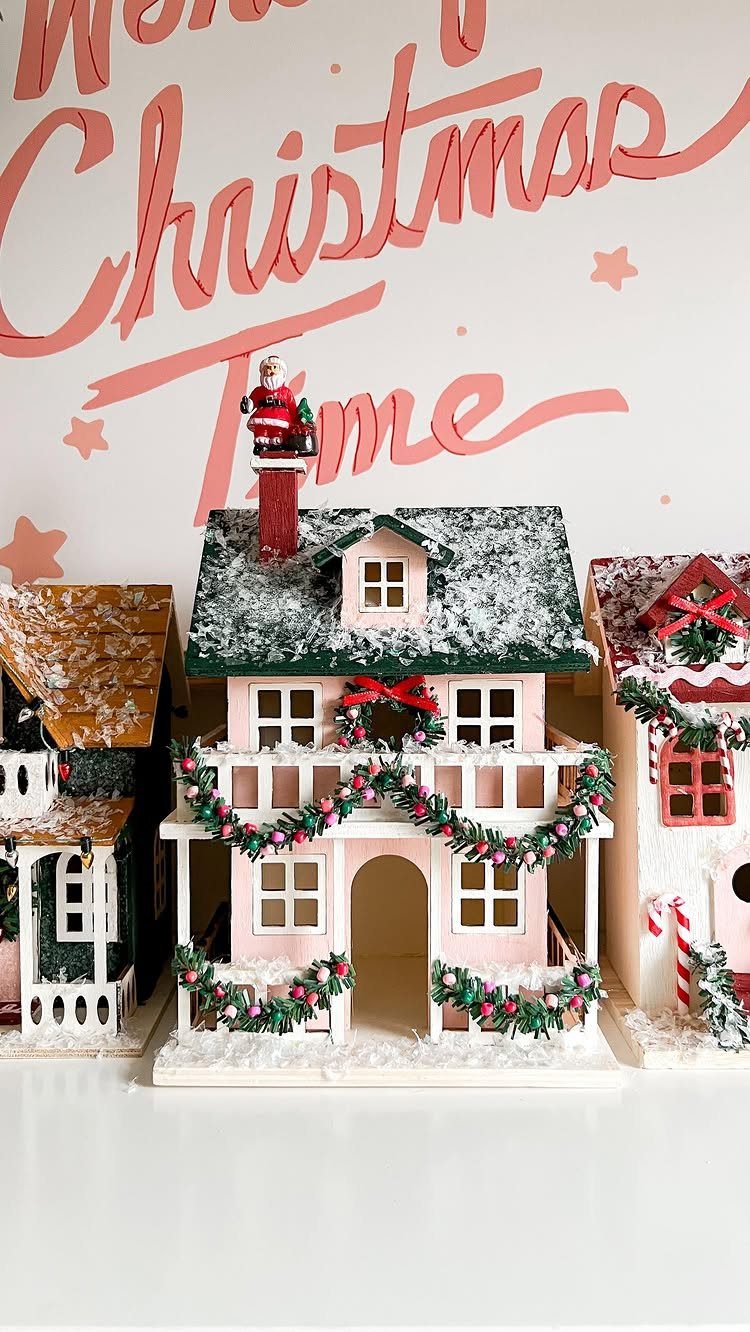
Dust snow on the roofs and drape garland along the front so it reads as a street.
Start with one or two houses and add a few each year; the village grows without a big spend. Paper or cardboard houses cost less than ceramic ones, and kids can paint them.
Put the village against a plain wall and add a hand-lettered sign like "Christmas Time" behind it.
13. Frosted Christmas Luminaries
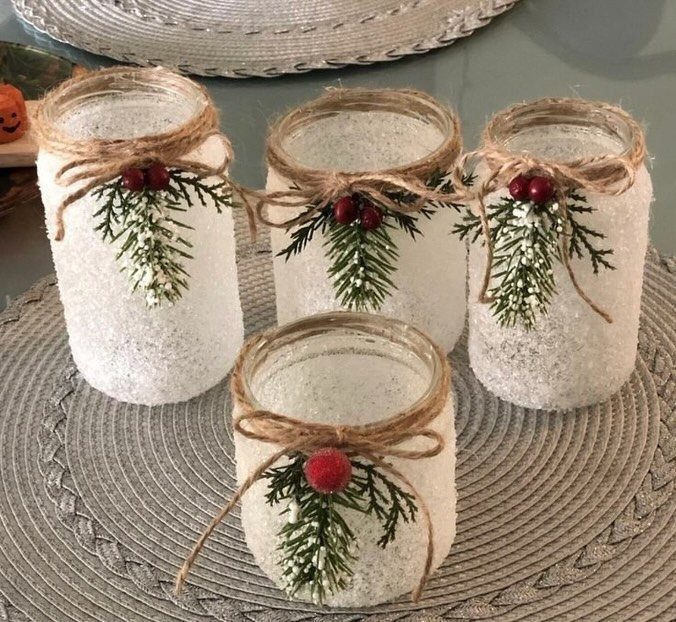
Frosted glass jars turn into luminaries once a tea light or LED candle goes inside.
Tie the twine tight around the neck of each jar and tuck the sprig under the knot, so nothing slides. Make a set of 4 in matching jars and the group looks planned.
I would choose LED candles for a table that kids will pass by.
14. Pom Pom Christmas Garland
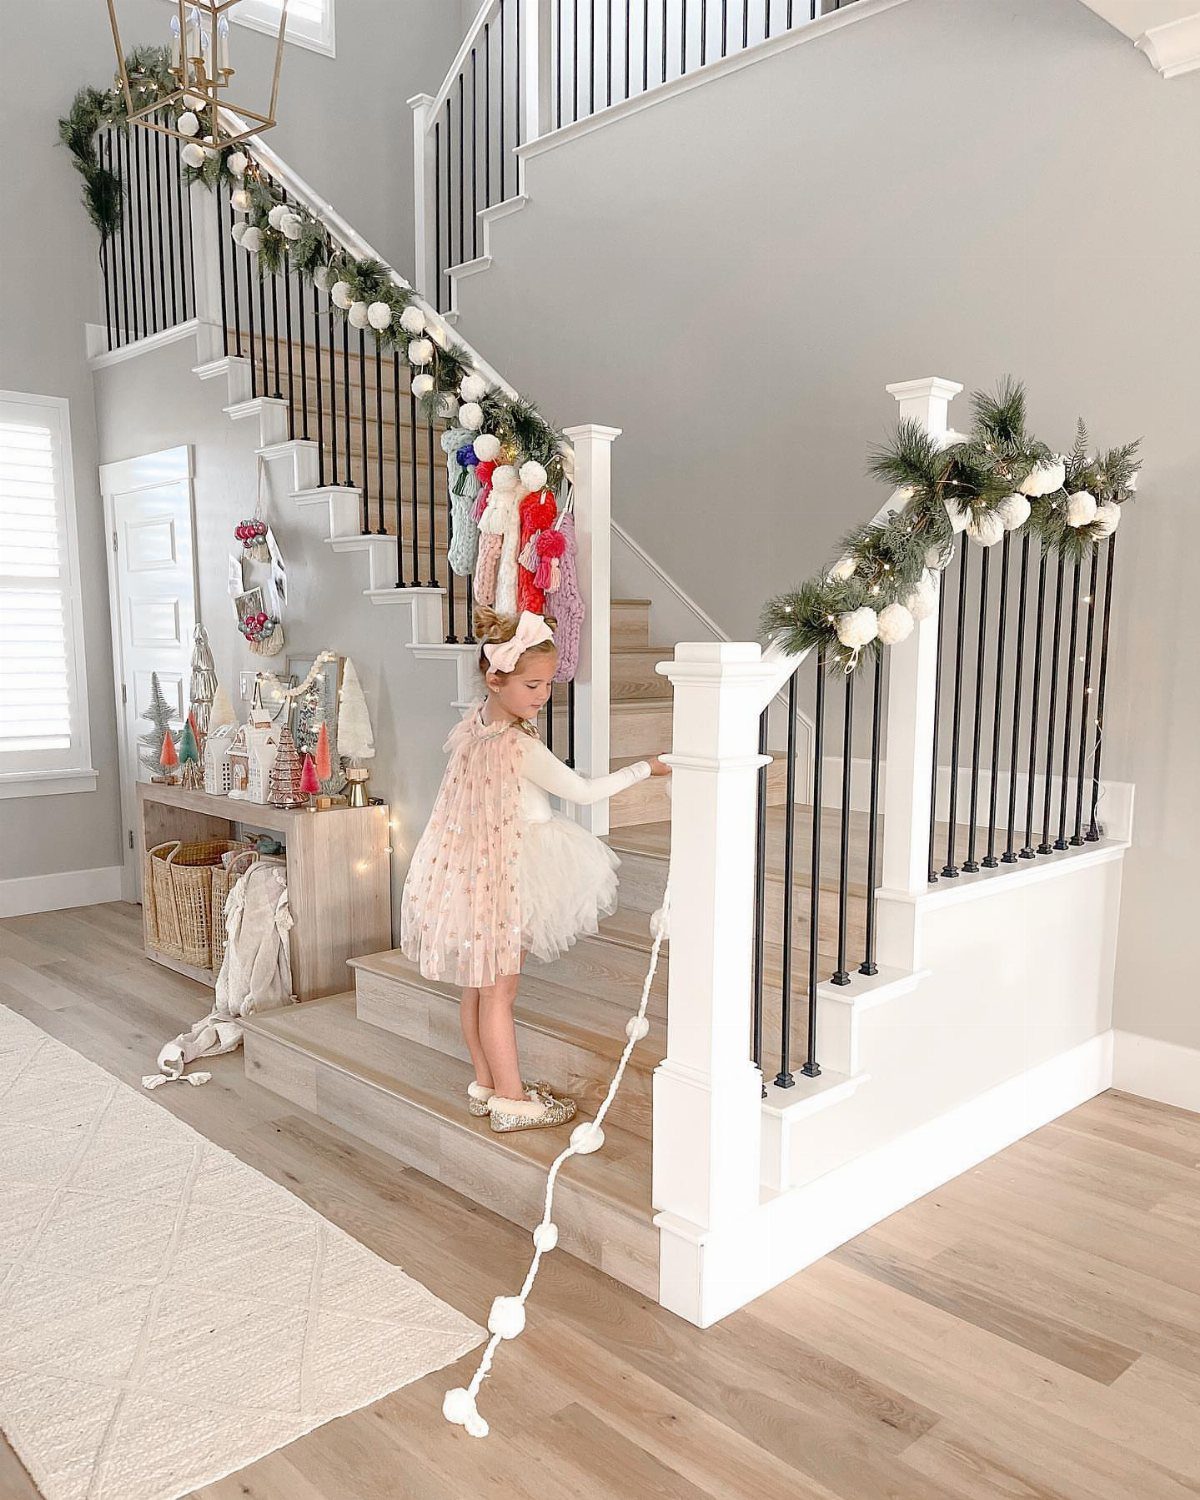
A pom pom garland is one of the few holiday decorations a child can make nearly alone. Pick two looks: white for a calm staircase, or a mix of colors for a playful one.
Thread the pom poms onto a long string with a large-eye needle, spacing them evenly. Tie a loop at each end so the garland hangs from a hook without tape.
Buy pre-made pom poms to save time. Making them from yarn costs less, but it takes much longer.
Budget-friendly Crafting
A craft counts as free when it runs on what most households already have: recyclables, things from outside, or printables that cost nothing to download. If a project needs a purchase, keep it small and pick something sold almost everywhere.
Before buying anything, I would empty a recycling bin onto the table and sort it. Cardboard tubes, egg cartons, jar lids and cereal boxes all turn into something with paper and glue.
Set a spending cap for the whole project before you shop, and write it down. A cap makes you check the drawer first, and it keeps one impulse buy from becoming five.
Printables are the easiest free option. A home printer and plain paper are enough, and kids can color them with crayons already in the house.
Family Involvement
Give each person a job that fits their age, and the table runs more smoothly. Little kids can sort, stick and press, older kids can cut and measure, and an adult handles anything hot or sharp.
Set the date ahead of time, the way you would plan a meal. Laying out every supply before anyone sits down keeps the mood good, because nobody waits while you hunt for scissors.
Cover the table with paper or an old cloth first. Glitter gets everywhere, so I would keep it to one tray or one project.
Let finished pieces dry in a spot where everyone can see them. Date the back of each one, and you build a keepsake box without extra effort.
Encouraging Creativity
Kids build fine motor skill when the work asks for small hand movements: pinching, tearing, threading, peeling and gluing. Offer a few of those in one sitting, and the practice happens without anyone calling it practice.
Hand over a choice instead of a pattern. Two or three colors, a few shapes and a blank sheet give a child real decisions to make.
Resist fixing the result. A crooked cut or an odd color pairing is the child’s own work, and correcting it teaches them to wait for approval.
Ask open questions like "What is this one for?" rather than "What is it?" The first invites a story, and the second can sound like a test.
Frequently Asked Questions
What are some easy Christmas crafts for kids?
Handprint Santas, paper plate wreaths and pom pom garlands are easy places to start.
For a handprint, set out one shallow plate of paint per color and brush on a thin coat with a sponge brush, since thick paint blurs the fingers.
A paper plate wreath needs only the center punched out and a handful of pom-poms and sequins glued to the green ring.
A child can string pom-poms onto yarn or twine with a blunt needle, turning out garland with almost no adult help.
How can I make Christmas crafts on a budget?
Start with what the house already holds: recyclables, things from outside, and free printables. Raid the recycling first: toilet paper rolls become trees, egg cartons turn into ornaments, and cardboard boxes cut down into whatever the craft needs.
Write down a spending cap before you shop, which pushes you to check the drawer first. When you do buy supplies, stick to basics like glue sticks, construction paper or pom-poms that every craft store and big-box retailer stocks.