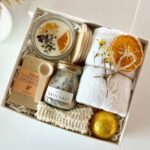
Paper and flowers have to suit each other, and the Choose Wrapping Materials step is where that gets settled: pale shades flatter a soft mix, and a frosted or translucent sheet over a darker one takes the harshness off.
The ideas run from simple tissue and cellophane wraps to a paper bow, a bordered sheet, layered paper and ribbon or twine, plus the stem and freshness steps that keep it all looking right.
1. Trim Flower Stems
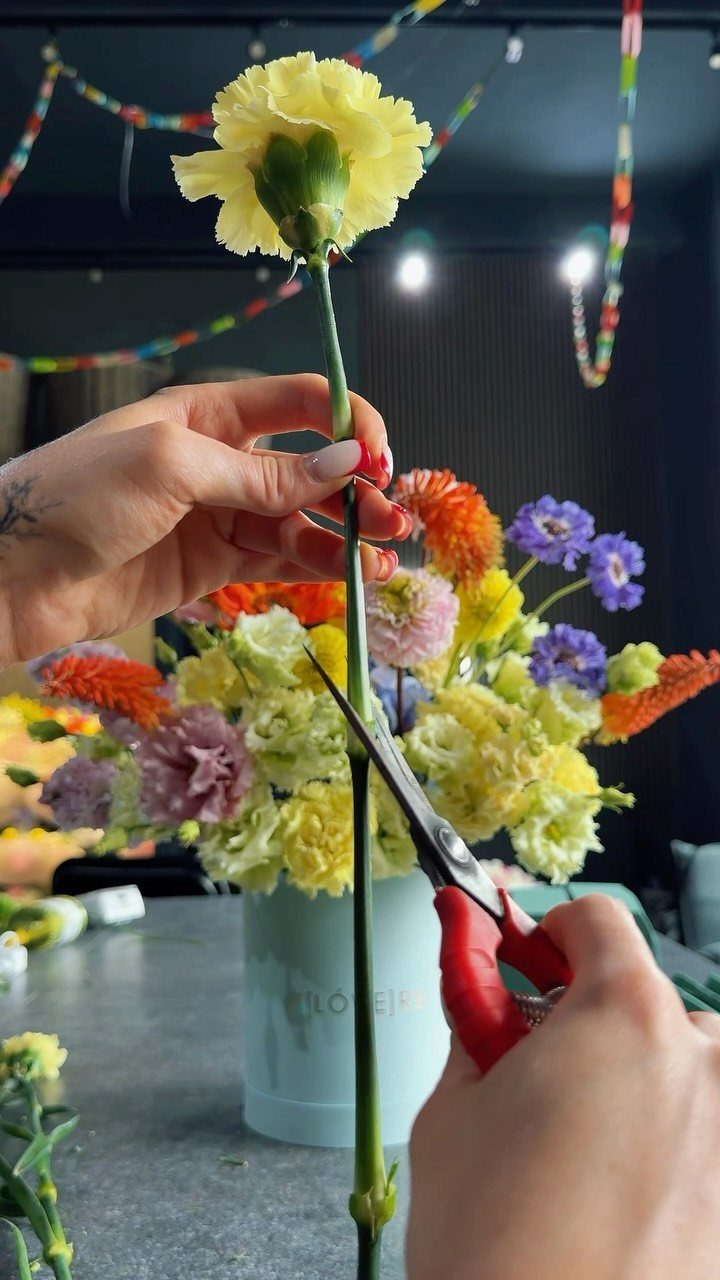
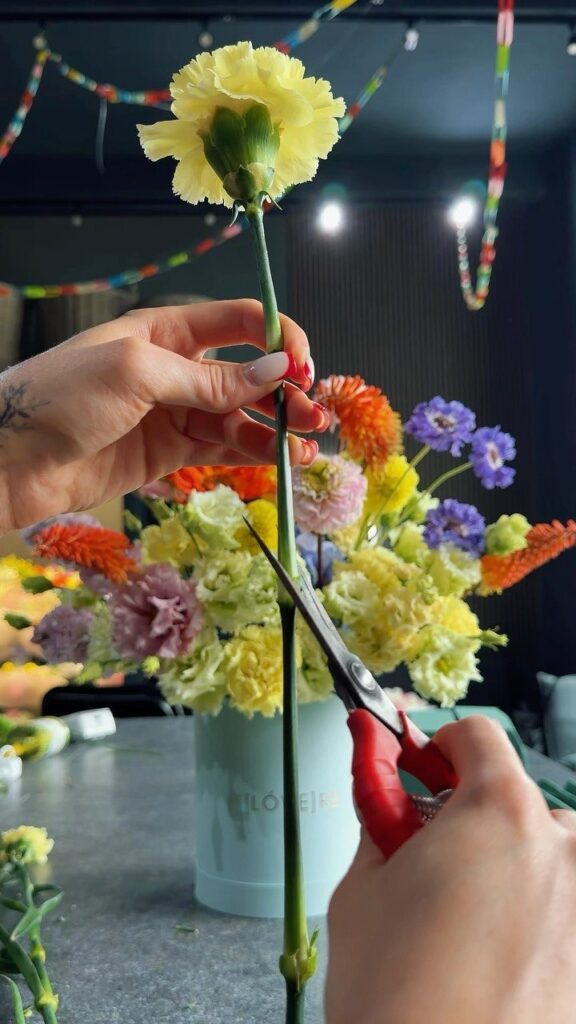
Cut stems on a slant with sharp scissors, and do it before any paper comes out. A fresh angled cut gives each stem a clean face to drink from, and it lets you set the lengths you want.
Carnations are forgiving, so they are a good flower to practice on. Keep the stems in the same range so the bundle gathers evenly in the paper.
2. Use Tissue Paper and Cellophane
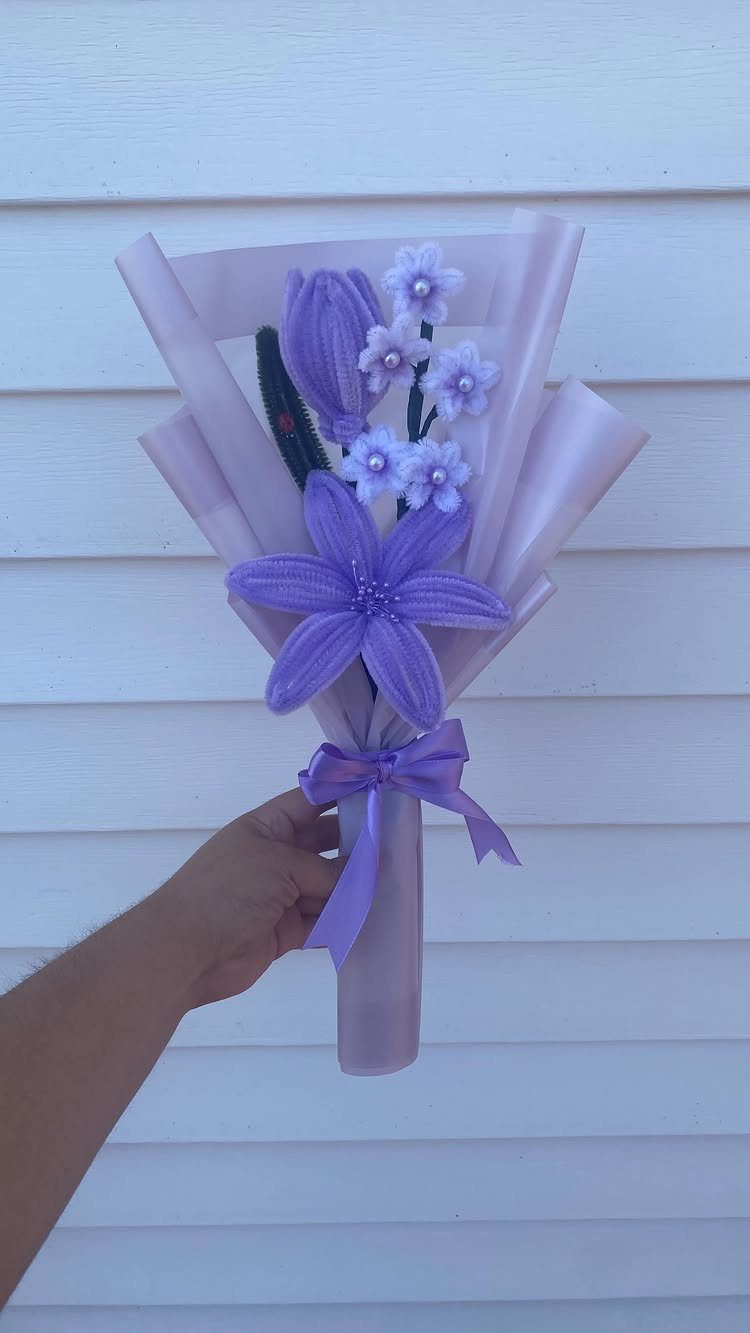
Tissue paper under cellophane gives a bouquet 2 layers that do different jobs: the tissue brings color and softness, and the cellophane adds shine and holds the shape.
Matching both to one hue, as in a single-color purple wrap, looks deliberate rather than busy.
Lay the tissue down first, set the flowers on it, then bring the cellophane up around both.
Gather everything at the base and tie it with a ribbon. I would pick a ribbon in the same color family so the tie reads as part of the wrap.
3. Arrange Flowers in a Fan Shape
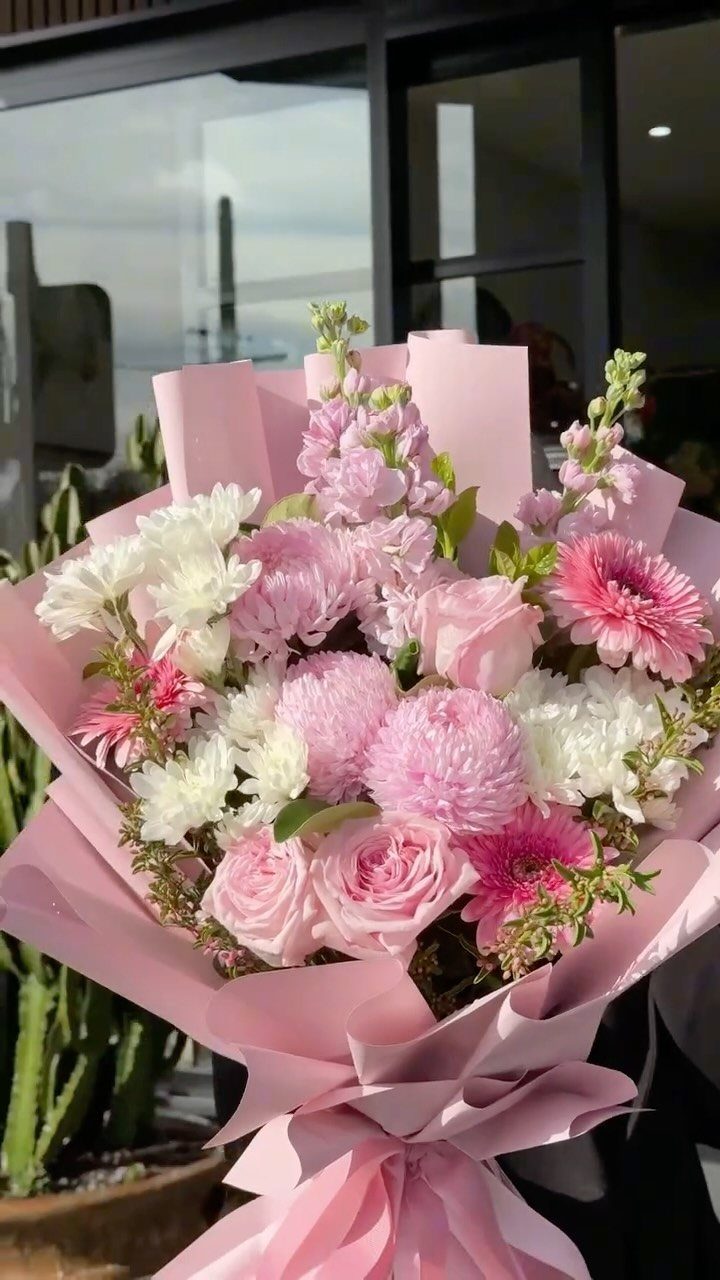
A fan shape starts with how you hold the flowers. Spread the stems in your hand so the heads open outward like a half circle, then set the paper behind them as a backdrop.
Light pink paper suits a pink and white mix, since it frames the blooms without competing. Fold the paper in a cone or a loose pleat, tuck it behind the heads, and bind the stems once at the base.
Balance matters most here, so turn the bouquet and check it from every side before you tie it.
4. Large Paper Bow Accent
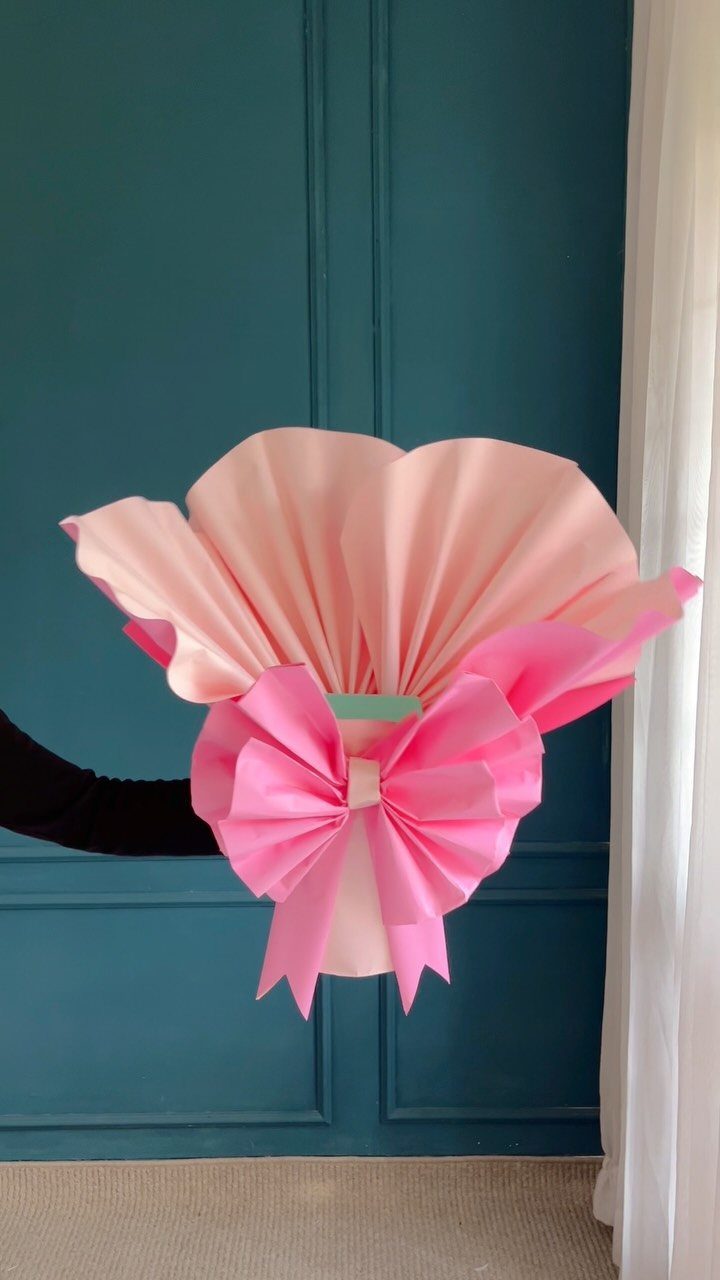
Paper bows give a bouquet a bold finish that ribbon rarely matches. One large bow in a bright shade, set against pastel wrapping, becomes the focal point of the whole piece.
I like matching the bow’s color family to the wrap, a bright pink over light pink, so it stands out without clashing.
Make it from the same kind of paper as the wrap, then attach it at the front where the paper gathers. Keep it big; a small paper bow looks lost.
5. Bordered Wrapping Paper
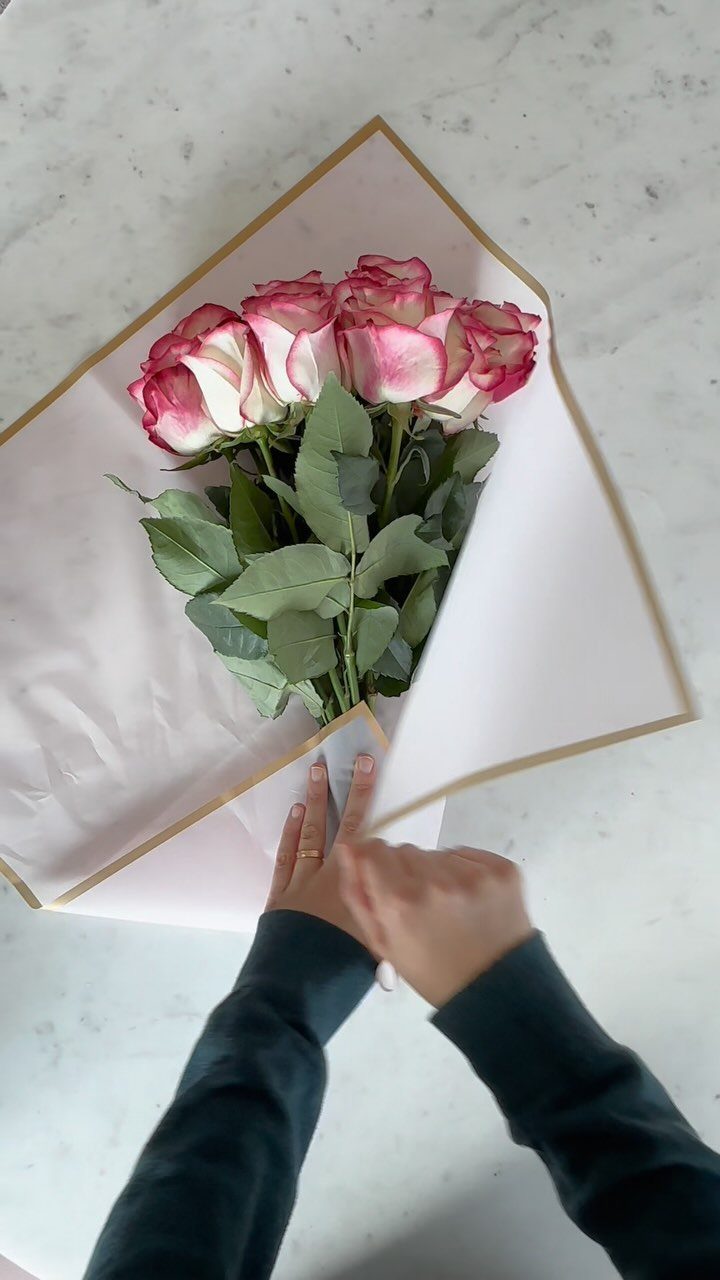
Paper with a contrasting border makes the edge of the wrap part of the design. A gold edge on pale pink paper frames roses in a way plain paper cannot.
Fold the paper so the border shows along the top edge where it wraps around the blooms.
Let the borders peek out evenly, and wrap with the flowers resting on a clean, flat surface so the creases stay crisp. Gold borders pair well with soft colors, and they keep a pink and white rose bouquet looking polished.
6. Voluminous Layered Paper Wrap
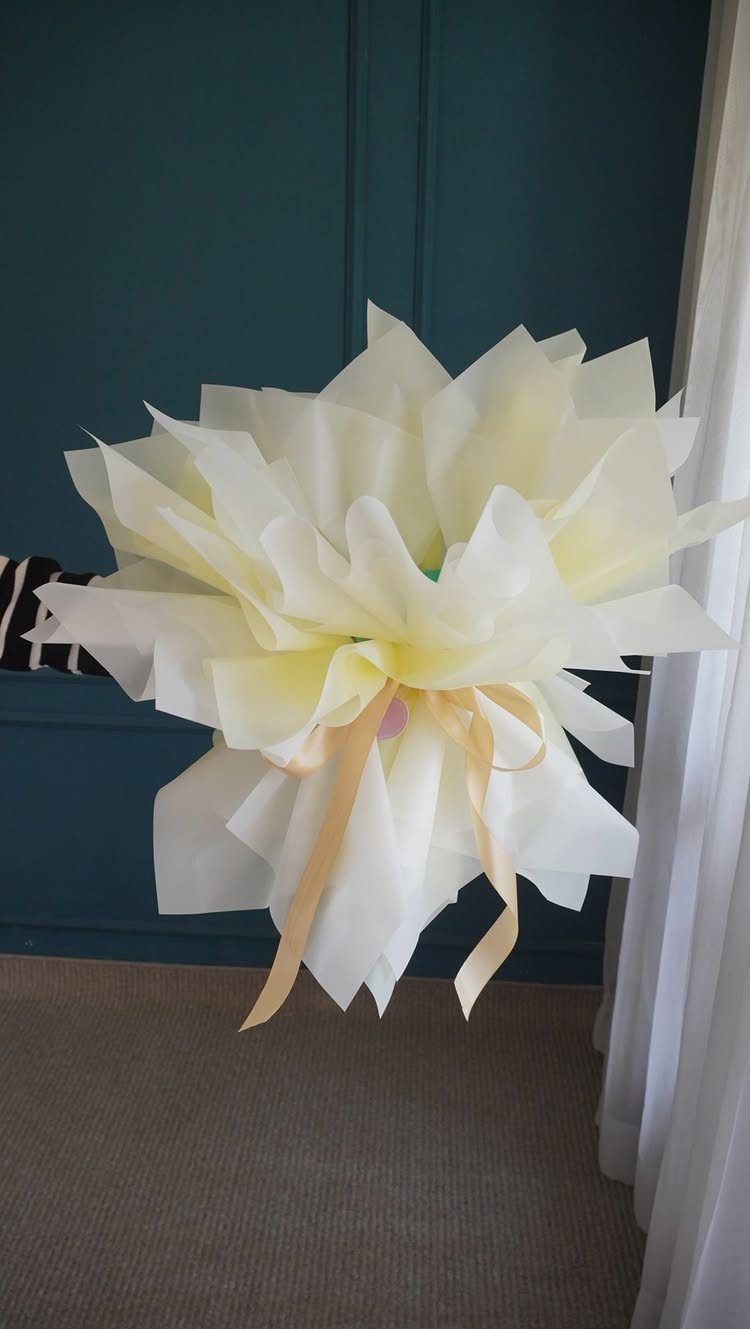
Volume comes from stacking sheets, not from using more paper in one piece. White and yellow layers, offset so each shows a little around the edge, give the wrap a full, ruffled look.
Place the sheets at slight angles, set the flowers in the center, then gather everything up and tie it with a gold ribbon.
The bouquet will look bulkier, so choose a ribbon wide enough to hold the layers firmly at the base.
7. Matte and Translucent Paper Layers
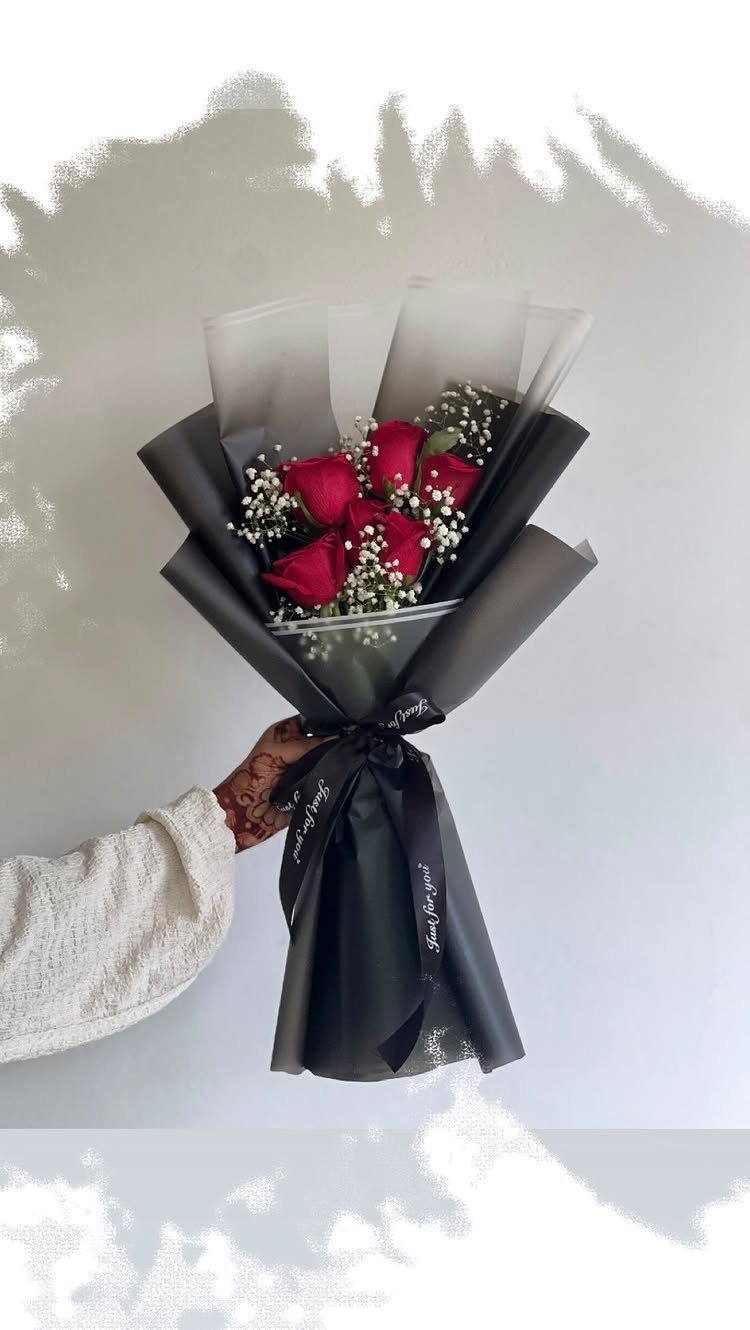
Pairing a matte dark sheet with a frosted translucent one gives red roses a stage with two textures. The black reads solid and graphic, while the sheer layer softens it and lets the baby’s breath show through.
Set the opaque sheet behind the stems and lay the frosted one over the front, so the blooms sit between them.
A ribbon with a short message, tied at the gathering point, finishes it without extra decoration. I would keep to 2 papers; a third muddies the contrast.
8. Translucent Colored Paper Wrap
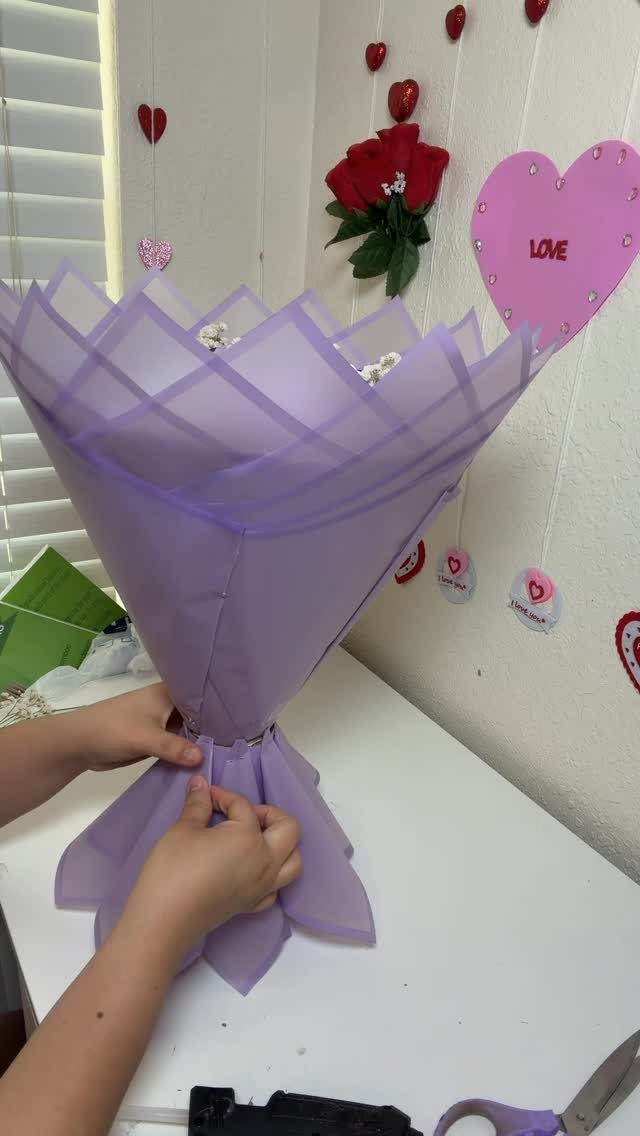
Semi-sheer tinted paper lets the flowers show through while washing them in a little color. Purple is a good pick because it flatters most blooms without hiding them.
Wrap on a clean, flat table so the paper stays smooth, and bring each side up around the stems one at a time.
Pleat the paper loosely at the base rather than pulling it taut; sheer sheets show every crease, so work slowly and keep your folds few. Tie off once the shape looks even.
9. Use Ribbon or Twine
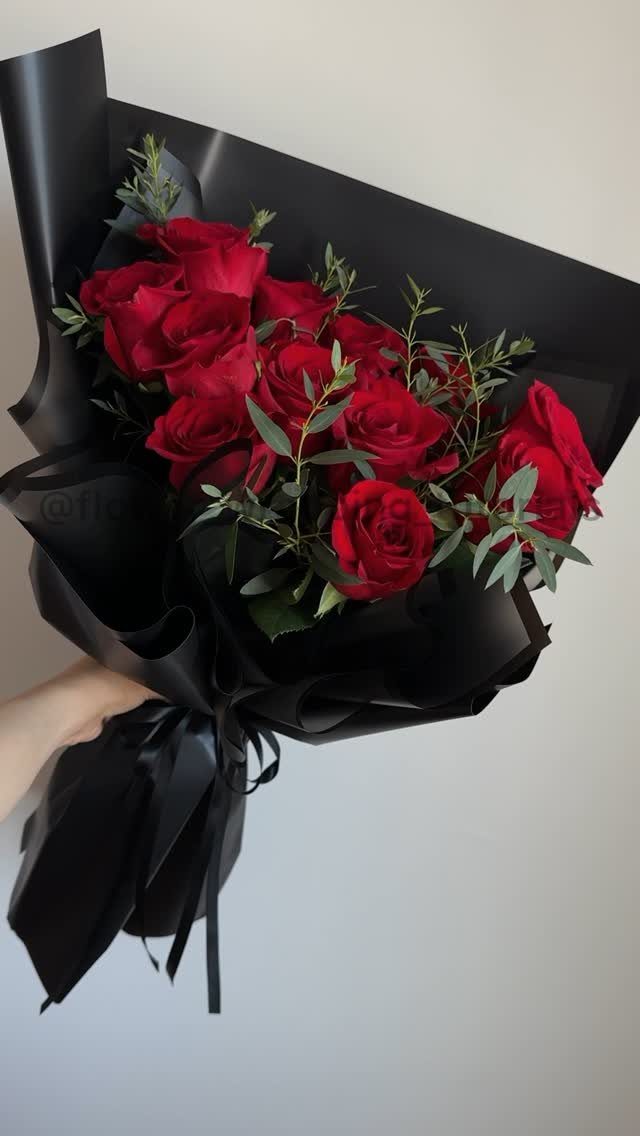
A ribbon does the practical work of holding the paper at the stems, and it gives the bouquet its last bit of character.
Black ribbon over black paper keeps a red rose bouquet tonal, so the roses carry all the color.
Tie it snugly at the point where the paper gathers, then finish with a knot or a bow.
Twine is the rustic alternative, and I would save it for kraft or softer papers, where it suits the look better than it would on glossy black.
Keep Flowers Fresh
Moisture is what keeps a gifted bouquet looking good after the drive. Wrap the cut stem ends in a damp paper towel, then cover the towel with plastic wrap so nothing leaks into the paper.
Size the plastic wrap so it overhangs the damp towel by a couple of inches on every side. If the towel pokes past the edge, water can soak into the wrapping paper and leave it limp and spotted.
Once the stems are wrapped in plastic to hold moisture, fold the paper over the plastic, one side and then the other, and finish the bouquet with tape or ribbon.
Fresh flowers hold up better than tired ones, so buy them as close to gifting day as you can.
Choose Wrapping Materials
Pick the paper to suit the flowers, not the other way around. Kraft, tissue and cellophane all work, and a solid color or a pattern both look good as long as they complement the blooms.
Start with a square or rectangle of paper big enough to circle the stems fully, with a few extra inches on each edge. Too small and the paper gapes at the sides; extra can be folded back or trimmed.
Rectangular tissue paper needs no folded bottom corner.
Fold the left edge in snugly, lay the right edge over it, then tie the bundle closed. A simple ribbon looks good on a patterned sheet.
Practice Wrapping Technique
Wrapping flowers takes a few tries, and the first bouquet is rarely the best one. Buy a cheap bunch to practice on before the one you plan to give.
A baseball diamond helps with placement.
Keep the wrap simple. A plain, neat fold usually looks better than a busy one, and a handwritten note makes the bundle feel like yours for almost no extra effort.
Frequently Asked Questions
How do florists wrap flowers?
Florists build a wrap in 3 layers: paper outside, plastic wrap in the middle, and a damp paper towel holding the stem ends. Layering protects the stems and gives the bouquet a finished look.
What can I wrap my flowers with?
Kraft paper, tissue paper, cellophane and newspaper all work. My pick is tissue under cellophane: tissue brings color and a soft look, while cellophane gives shine and keeps the bundle in shape.
Match the paper to the flowers, then cut a sheet large enough to wrap around the stems with 2–3 inches to spare on every edge.
How do I keep flowers fresh after wrapping?
Wrap the cut stem ends in a damp paper towel, then cover the towel with plastic wrap.
The plastic keeps moisture against the stems and keeps water out of the paper, which would otherwise go limp and spotted. Fresh flowers last longest, so buy them as near to the day you give them as possible.
How should I cut flower stems before wrapping?
Before you touch the wrapping paper, trim the stems at an angle with sharp scissors. Trimming also sets the stem lengths, and keeping them close together lets the bunch sit evenly in the paper.