Paper is the only material here, but the projects range from simple snowflakes a child can cut and tape together to 3D gold paper stars that need firm, sharp creases.
Time and patience decide which one is yours: kids at the table or a beginner with an hour should start with paper snowflakes or the origami star bowl, while an ornament that has to look expensive from across the room, like the 3D gold paper stars, is worth a slower fold.
Kraft, burgundy and gold do most of the work in this list.
1. Paper Snowflakes
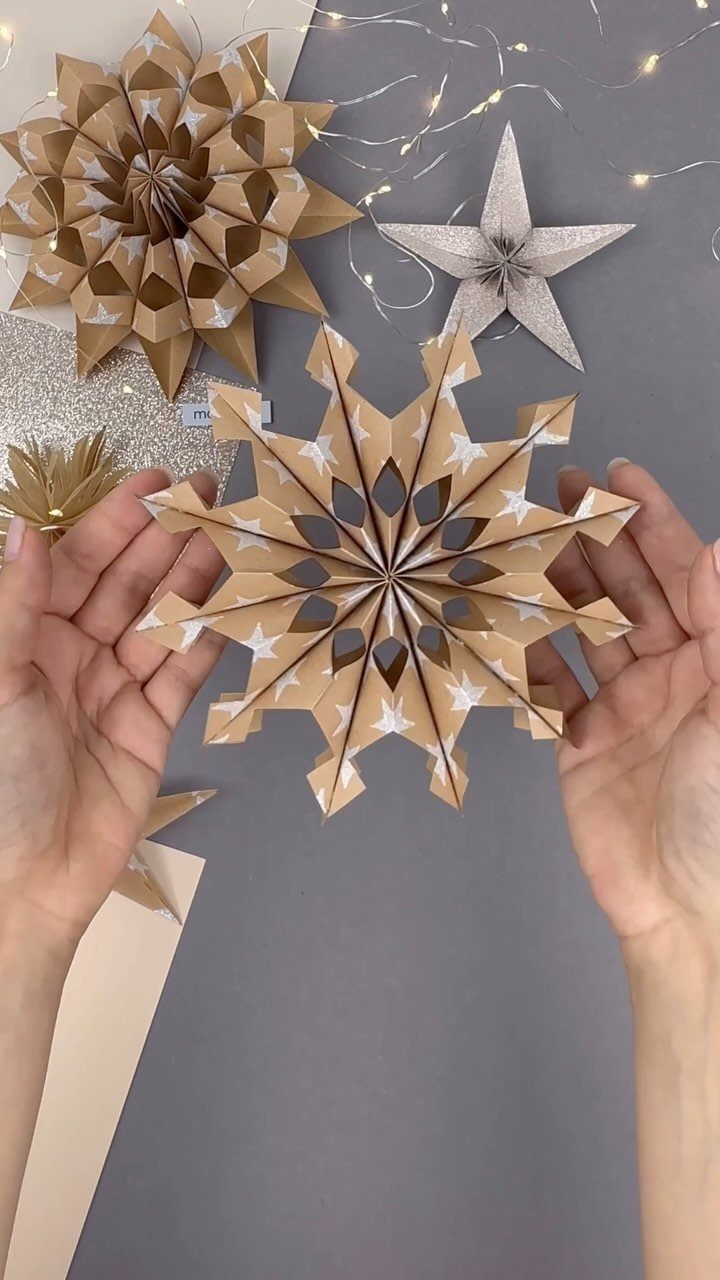
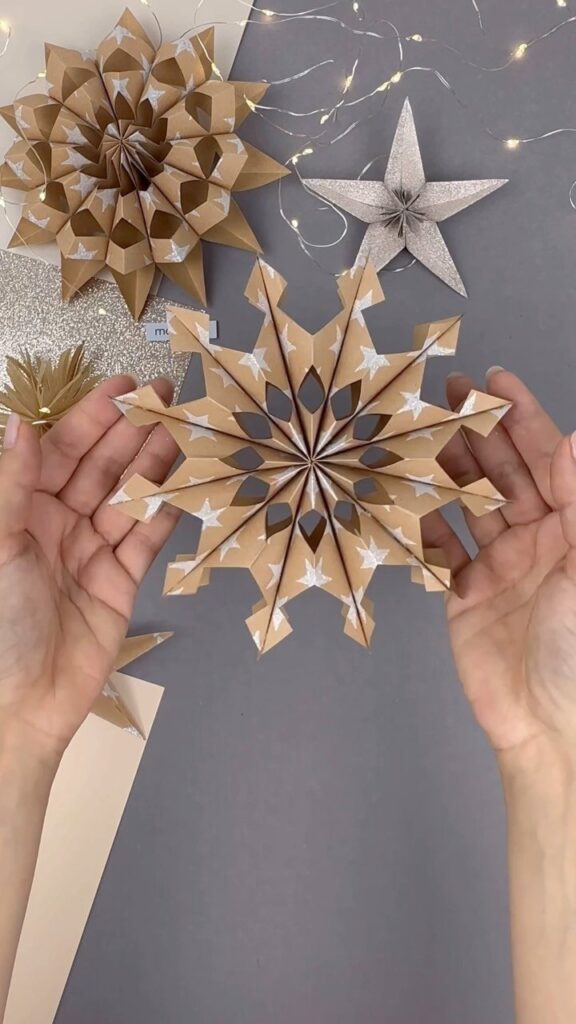
Brown kraft paper gives a folded 3D snowflake a warmer, more grown-up look than the usual white, and the white star patterns stand out against it. Kraft is also sturdy enough to hold its shape when it hangs.
Fairy lights set nearby make these look better in the evening. I would make a handful in different sizes and group them on one wall instead of spacing them out.
2. DIY Christmas Cards
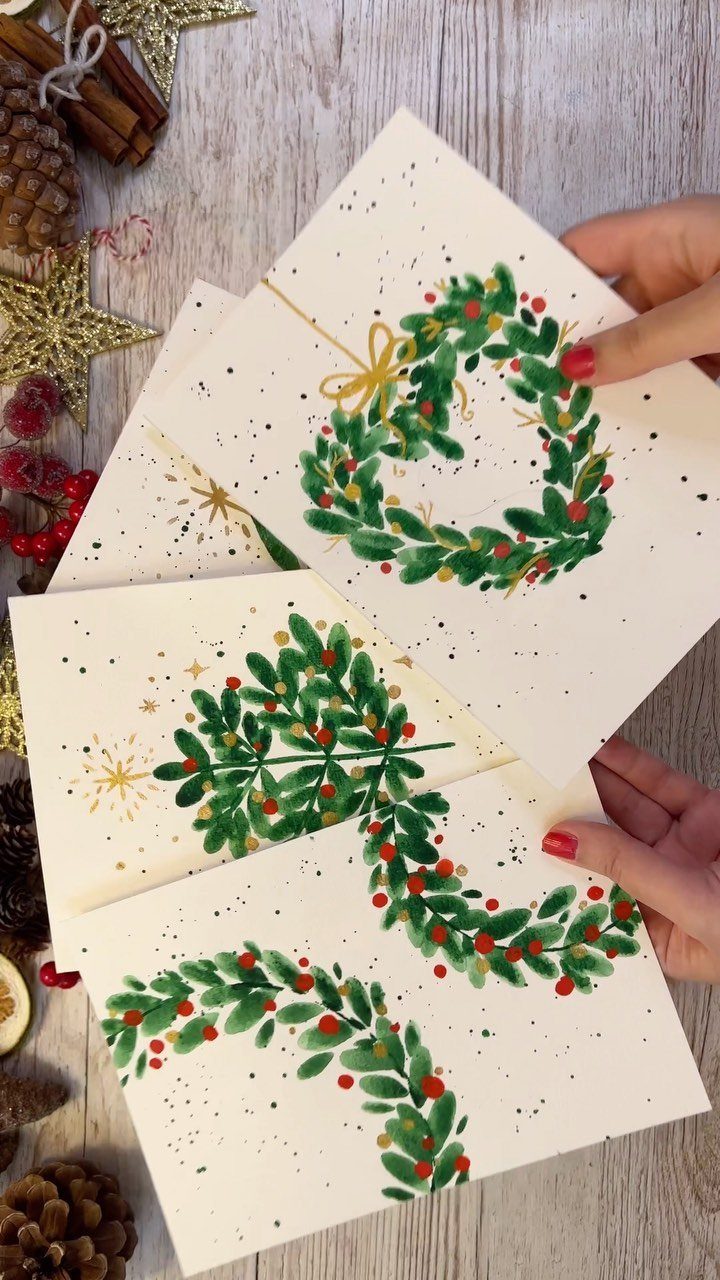
Painted wreath cards work for people who think they can’t draw. A ring of green strokes with a few red dots for berries is forgiving, because loose and uneven reads as hand-painted rather than wrong.
Make one batch at a single sitting so the paint stays consistent from card to card. A gold star tucked in at the top is an easy upgrade.
Christmas paper decorations don’t have to involve complicated instructions and a penchant for crafting.
3. Easy Origami Star Bowl
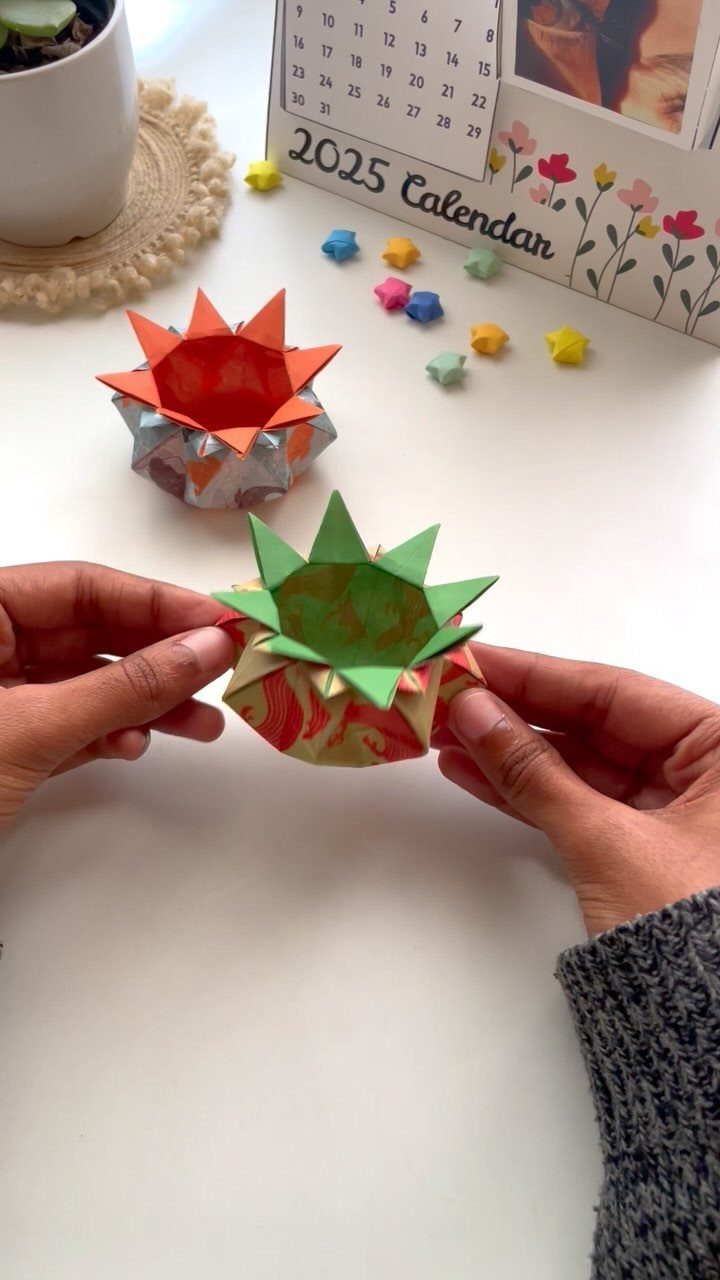
Folded from a patterned square, an origami star bowl holds wrapped candies or small ornaments on a table. A double-sided sheet, like the green and red one here, shows both colors in the points of the star.
Beginners can fold it in one short sitting, which suits kids. Make a few in different color pairs, and the set fills a shelf or buffet with almost no cost.
4. Mini Paper Wreaths
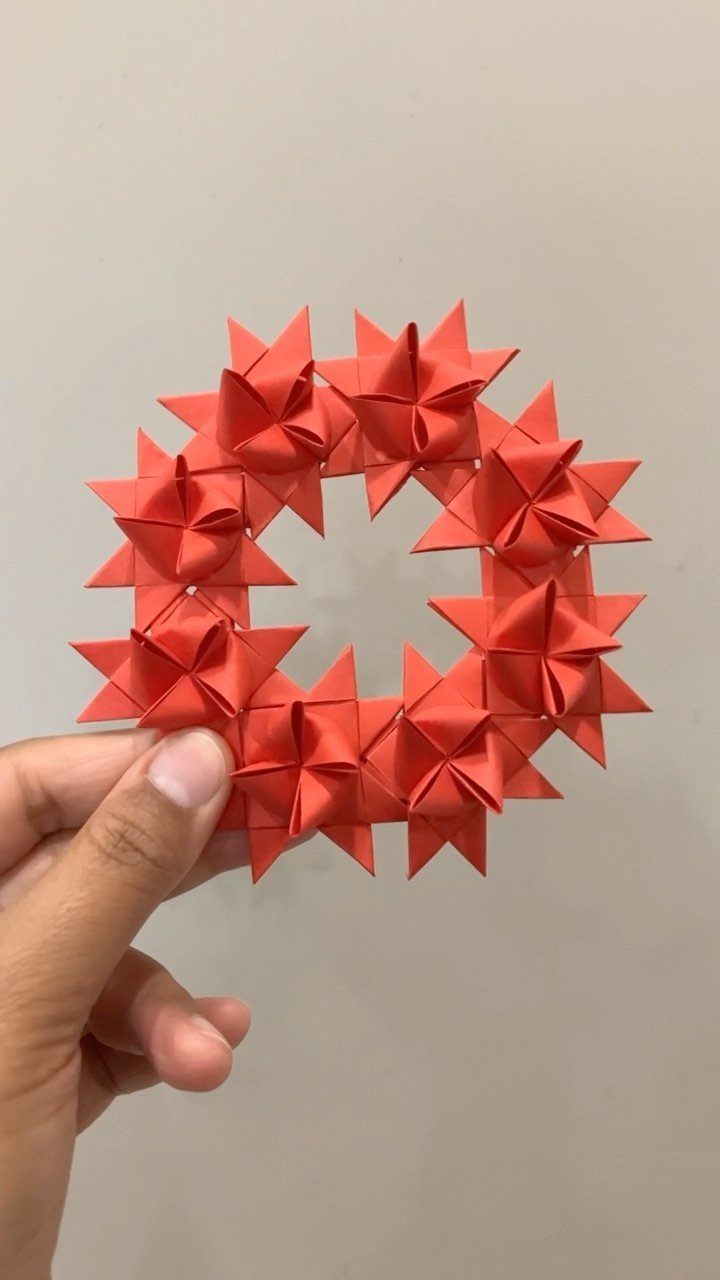
A wreath built from small red origami stars is a good use for scraps of paper. Each star is tiny, so the wreath ends up lightweight and easy to hang on a cabinet knob, a window latch or a package.
Glue the stars edge to edge on a ring base so the circle closes without gaps.
5. DIY Gift Tags
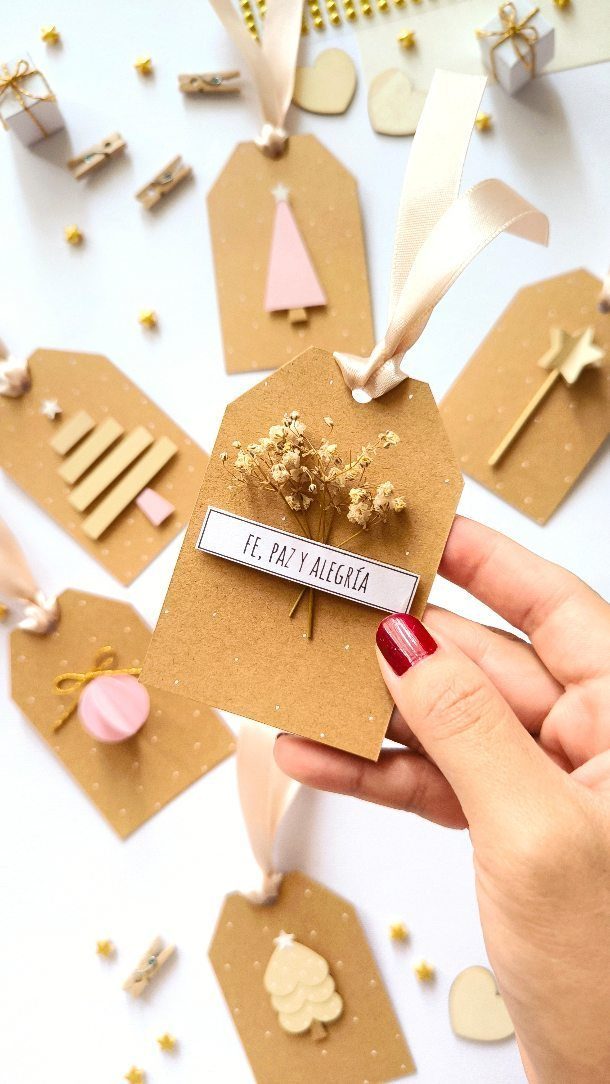
Dried flowers on a brown paper tag turn a plain wrapped present into a gift that reads as chosen. Kraft stock keeps the cost low, and a short handwritten phrase, in any language you like, makes the tag personal.
Make several in one go and keep a few spare for last-minute gifts. Flatten the flowers before gluing so the tag lies flat under ribbon.
6. 3D Paper Christmas Trees
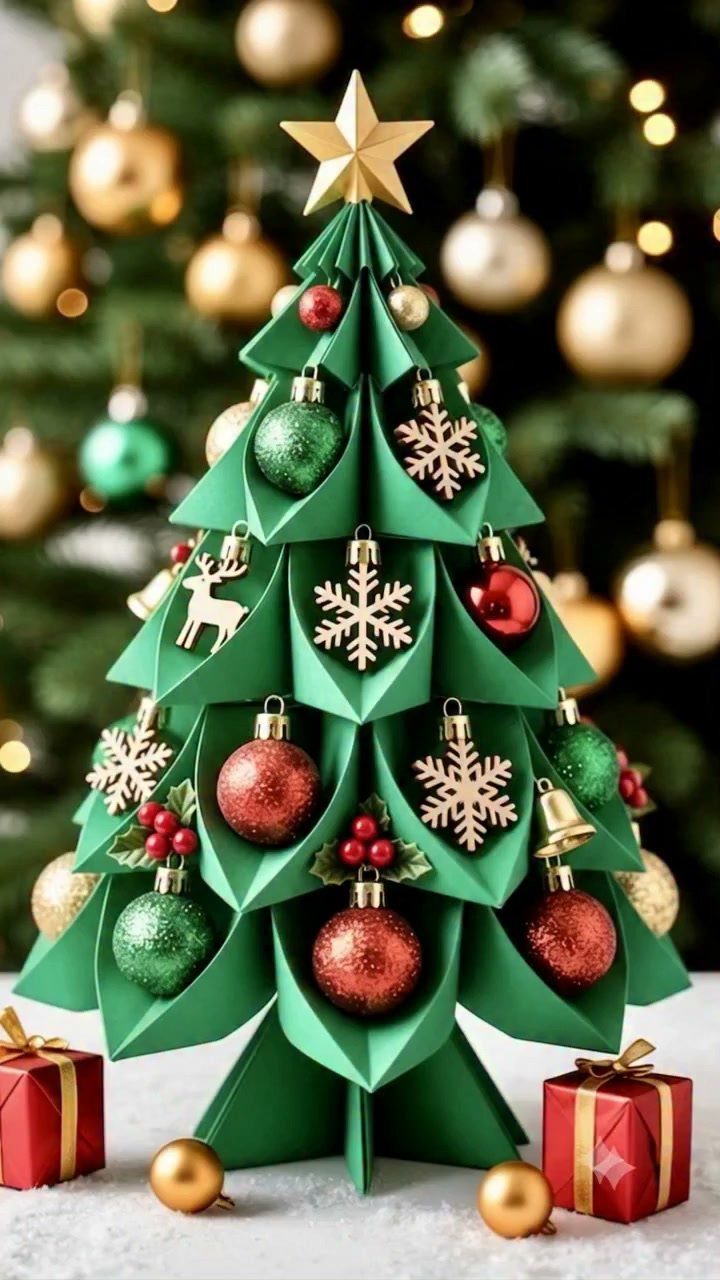
A paper tree that stands on its own works on a shelf, a mantel or a table where a real tree would never fit.
Green paper keeps it recognizable, and small ornaments plus a gold star on top give it the finished look.
I would decorate it last, after the cone or layers are glued and dry. Make a few in graduated heights and the group becomes a tiny forest.
7. Accordion Trees
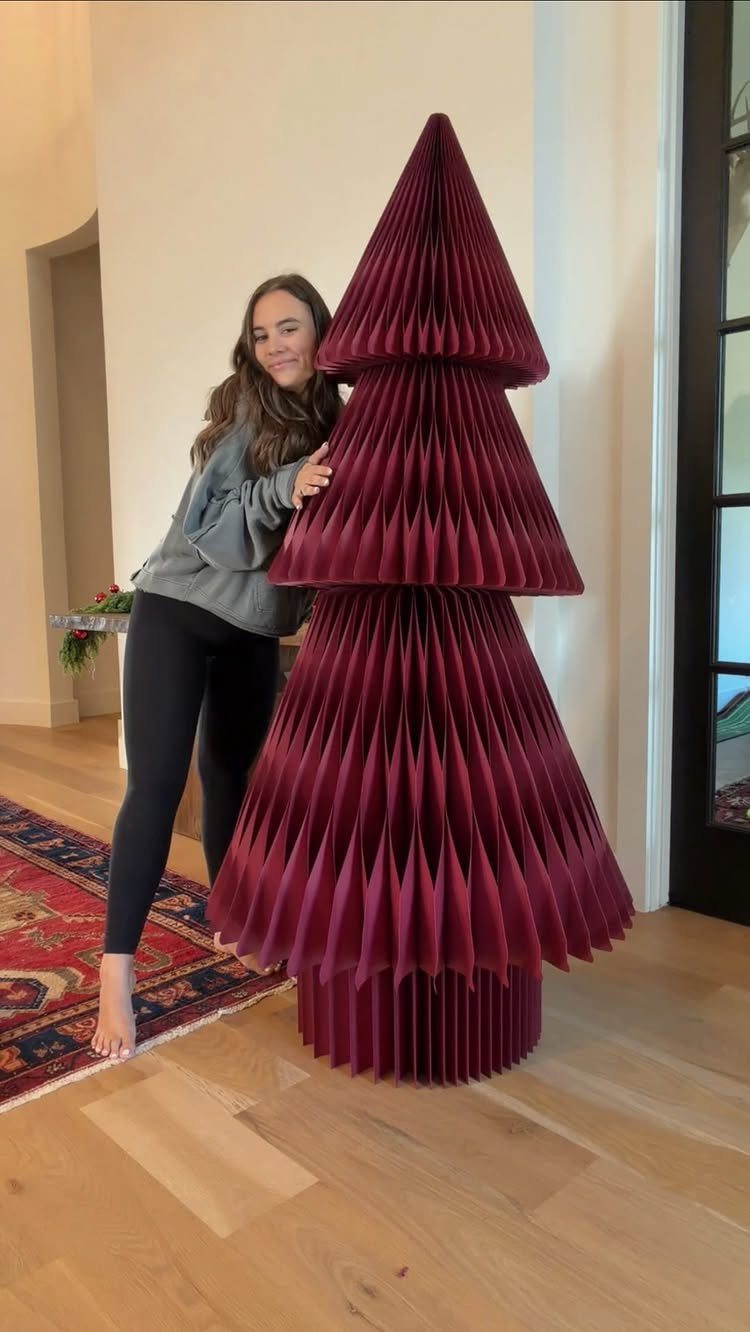
A burgundy accordion tree stands out because deep red reads as a color choice, not a default green. The folded pleats do the work, so the tree needs no ornaments to look finished.
Stiff paper holds the pleats upright; thin sheets flop. Make one tall tree for a corner and let it carry the room.
8. Paper Angel Printable Ornaments
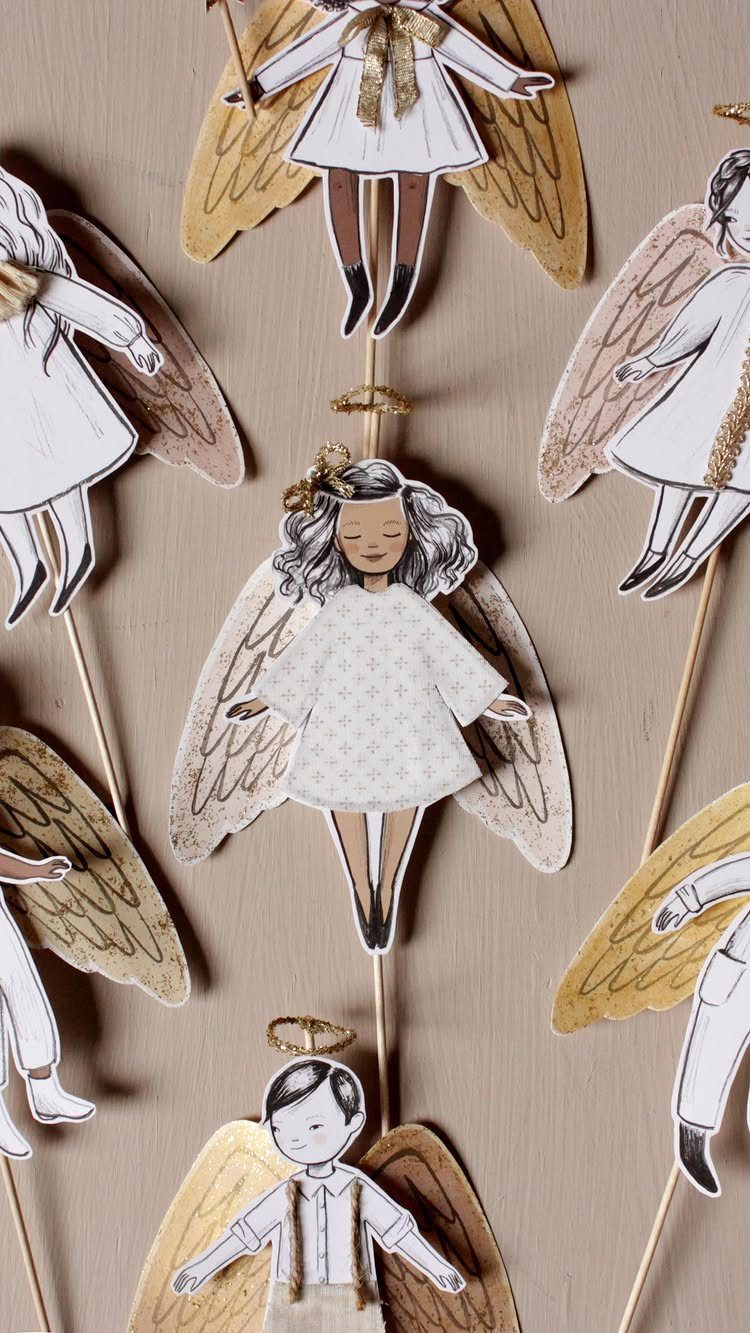
Angel cutouts on wooden sticks can stand in a pot of greenery, tuck into a wreath or sit in a centerpiece. Print them on heavy paper so the wings stay flat.
Gold accents on the wings and halos are the detail that reads as special, so a gold pen or a dab of glitter glue is worth keeping nearby.
Kids can cut them out, and the sticks give small hands something to hold.
9. Retro Paper Ornaments
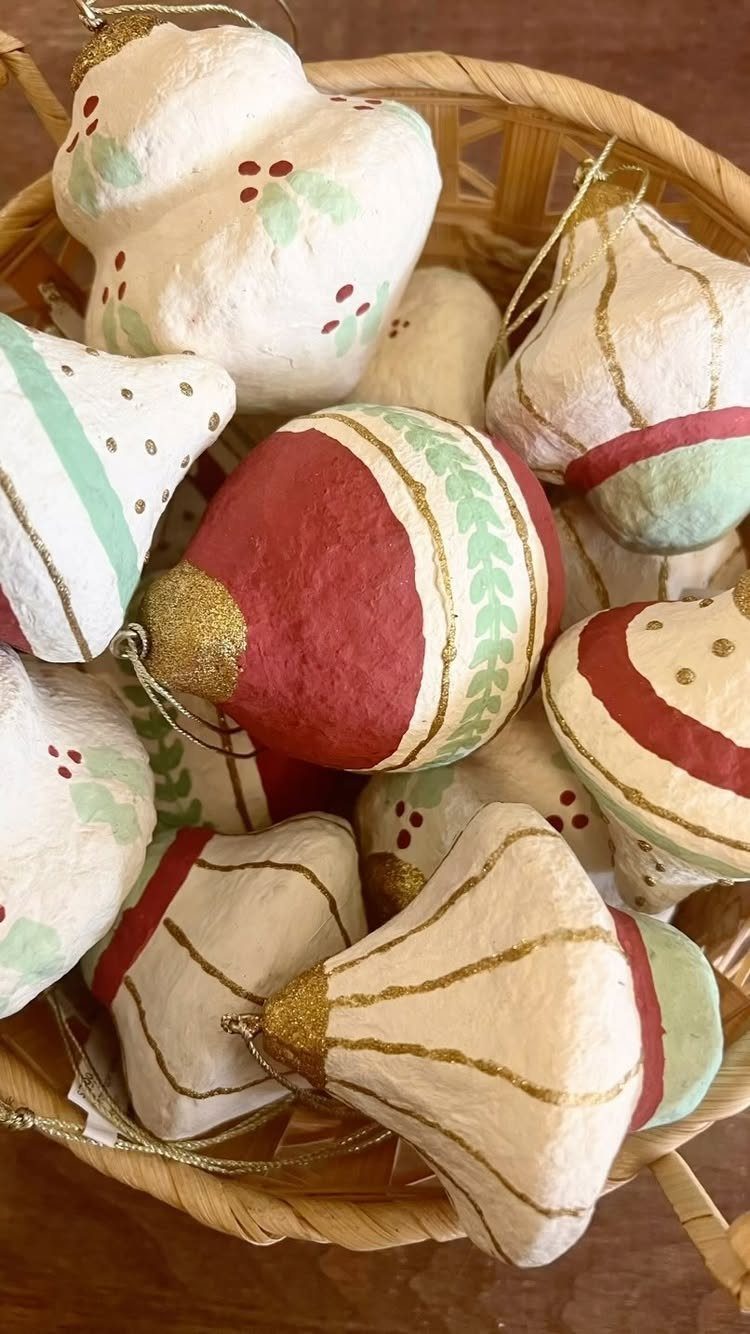
Painted paper ornaments in red, white and green with gold touches can pass for old glass ones from a few feet away.
A wicker basket suits them, and it keeps the whole set in one place until the tree is ready.
Lia Griffith designed these, so her pattern is the place to start. Paint all the pieces in one batch so the reds match, and add the gold last.
10. DIY Paper House Ornaments
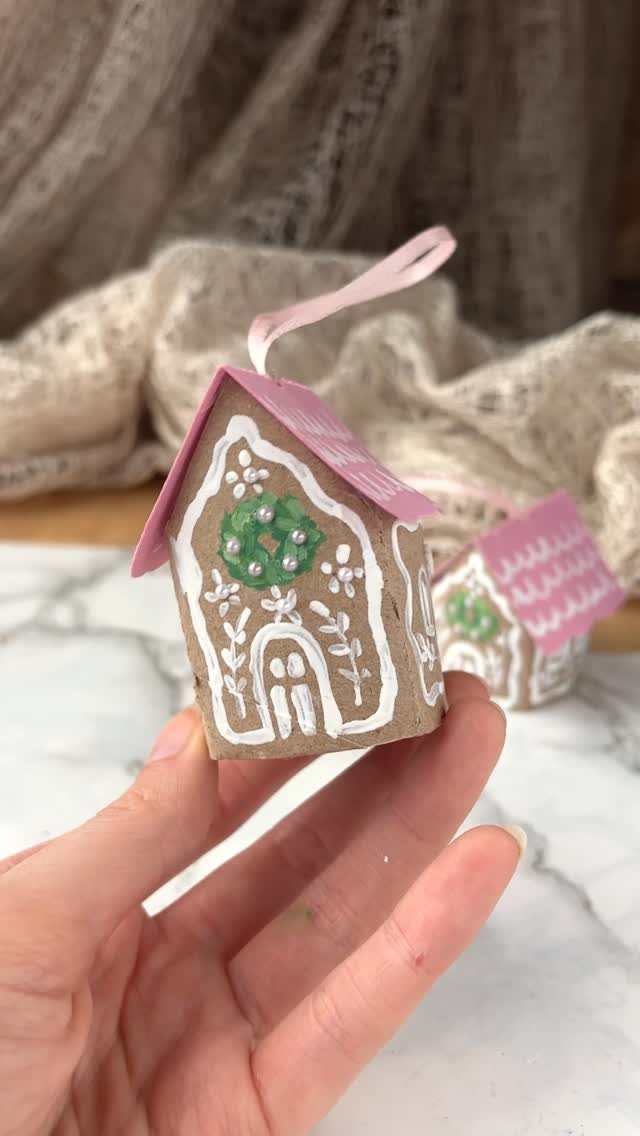
A tiny paper house with a pink roof and white icing-style trim gives you the gingerbread look without the baking.
Lia Griffith offers the pattern. Draw the white trim on slowly, and give the lines time to set before you hang the house, or they will smear.
11. Festive Paper Garland
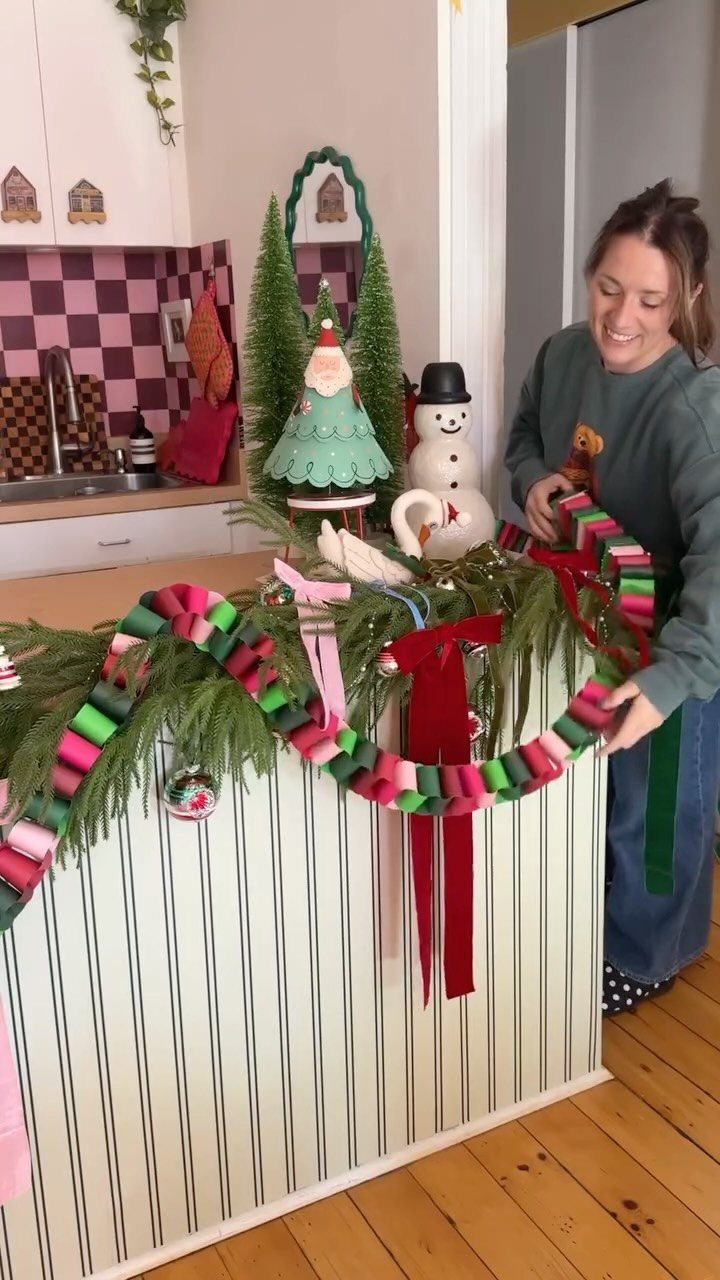
A paper chain is the easiest garland a child can make, and pink and green links look fresh draped over real greenery. Cut equal strips, loop one through the last, and glue or tape each ring shut.
Stick to a pair of colors, or a third at most, instead of a full rainbow, and the garland looks planned. Lay it along a counter or mantel, where the weight of the loops keeps it in place.
12. DIY Paper Honeycomb Ornaments
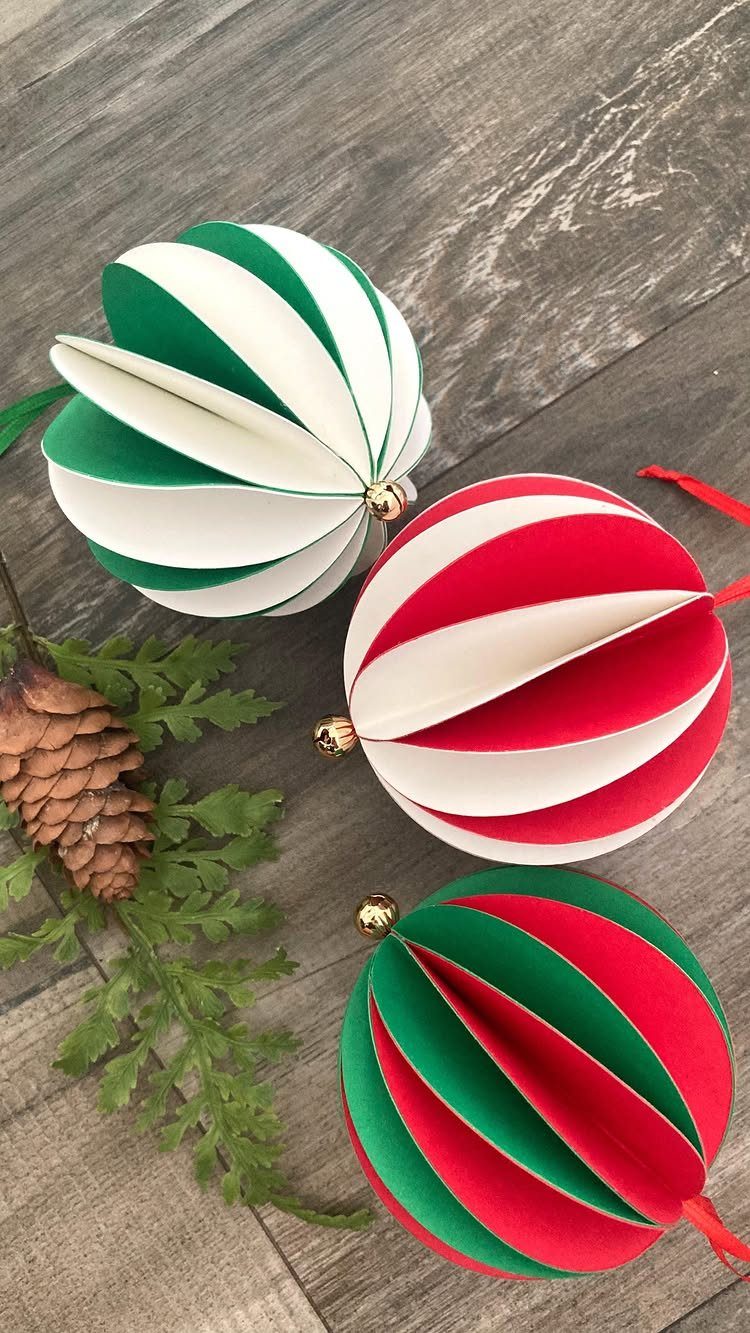
Honeycomb ornaments fold flat and open into a round, striped ball, so a big batch costs little and stores in a drawer.
I would make them in a mix of sizes and hang them close together on the tree or a branch. Tissue paper is a good place to begin.
13. 3D Gold Paper Stars
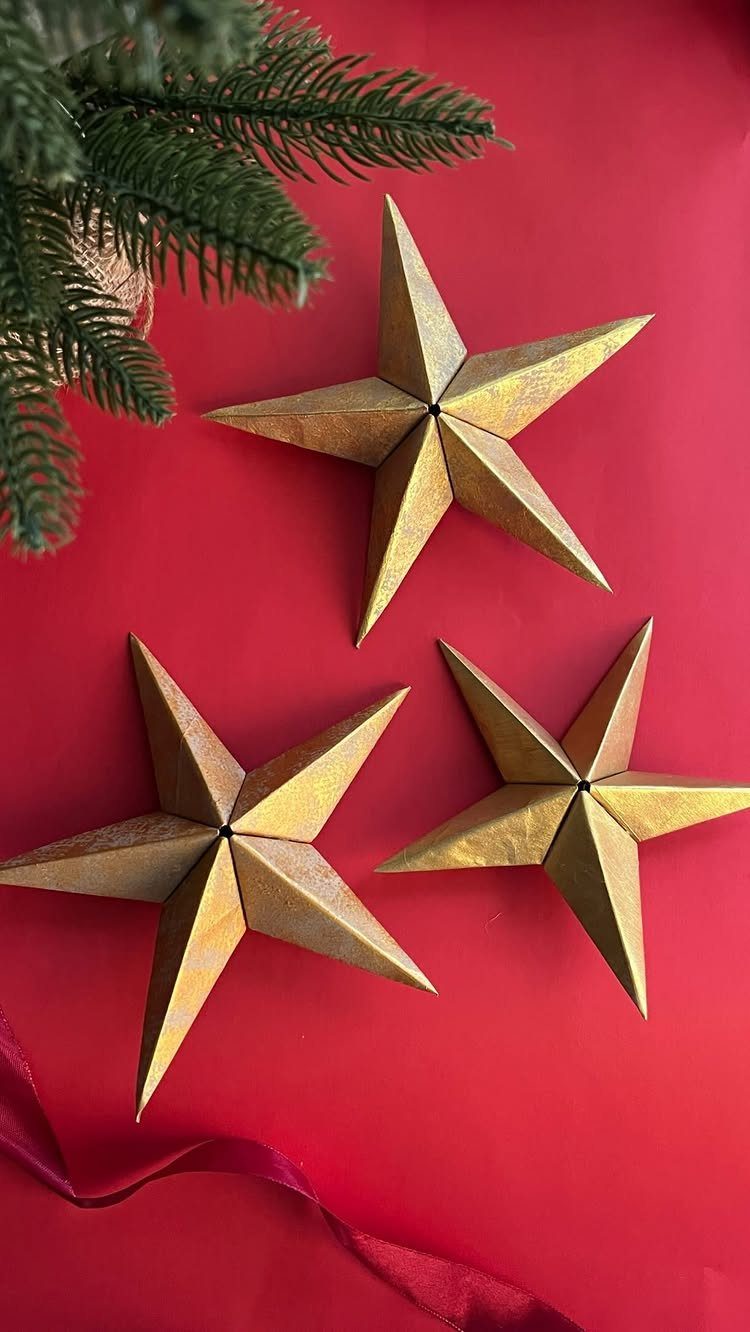
Gold paper folded into a dimensional star catches light from every side, so it looks metallic and expensive even though the paper costs little. Against red and pine, the gold reads warm and traditional.
Metallic or foil-finish paper holds the sharp creases that make the points look crisp. Fold and crease each piece firmly before gluing.
I would hang a few on the tree or tie them to a wrapped present with ribbon, and I’d pick one shade of gold for the whole set so the stars match.
Crafting with Kids
Construction paper, tape and one pair of scissors are enough for a good kid session, so check the junk drawer before you plan a store run.
A craft built from what’s already in the house gets started in minutes, while a trip for supplies tends to eat the afternoon.
Pick projects where an adult isn’t needed every minute. Younger kids do best with tearing, gluing and simple cutting; save anything fiddly for older ones.
Set everything out on the table before anyone sits down. Kids lose interest while they wait for you to find the tape.
Budget-friendly Materials
Basic craft supplies cover most paper projects, so the cost stays low even for a big group. Start with what you own: leftover wrapping paper, old cardstock, construction paper and scraps.
Buy only what’s missing. A single pack of paper in a small set of colors, say red, green and kraft, usually goes further than you’d expect, and one glue stick can serve a whole table.
If you’re making decorations for several rooms, plan the palette first. Sticking to a small palette across every project lets you reuse one set of supplies, and mixed leftovers still look like they belong together.
Easy to Follow Instructions
Choose a project with few steps and read it through once before you cut anything. Most mistakes come from skipping ahead, and a quick read shows you which tools you need.
If you’re a beginner, make one test piece from scrap paper first. It costs nothing and shows you where a fold or a cut goes wrong.
Do the steps in order and don’t rush the gluing, since glue that hasn’t set shifts the whole piece.
When a pattern gives you a choice of paper weights, take the heavier one for your first try; it’s easier to handle and forgives uneven folds.